G.C.D: Stands for Geoidi Crush'D [W.I.P.] [Newest: Orders & boulders?]

Hey! This is old stuff, skip to here for the stuff that “matters”:


Old, outdated stuff (You have been warned):

GC_DevLog01_31-12-24

Hello everyone! I am developing a game and I’d like to share some stuff I’ve been working on.

Some basic info’

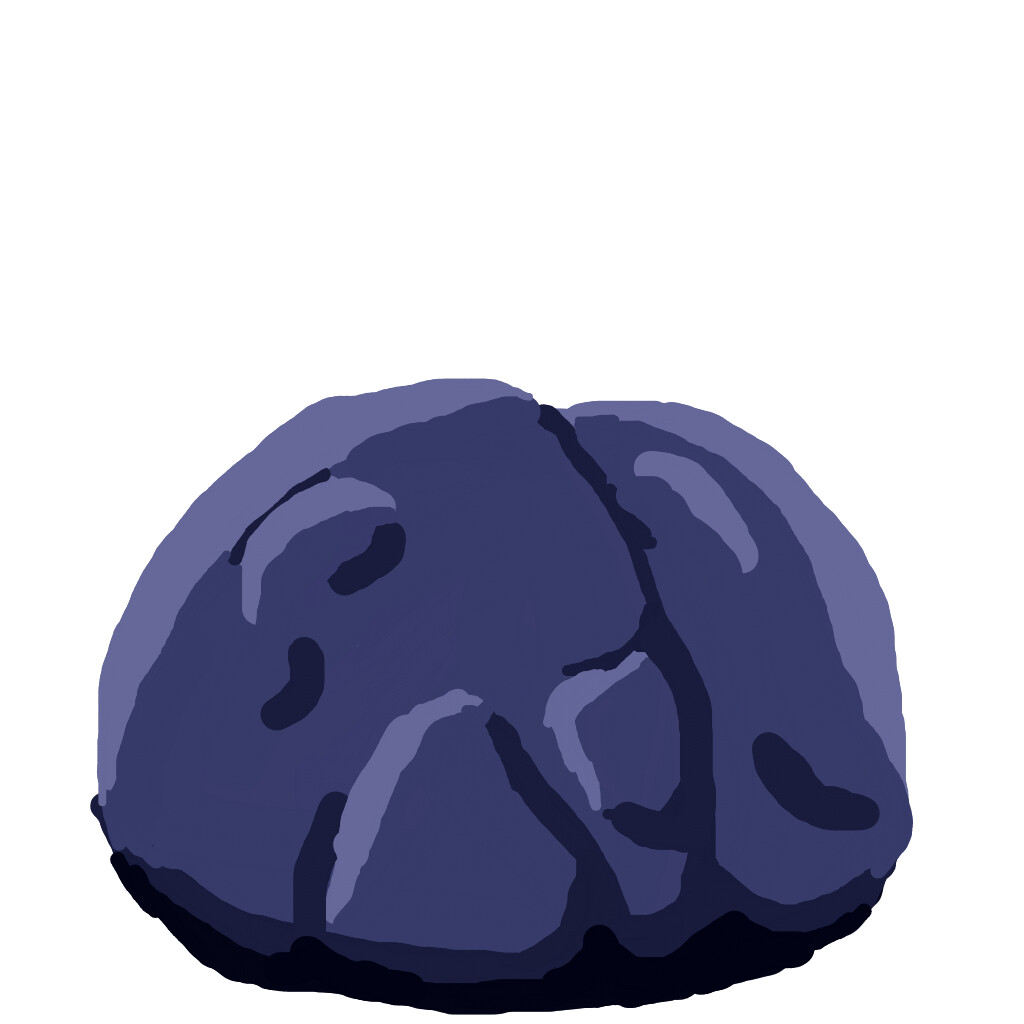
The name of the game is “Geodi Crush’d”, because there are geodes and you crush em’.
Genre: I’m not sure what genre it is, but the two most genre defining mechanics/things I can see are deck-building and grid-based, turn-based chaotic strategy.

Current development progress

I’ve been developing GC for around five months (that’s what my oldest back-up tells me) and I’ve only made code stuff, nothing visually interesting or cool.

Picture time!

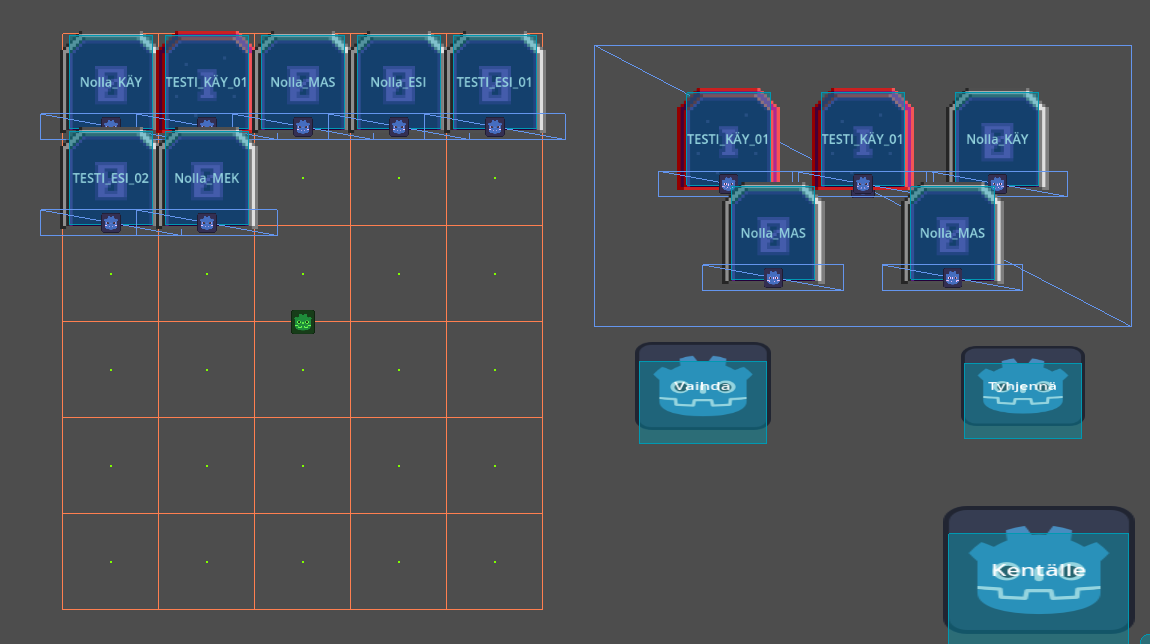
Fancy, shiny deck builder (that I wasted most of my time on), featuring multiple categories of cards, as well as cards within cards (not shown on picture) (also includes deck saving and loading)!


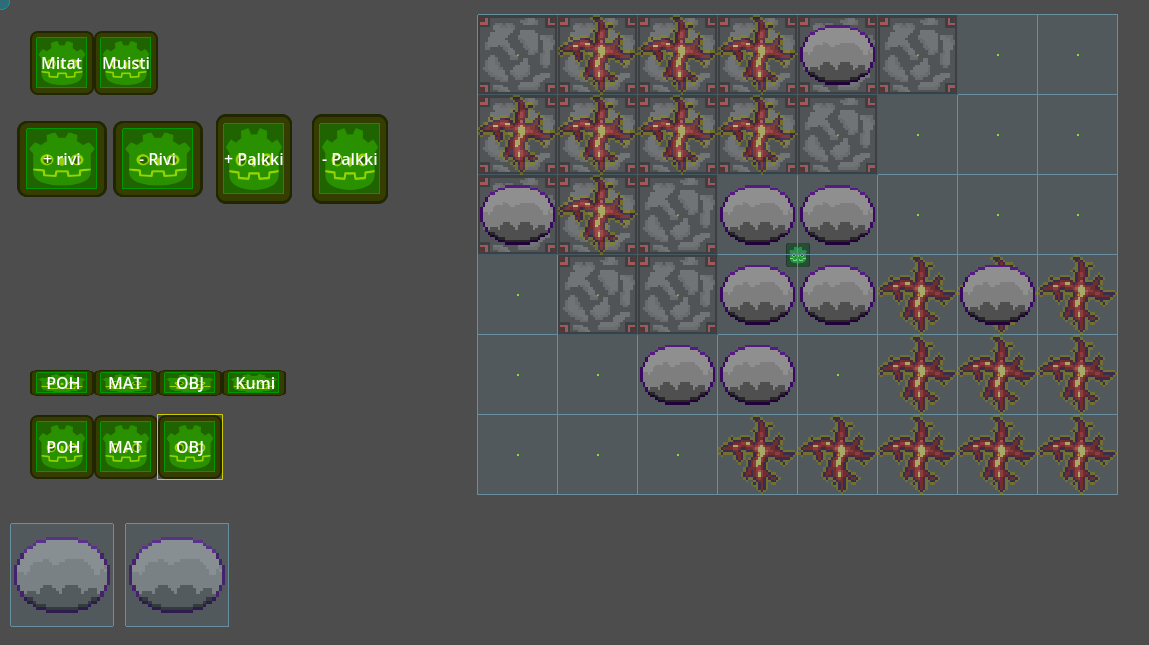
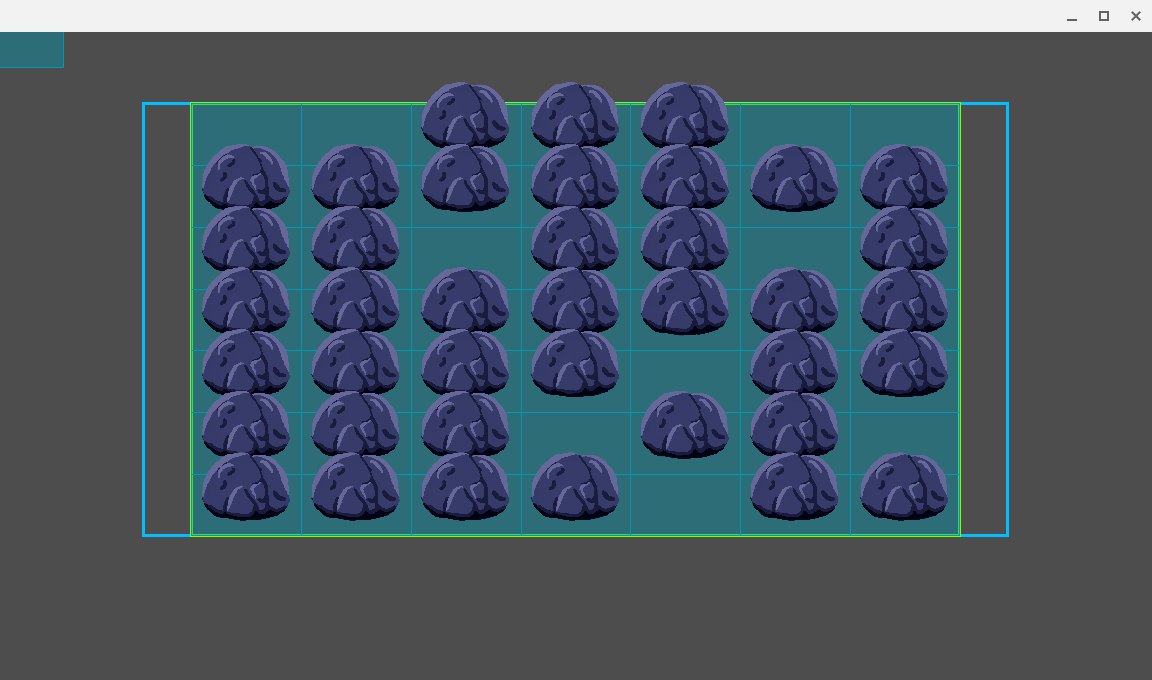
Stylish, grid-based boulder moving action! (That blue floating box is a visual glitch, it’s actually the TouchScreenButton for that big menu button, and it’s still actually on top of that big menu button (why touch screen? Cause’ I’m working on a Chromebook that has a touchscreen functionality.))


Some context for the image above: The card with a yellow border is currently selected and the red tiles tell me possible places where to place it. The yellow tiles are start tiles, which means that if the card isn’t on board, it can move from those start-tiles in a “queen in chess” -like fashion. If it is on board, the red tiles are calculated from its current position on the grid.


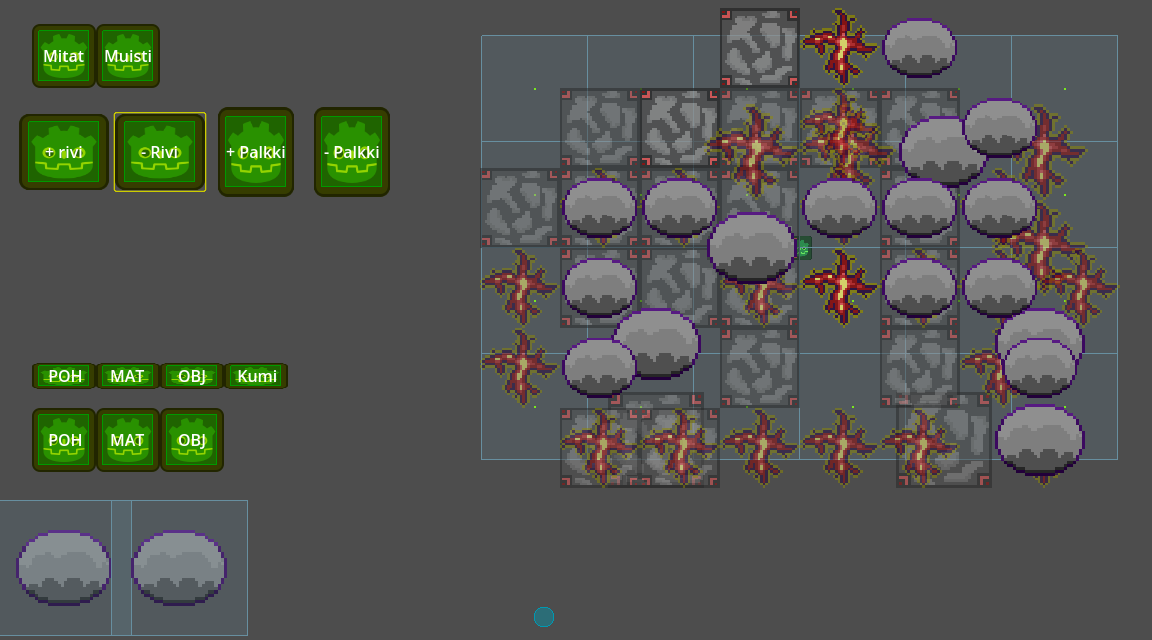
Cool map maker I’m currently working on (a lot of Finnish buttons) (also, Dev only stuff, probably).


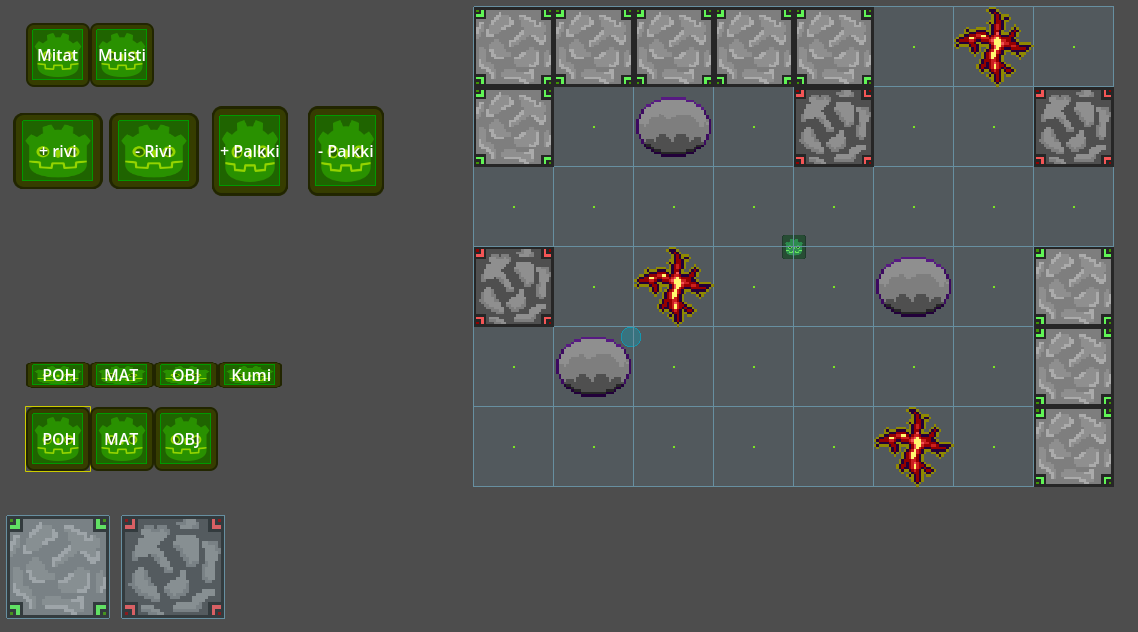
No additional context, because there are a lot of buttons (the green Godot logos).


As you can see, a lot of work-in-progress stuff everywhere, but do you know what else is work-in-progress? My skills, and the best way to learn is by doing stuff and asking people how to do stuff, so my question to you is what kinda’ stuff would you like to see in future devlogs?

Thanks for checking out my post (and also, happy new year)!

2 Likes

GC_DevLog02_2-1-24

Hello again!
New year, new code. I decided to reprogram my amazing map maker:

I also got the idea to include a short video, this one is me erasing stuff
(does not include audio):

Next up is adding in “round” -layers, which are groups of objects that are dropped on the board in between rounds!

Also, the way I save these maps is by printing them out, and then copy-pasting them back into my map-storage code. The print system was quite tedious to make, since vectors are printed out like this: (x, y), when Godot requires it to be formatted like this: Vector2i(x, y), in code.
Here is what that earlier map from the video looks like in its printed out form (Names of keys changed to English, and comments added for extra info’):

{
	"name": "____", "proportions": Vector2i(8, 6), "size_of_cell": 80, "scale_multiplier": 0.625, 
	"foundation": {  }, # Foundation is a work in progress. Basically floor and wall decorations
	"things": {
		"POH": { # Floor layer.
			"(1, 3)": {
				"coords": Vector2i(1, 3), "info_key": "POH_T1", },
			"(0, 2)": {
				"coords": Vector2i(0, 2), "info_key": "POH_T1", },
			"(0, 0)": {
				"coords": Vector2i(0, 0), "info_key": "POH_T1", },
			"(2, 0)": {
				"coords": Vector2i(2, 0), "info_key": "POH_T1", },
			"(3, 0)": {
				"coords": Vector2i(3, 0), "info_key": "POH_T1", },
			"(3, 1)": {
				"coords": Vector2i(3, 1), "info_key": "POH_T1", },
			"(4, 1)": {
				"coords": Vector2i(4, 1), "info_key": "POH_T1", },
			"(4, 0)": {
				"coords": Vector2i(4, 0), "info_key": "POH_T1", },
			"(5, 0)": {
				"coords": Vector2i(5, 0), "info_key": "POH_T1", },
			"(1, 1)": {
				"coords": Vector2i(1, 1), "info_key": "POH_T1", },
			"(2, 1)": {
				"coords": Vector2i(2, 1), "info_key": "POH_T1", },
			"(1, 0)": {
				"coords": Vector2i(1, 0), "info_key": "POH_T1", },
			"(0, 1)": {
				"coords": Vector2i(0, 1), "info_key": "POH_T1", },
			},
		"MAT": { # The "carpet" -layer, things in between the floor layer and the object layer.
			"(3, 5)": {
				"coords": Vector2i(3, 5), "info_key": "MAT_T1", },
			"(4, 5)": {
				"coords": Vector2i(4, 5), "info_key": "MAT_T1", },
			"(5, 5)": {
				"coords": Vector2i(5, 5), "info_key": "MAT_T1", },
			"(6, 5)": {
				"coords": Vector2i(6, 5), "info_key": "MAT_T1", },
			"(6, 4)": {
				"coords": Vector2i(6, 4), "info_key": "MAT_T1", },
			"(5, 4)": {
				"coords": Vector2i(5, 4), "info_key": "MAT_T1", },
			"(5, 3)": {
				"coords": Vector2i(5, 3), "info_key": "MAT_T1", },
			"(6, 3)": {
				"coords": Vector2i(6, 3), "info_key": "MAT_T1", },
			"(7, 3)": {
				"coords": Vector2i(7, 3), "info_key": "MAT_T1", },
			"(7, 4)": {
				"coords": Vector2i(7, 4), "info_key": "MAT_T1", },
			"(7, 5)": {
				"coords": Vector2i(7, 5), "info_key": "MAT_T1", },
			"(3, 0)": {
				"coords": Vector2i(3, 0), "info_key": "MAT_T1", },
			"(3, 1)": {
				"coords": Vector2i(3, 1), "info_key": "MAT_T1", },
			"(0, 1)": {
				"coords": Vector2i(0, 1), "info_key": "MAT_T1", },
			},
		"OBJ": { # Object layer.
			"(6, 3)": {
				"coords": Vector2i(6, 3), "info_key": "OBJ_T1", },
			"(4, 0)": {
				"coords": Vector2i(4, 0), "info_key": "OBJ_T1", },
			"(4, 3)": {
				"coords": Vector2i(4, 3), "info_key": "OBJ_T1", },
			"(4, 2)": {
				"coords": Vector2i(4, 2), "info_key": "OBJ_T1", },
			"(3, 4)": {
				"coords": Vector2i(3, 4), "info_key": "OBJ_T1", },
			},
		},
	},

A lot of stuff is still left to do to get this map maker thingy fully functional, but it works for now and I feel like I’ve learned a lot while making it.

Thanks for reading and have an amazing rest of your day!

1 Like

GC_DevLog02_and_a_half_2-1-24

Really small progress update:

Bugs, a lot of bugs. I’m one hundred percent sure, that I do know why the grid is all messed up, but my brain doesn’t want to think about it (the new objects are replacing the earlier objects in a dictionary). I don’t know why those two Area2Ds down in that left corner are so big, they seem to be changing in size at the same time as the Area2Ds on the grid, but they shouldn’t, and I’ve already checked everywhere in my code. They don’t appear in the same arrays or dictionaries as the grid areas, they aren’t children of the grid. Why do they change their scale, when they shouldn’t?! It isn’t even a visual bug because my cursor’s Area2D detects them!

As I’m writing this, I came up with a way to easily solve that first issue…
Thanks for checking out my post, I’m gonna’ go fix some bugs now!

1 Like

6.7.2025

Hello.

It’s been a while since my last post, hasn’t it?
I’ve pretty much been in a constant state of “one step forward, two steps back”…development hell basically. Everything I’ve made has been erased and remade over and over again, and the code got really messy.

But I haven’t given up yet. I started the project from scratch, but development has been slow. I have been constantly anxious about the scalability of my code and if the game is even enjoyable.

I have learned a lot and there will be a day when Geoidi Crush’D is finished and I challenge myself to publish a playable demo of my project in the next three months.

I am abandoning this thread of post and I will start a new one someday, because this one has a bad structure and really doesn’t explain my game idea at all.

Thank you for reading.

1 Like

1.12.2025

About my previous post

Hello! I’m back. It has been a little under four months (What? It’s been over five?) and I’ve failed my challenge:

…but, I didn’t fail, because of…

…I took many steps forward, but misjudged how much travel time I had. When coming up with the three months of time, I was only thinking about how much time it would take, instead of how much time I actually had. I failed to look at a calendar, or more broadly speaking, make a plan.

How much did I progress? I almost made a gameplay loop, then I had to take a break from coding and I forgot everything I made (I need to learn to comment code more often). Then I figured out how it works and turned it into a plate of fine raketti spagetti, because I saw a post on here talking about “circular dependencies” and how bad they are and then I looked at my code and realized, it was full of 'em! I then tried to remove all of them, got overwhelmed with everything breaking and threw said spaghetti into a komposti.

Now I have a new plate! (did I make any progress?)

What I’ve learned:

  1. If you’re going to make a “challenge” (or a promise), actually make sure you can do it, by making a plan.
  2. Make sure to account for other plans when planning a plan.
  3. Don’t make internet posts when in a bad mood.
  4. Comment and document code.

The language I forbid myself from ever speaking! A cursed word! Why did I use it?!

Also, I lied:

I dislike lying, which is why I haven’t posted on this post of posts for a while. But now, by posting this, I have lied, and made myself a lying liar. I apologize for my behaviour.


THE NEW BEGINNING!

About the game

The name of the game is “G.C.D: Stands for Geoidi Crush’D” and it is going to be a simple, turn-based roguelike.

It is simple, you have workers on a grid and you use them to move boulders and geodes to crush 'em (in a long cave tunnel thing, on top of a drill)! Crushing a thing means trying to move it, when it can’t, which is the only way you can destroy things on the grid.

A normal worker has two moves to start off with. To recharge these moves, you need to “crush” a wall, which rejuvenates all workers. Walls are the primary thing you crush things against, so you will usually get all of your moves back each “crush”. Hitting walls causes them to be unstable, and if the cave gets too unstable, the ceiling comes down. The most optimal strategy is to chain objects, so you can crush multiple things in one strike!

Moves are also your worker’s moves, their mobility, that is why they got two of them. You can also “upgrade” your workers to increase their move force, which will increase their crush force. [example: move thing by two instead of by one (A.K.A. double crush damage)], but it will also make positioning the upgraded worker as well as the rocks on the field a lot more difficult.

After crushing enough things and looting enough loot, the big drill platform your workers are on moves down by one (further away from the ceiling). However, the deeper you go, the more challenging things get…you may even encounter special challenges, such as a big robot piloted by moles.

Currently this is just a plan.

Because I started my project from scratch, I have also made the decision of sharing boring stuff, instead of trying to make the entire game in silence, just to keep myself a bit more motivated.

My next post will be about the grid and how I plan to fit it on the screen!

1 Like

Grids on grids!

2.12.2025

Hello! I have made another grid, so that I can fit the original grid on the screen.

A grid on a grid (No Audio):

The screen-grid (A.K.A. avaruus)

The manager of space and positions.

The purpose of the bigger “screen-grid” is to manage positions on the screen, so I (and possibly the player) can easily manage, rearrange and scale U.I. elements on it. G.C.D. is going to consist of a plethora of different U.I. panels, like the grid and the deck (more about both of these in future posts).

The amount of cells the screen should be divided in is stored in a simple Vector2i -variable (16, 9). This variable is located in a global script called “asetukset” A.K.A. settings. The settings also house how all of the U.I. elements should be positioned on the screen (also as Vector2i). For example, the location coordinates for the “game-grid” are (4, 0) (beginning) and (12, 7) (end).

Here’s some simple math I use to get the location of coordinates on the screen-grid (translated to English):

func location_on_screen_grid(coord: Vector2i) -> Vector2:
	var screen_size: Vector2 = get_viewport().size
	var cell_size: Vector2 = screen_size / Vector2(settings.screen_dividing_amount)
	var location: Vector2 = Vector2(coord) * cell_size
	return location

In the next post I am going to go into further detail about how the smaller grid resizes and positions itself (and possibly what it is used for).

Thank you for reading!

The “game-grid”

4.12.2025

Hello!
The “game-grid” is the grid that stores and positions the contents of the cells. It doesn’t actually have any game logic in it. The grid doesn’t even have the info’ on what is in its cells. The only things stored in it are where things should be placed. I am renaming it to the “visual-grid”

The “visual-grid”

The lesser manager of positions and size

It is given an object and a coordinate where to put it and then it places it there (as well as scales it).

Epic-style image:

Currently, the visual-grid has simple code (translated to English) (helpful comments added):

# Helpful comments!

func cells(start_point: Vector2, end_point: Vector2):
	var area_size: Vector2 = end_point - start_point
	var cell_amount := Vector2i(7, 7) # Currently hard-coded.
	
	# ...I could merge these two "scale" variables into a Vector2...
	var scale_x: float = (area_size.x / cell_amount.x) / CELL_SIZE.x
	var scale_y: float = (area_size.y / cell_amount.y) / CELL_SIZE.y
	cell_size = CELL_SIZE * min(scale_x, scale_y)

	# These are used for positioning and scaling the grid.
	var grid_size := Vector2(cell_amount) * cell_size
	var grid_start := start_point + (area_size - grid_size) / 2
	
	# I can't come up with any helpful comments!
	for x_column in cell_amount.x:
		for y_row in cell_amount.y:
			var coord := Vector2i(x_column, y_row)
			var point: Vector2 = grid_start + Vector2(coord) * cell_size
			coord_point_dict[coord] = point
	
	# -maybe it's a good thing. My code is readable enough to not need any 
	# comments.
	
	# These are for drawing the bounding boxes.
	area_rect = Rect2(start_point, area_size)
	grid_rect = Rect2(grid_start, grid_size)
	
	# This thing draws.
	queue_redraw()

The Area2Ds on the grid act as buttons. I have a small Area2D following the mouse at all times used for detecting 'em.

The buttons are created in the scene of which the visual-grid is a child of. When they are needed to be positioned, this function is called (translated to English):

func position_buttons(button_coord_dict: Dictionary):
	for button in button_coord_dict:
		var coord: Vector2i = button_coord_dict[button]
		var point: Vector2 = coord_point_dict[coord]
	
		var pos: Vector2 = point + cell_size / 2
		button.global_position = pos
	
		var collision: CollisionShape2D = button.get_children()[0]
		var shape: RectangleShape2D = collision.shape
		shape.size = cell_size

Currently, the system I am working with is very dumb. If I create more than 49 (7 x 7) buttons, it crashes, because there aren’t enough positions in the dictionary. I have tried to solve this problem, which is why this post was released on the fourth of month 12, instead of the third. I dislike my current solutions and I have decided to move forward with it, until I have to change it. I do not want to end up in development bad-place again.

Topic of the next post:

It will (probably) be about the main scene: Cave the wiring of the whole experience. I also wish to share some concept art that I have tried to create, but I am quite slow at drawing.

Thank you for reading! (I also want to come up with another way to end posts. This one is getting quite repetitive)

Orders & boulders?

7.12.2025

Cave-scene

The wiring of the whole experience

The cave-scene is the “main” scene. The cave scene stores everything gameplay related, such as coordinates (not positions, those are stored in the visual-grid), objects and other components, such as the visual-grid and window-timer.

Examples of what the cave-scene does, with examples:

  • Hands out information as calls to its components:
    • Objects and coordinates to the visual-grid.
  • Receives signals from its components:
    • Window-size-changed from window-timer.
  • All game logic:
    • Object information and behaviour, and player input.

The visual-grid (again)

I figured out why I struggled so much with the information handling of the visual-grid. It’s because I did it in the wrong order! The information for the visual-grid comes from the cave-scene, which had only temporary information management, but now I have implemented the new “solu_kirj”, A.K.A. cell-dictionary.

The cell-dictionary is a dictionary that has coordinates as keys and their contents as a list of objects (in cave-scene, translated to English):

var cell_dict: Dictionary = {} # Vector2i: Array[Object],

# I am on Godot 4.0, so I don't have typed dictionaries yet, and I don't 
# know how to upgrade.

Then, I can just pass this dictionary to get the amount of cells (in visual-grid, translated to English):

func cells(cell_dict: Dictionary, start_point: Vector2, end_point: Vector2):
	var area_size: Vector2 = end_point - start_point
	
	# This is the new way of getting the size, smartly.
	var coords: Array = cell_dict.keys()
	coords.sort()
	var cell_amount: Vector2i = coords[-1] - coords[0] + Vector2i(1, 1)

	# I merged the two scale-variables!
	var cell_scale: Vector2 = (area_size / Vector2(cell_amount)) / CELL_SIZE
	
	cell_size = CELL_SIZE * min(cell_scale.x, cell_scale.y)
	var grid_size := Vector2(cell_amount) * cell_size
	var grid_start := start_point + (area_size - grid_size) / 2
	
	# I was able to make this a bit more compact:
	for coord in coords:
		var point: Vector2 = grid_start + Vector2(coord) * cell_size
		coord_point_dict[coord] = point
	
	area_rect = Rect2(start_point, area_size)
	grid_rect = Rect2(grid_start, grid_size)
	
	# This thing still draws!
	queue_redraw()

I also changed the scaling of objects (in visual-grid, translated to English):

# Instead of positioning buttons, it positions everything now.
func position_object(object: Object, coord: Vector2i, x_size: float = 128.0):
	var point: Vector2 = coord_point_dict[coord]
	var pos: Vector2 = point + cell_size / 2
	object.global_position = pos
	var cell_scale: float = cell_size.x / CELL_SIZE.x
	object.scale = Vector2(1, 1) * CELL_SIZE.x / x_size * cell_scale

Let’s see what this looks like on the grid:

Is that epic-style boulder art I see?

Boulders

I made some template art for the boulders. Normally I use pixel art, but now I am trying a new tool.

Pixel-art ones for reference:

I like the pixel-art ones more, but with practice, I think I can make the high-res ones better.

Next post:

I will probably slow down on posting, since I have a bunch of other stuff on my schedule, but my next post will be about the hand (and possibly gameplay)!

I appreciate that you read through this post! (This one will do for now, but it feels off…)

Also, I turned on y-sort for the grid, which also has to do with orders and boulders.

1 Like