Hello!
I took some past work I have done for a gamejam and I will be trying to make a 3D TwinStick Shooter Starter Kit (e.g. HellDivers: Dive Harder, Nuclear Throne, Magicka). I was inspired by the Starter Kits from Kenney  . I would like to post my progress here to keep myself motivated and gather feedback.
Here is a quick video of what the project look like at the moment.
The github repository:
The current features:
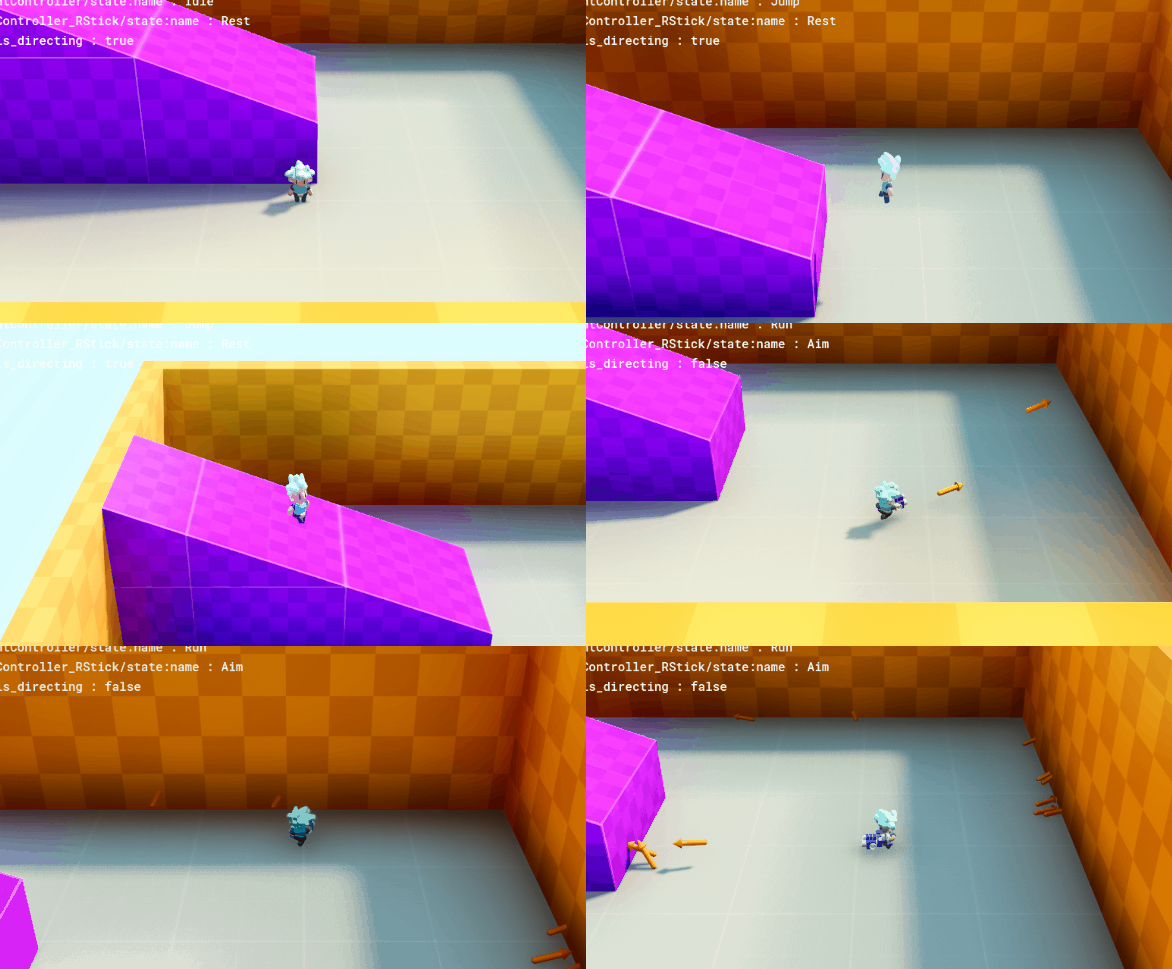
- 3 controller schemes for Gamepad:
- Left Stick to Move/Aim, Right Trigger to Aim, Button B to shoot
- Left Stick to Move, Right Stick to Aim, shoot with Right Trigger
- Left Stick to Move, Right Stick to Aim, auto shoot
- Collision layers are set up to reproduce the
infinite_inertia property which was dropped in Godot 4
- Character Controller based on a State Machine (inspired from GDQuest tutorials)
- Animation System based on a Blend Tree (rather than a State Machine)
- Fully modelled and rigged character
- Easily switch Character’s Skin
- Camera follows Main Character
- One Laser Gun
- Debug Layer which can be toggled with L key
Next features, I am thinking of:
- add Pause menu to select Controller Scheme
- add
keyboard + mouse Controller Scheme
- make a level with Kaykit Prototype Bits
- adding breakable box
- adding juice / game feel
- add ennemies
- add multiple weapon support
Please let me know if you have any feedback, and/or what you would like to see in a such a starter kit? To be honest, I am thinking that it could be a starter kit for any top-down view game  but well, better keep the scope small for now.
13 Likes
Hello there!
I updated my project with a new feature. We can now open a menu and select between 3 controller schemes:
- One Stick Controller (move with Left Stick, aim with Left Trigger, shoot with B)
- Two Stick Controller (move with Left Stick, aim with Right Stick, shoot with Left Trigger)
- Two Stick Auto-Shoot Controller (move with Left Stick, aim and shoot with Right Stick)
Does not look like much on-screen without seeing the gamepad!
Is there an easy way to show the gamepad input on screen

for demonstration purposes ?
Anyway, you can try it for yourself by cloning the repo  !
!
7 Likes
Small Update! I made a my first EditorScript to build basic AABB collision boxe for my level modules (I am using KayKit Prototypes Bits).
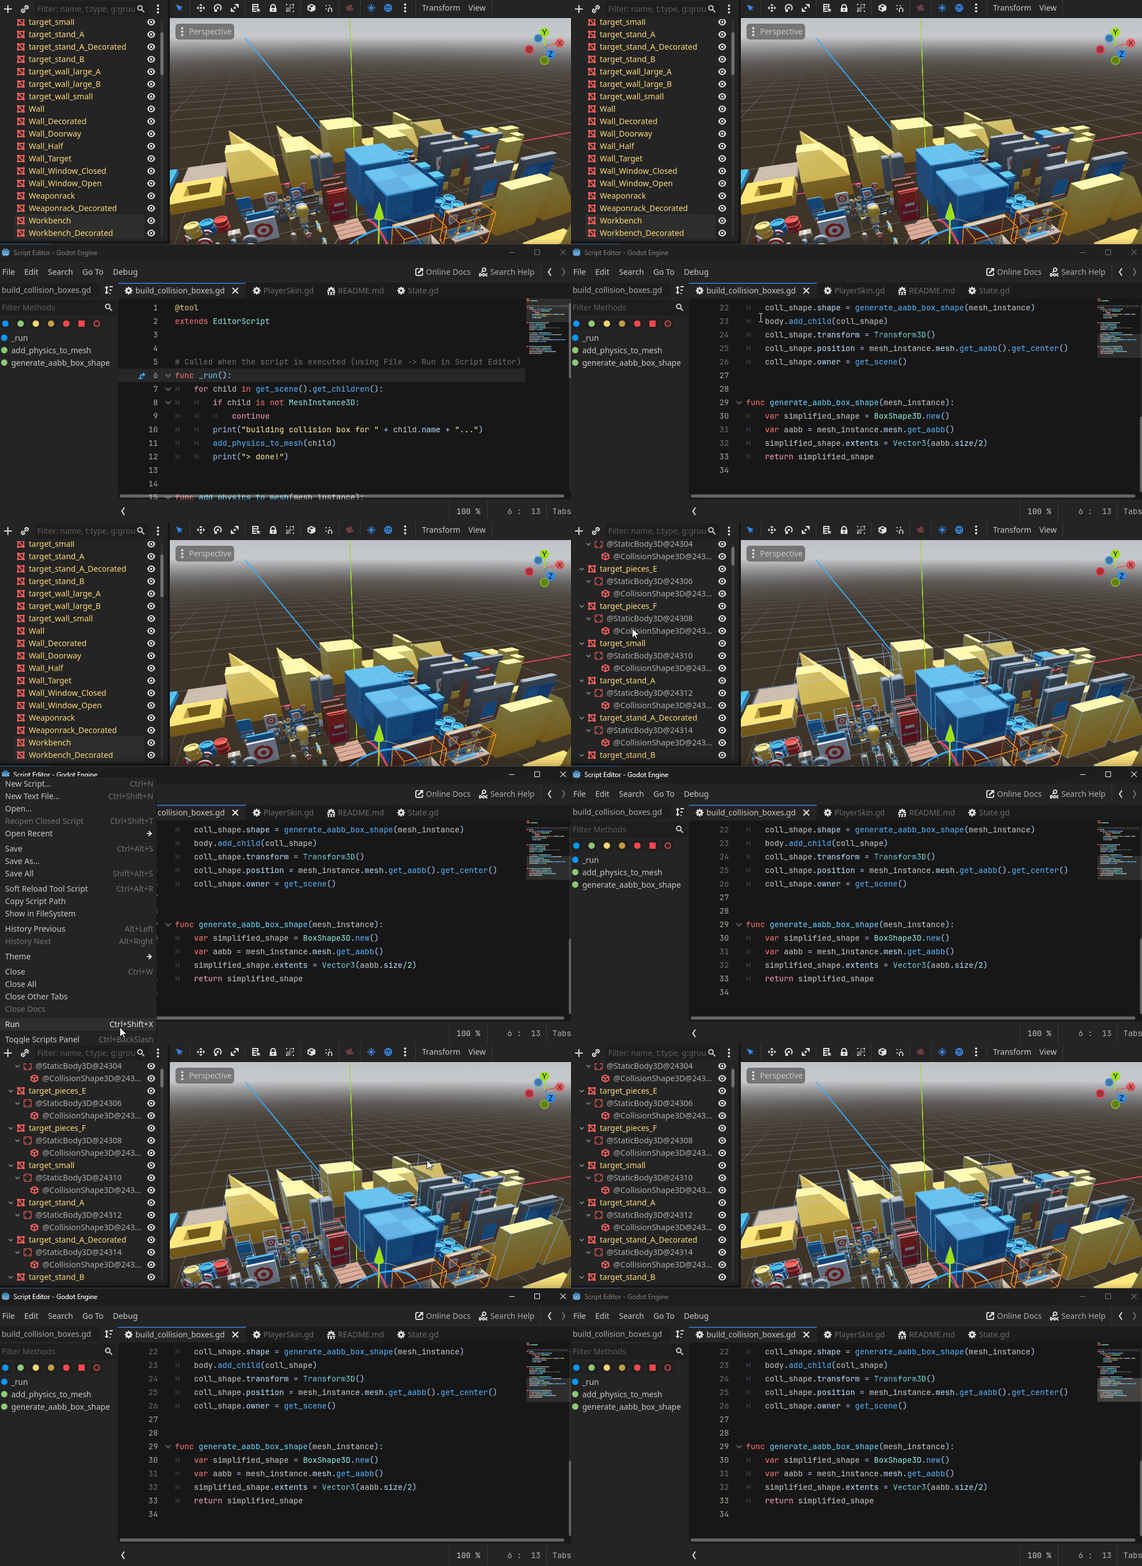
Just pushed the script into Github if you want to use it (in the branch make-new-level).
1 Like
Hey your project is looking really good! Starter Kits are incredibly useful so I am sure it will help a lot of people. I would suggest doors + switches. Weapon ammo pickups once you’ve implemented multiple weapon support. From your own list; enemies and juice are the big ones.
1 Like
If you get to a state you are satisfied with, it would be awesome if you submitted your project to the Godot Asset Library, like Kenney ! 
https://godotengine.org/asset-library/asset?filter=starter+kit
2 Likes
Yes I would like to submit it to the Godot Asset Library when it is a bit more mature!
I will defintely add picking up ammo in my todo!
I added a small level using Kaykit Prototype bits and the Gridmap node.
The Gridmap node is pretty neat, only problem is that we can’t change the spacing of the painting brush. It would be great to be able to work on 2x2 grid with 4x4 pieces.
I opened a proposal here: Add a Brush Spacing property to GridMap to control spacing between tiles when using paint/fill tools · Issue #9612 · godotengine/godot-proposals · GitHub
Next steps:
- Adding destructible elements
- Adding some juice
5 Likes
Hello everyone!
Here an update from last week! I added destructible elements and some juice (e.g. recoil animation).
It was the occasion to explore the import workflow. I wanted to import 40 glb files as destructible objects.
Godot imports GLB files implicitly as scenes (.scn file) in the .import folder of our projects. And with the advanced import and post-import script you can shape the .scn file to be anything you want.
Here is the post-import script I am wrote (on the left) and what the results of what it does on the (right):

It basically add a RigidBody (in Kinematic mode), a AABB Collision Shape and a script to the root node (destructible.gd).
And a quick example of how I use it:

Note that if your assets are already in a level (.tscsn file, as it was for me), it is a bit more complicated to use.
Godot automatically keeps the properties of the objects in the level as they were before the re-import. That is a good thing for keeping the object in the same position as before the re-import, but, guess what? The script slot is a property!! so Godot will force it to null as before the reimport, even though you added a script through the post-import function.
My temporary solution was to open VS Code and delete all occurence of script = null in the .tscn file of the level. I will probably open a proposal to discuss this behaviour. Godot should probably keep the script that the user added through the post-import.
Let me know if you have any questions!
Next steps for this week:
- clean up what assets are part of the repo;
- add muzzle and impact VFX (maybe trail?)
- add sound that support the new VFX
- start designing modelling an ennemy
2 Likes
Last week I was busy modelling a new enemy and adding animation!
Here is the final kill animation. This is just a in-game test, the enemy is set to play the same animation again and again and I do as if I am shooting at him.

This week I am working on the actual IA. Here I’ve got a simple navigation region and agent working for a chase behaviour:
3 Likes
Hello!
A long time I did not post an update, sorry!
Since then, I basically added the AI for the meelee enemies:
And I started to work on putting together a part of the level (which I call Beat 2), where the player will have to activate 2 switches while being sent waves of meelee enemies.
That was the opportunity to work on a switch and door system 
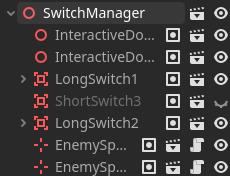
The switch manager basically holds a list of its emitting children (e.g. switch) and its receiving children (e.g. doors, spawners) and it activates the receiving objects when the emittings object are all switched ON.
What’s next? I will be adding:
- a first room with just a simple switch to teach the player that they need to look for switches to open the doors
- replace the placeholder switches/doors with better assets
Then it will be time to work on Beat 1, which is the intro of the game (i.e. the player wakes up in a lab/workshop and speaks with a scientist).
Hopefully I will give more regular update now that I am back from annual leave 
2 Likes
Hello!
I have been working on making the final 3d asset for the different types of switches, the door and spawner.
Here an example of how I am setting up my switch system.
And how it works in game:
There are 5 type of elements in the current Switch system at the moment:
-
Long Switch: where the player needs to hold the action button for a while before the switch gets activated
-
Short Switch: where the player just need to press the action button once to toggle the switch
-
Door: it can opens or closes
-
Spawner: it can spawn an object or enemy at a specific rate for a specific duration. You can set it up for instance so that it spawn 1 wave of 3 enemy every 10 sec.
-
Switch Hub: it connects Switch elements together. For instance: 2 switch needs to be activated so that 2 doors get opened.
Finally, I’ve also learnt a quick way of making a NavigationMesh from a Gridmap:
4 Likes
Hello! here is some progress on making an introduction cutscene and dialogue using the AnimationPlayer and the Dialogic2 add-on.
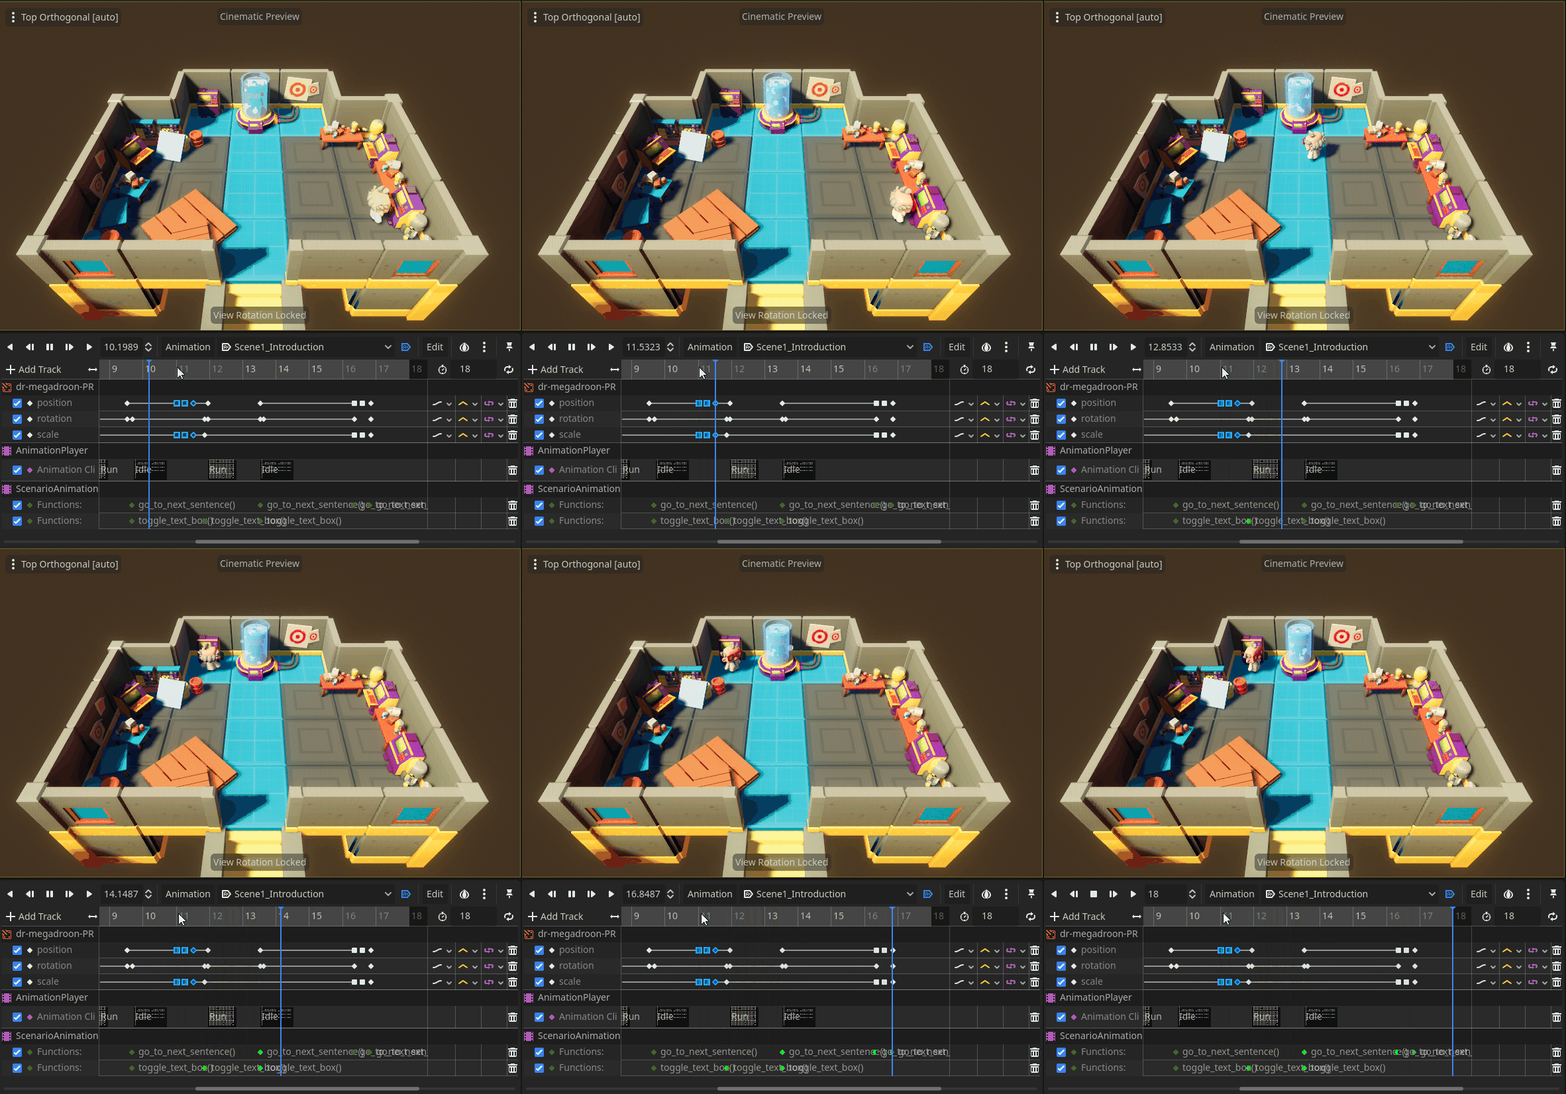
Here a preview of the results:
It was quite difficult to use Dialogic tbh, there is a lack of documentation and some unexpected behaviour.
But once you find out how to put things together, it is quite nice to use!
I still need to double-check how much memory and CPU usage Dialogic eats away though.
What do you personally use to create cutscenes and dialogues in Godot?
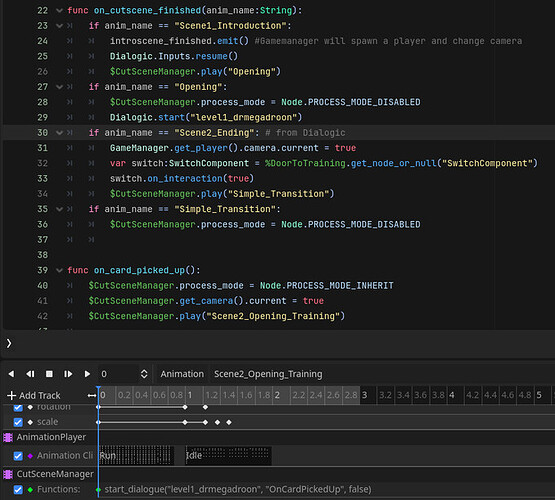
This week, I have been working on items and how their pickup can trigger a dialogue, a cutscene, and/or unlock part of a level.
Note how the purple/gold door is opening only at the end of the dialogue.
I have attached a screenshot of the code below.
The on_card_pick_up() starts an animation in the CutSceneManager, which calls Dialogic to start a dialogue at a specific line (OnCardPickedUp). Then Dialogic sends a signal “Scene2_Ending” which is processed by on_cutscene_finished() and opens the door.
As usual, all the code is available in the github repo of the starter kit. Note that I improved the explanation on how to install the kit for the first time, as there are now add-ons to install!
By the way:
- let me know if there are specific things you would like me to add to this kit next?
- I am considering changing the name to something like Top-down Action/Adventure starter kit as it turns to be less of a shooter than expected
 what do you think?
Also, I will probably release a .exe directly downloadable soon, but I am waiting to add proper mouse/keyboard controls. 
4 Likes
Hi there, just wondering whether the key and door mechanism for the training facility is actually implemented? I ran the game from the editor and my character picked up the gun, but I can’t find the key to open the door anywhere.
By the way, do you guys know if it’s even possible to use an AI assistant to analyze code and scene nodes and then have it answer questions like the one above? 
I messed around with Godot a while back but never really got serious with it. Now, with the help of AI, maybe it’s finally time to actually get something done, and this starter kit seems perfect for me! 
Hello!
This issue might be related to the toygun metadata being deleted/not saved by Godot.
I posted a walkaround here: Toygun is not working after collecting it · Issue #5 · Nodragem/top-down-action-adventure-starter-kit · GitHub
Let me know if that solves the issue.
As par you second question about AI, I think we are still far from AI assistant to be able to look at the code, at the scene, the resources, and at you issue and connect the dots. AI assistants are roughly an advanced version of your phone predictive text. They can only predict on what they’ve seen, and would only give the impression to connect dots if they’ve seen these dots being connected by numerous humans in their text repository.
As for learning Godot, GDQuest and KidsCanCode are good starting points I can’t recommend enough 
These days, I’m kinda agnostic about AI, but I lean “optimistic” when it comes to whether it’ll eventually match or beat human intelligence in pretty much everything, and what would happen to us. Though, to be fair, talks like that tend to get super philosophical way too fast, which is pointless… there is a reason why they call that point the singularity 
1 Like
![]() . I would like to post my progress here to keep myself motivated and gather feedback.
. I would like to post my progress here to keep myself motivated and gather feedback.
![]() but well, better keep the scope small for now.
but well, better keep the scope small for now.


