My journey and failure in trying to combine PBR materials from Blender into Godot

Godot Version

v4.2.1.stable.official [b09f793f5]

Question

How do you guys combine PBR materials to use in Godot?

So, I know this might seem obvious to experienced users (feel free to skip to the question), but I just started learning 3D modelling and I wanted to make a level of a cave for my first-person adventure exploration game. I’ve been studying tutorials non-stop (Blender tutorials, shading tutorials, Godot tutorials, etc.) and I was learning a lot. Despite feeling a little overwhelmed, I tried to follow a simple tutorial to make a cave (courtesy of Rob Tuytel from the Poly Haven team).

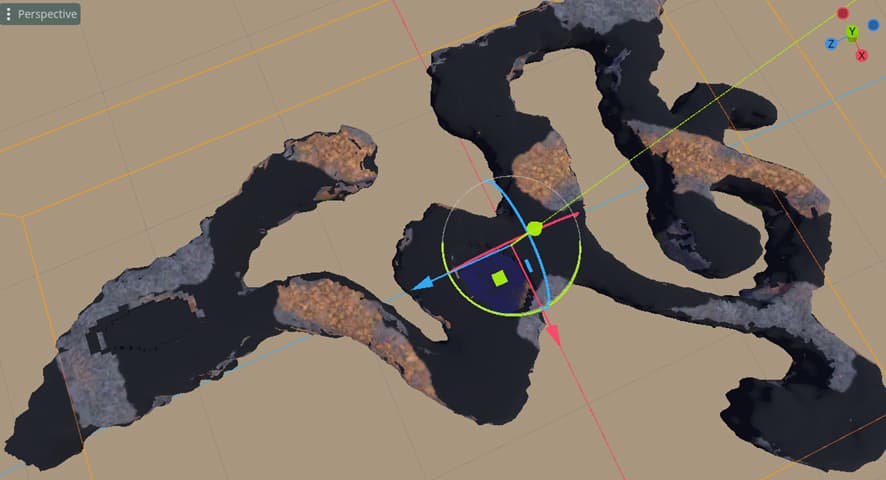
The result looked amazing and after a couple hours I was able to create something close enough in my blender project:

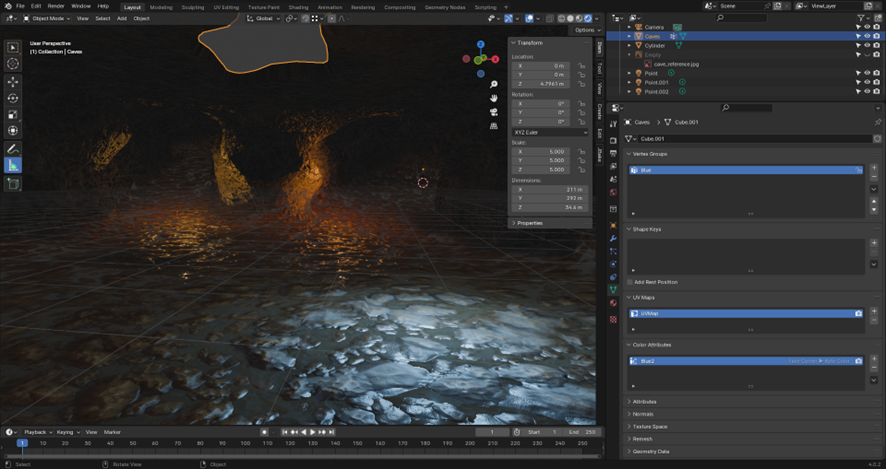
Notice how the walls are made of rough-looking rock, whereas the floor is wet stones. I thought it looked pretty nice, so I tried exporting to Godot… and that’s when the problems started.

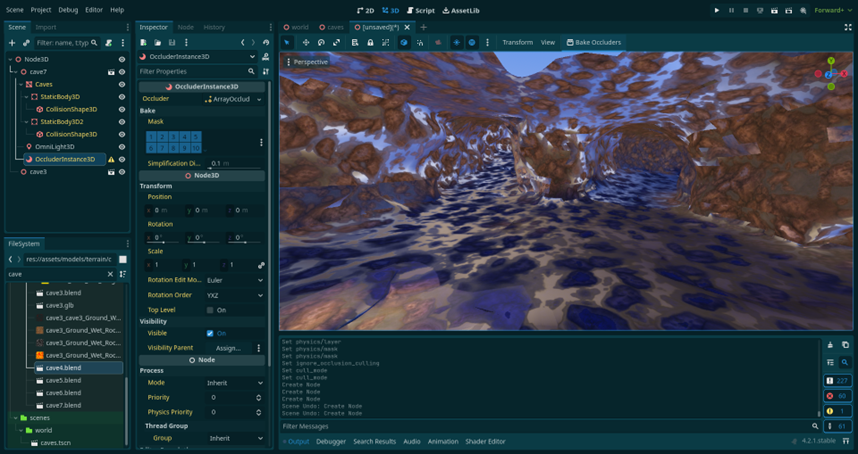
Uhm, what’s going on? (exported as gltf)

So, exporting materials from Blender to Godot has a few caveats. The tutorial I followed used vertex painting to achieve the seamless look between two different PBR Materials. However, upon exporting, only one of the two materials remains, and tinted blue from all of the vertex painting. I found a way to disable the blue paint showing up during export, but no way to keep both materials…

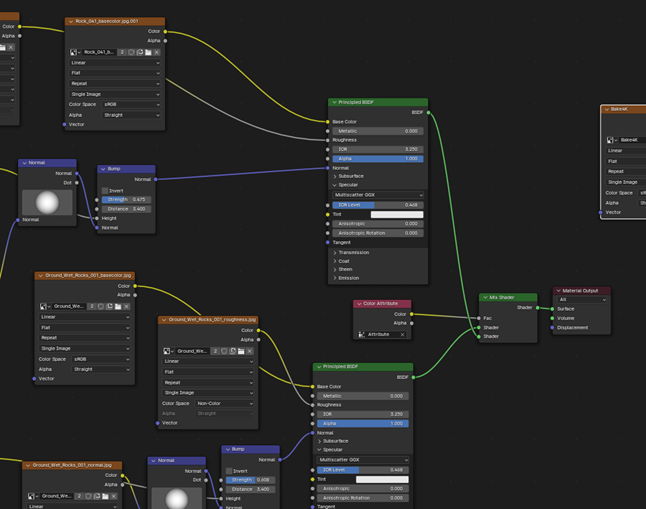
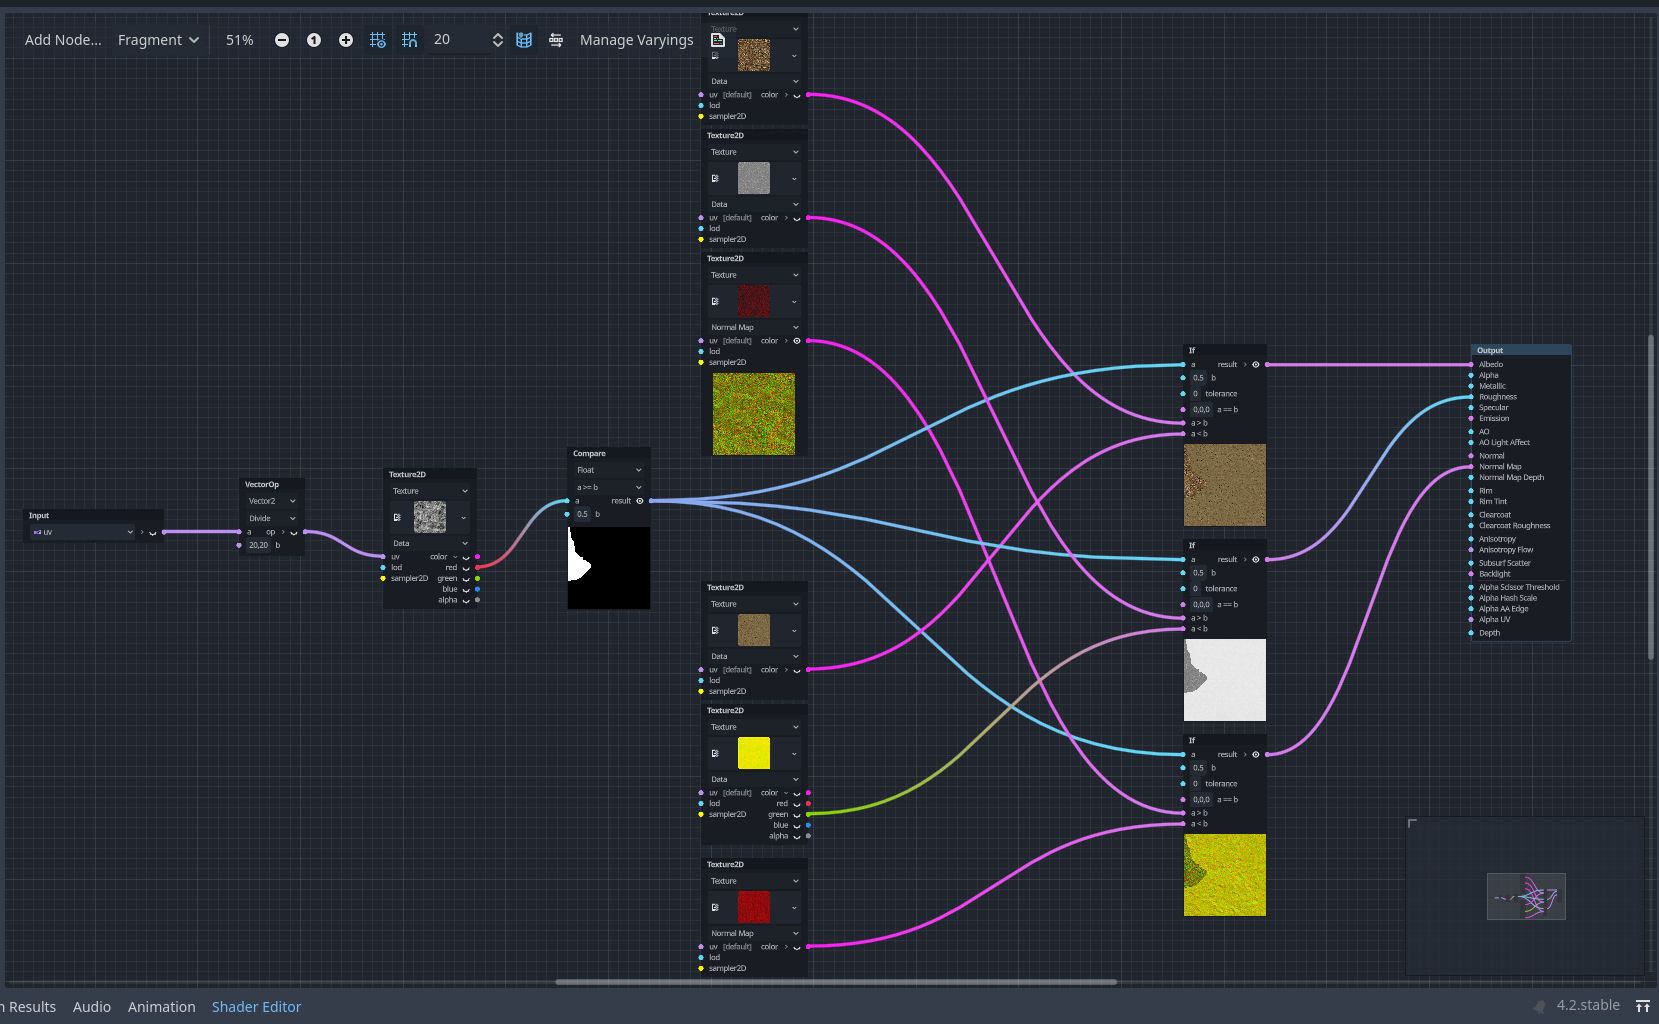
The shader node setup (two principled BSDFs for two materials that are later mixed using the vertex painting as a mask [the blue color attribute]).

At this point I had the mostly seamless fusion of both textures I wanted in Blender (seen here on the right), but the UV scaling was too large. Compare top left (you can see the texture underneath the UV map) to the bottom left, where you can see the actual extent of the UV map:

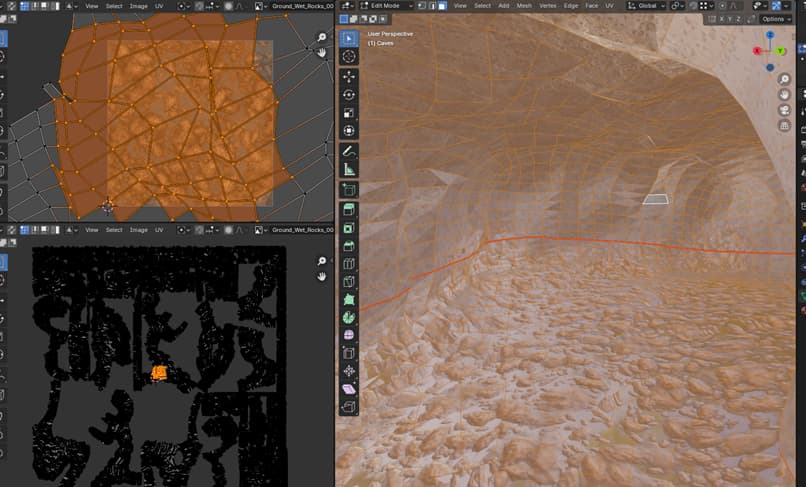
The textures I was using in the materials were 1K resolution, but my mesh was waaay bigger than anything else I had seen in any tutorial. I had to scale the UVs 15x in order for the detail in the texture to be visible and not look stretched.

This didn’t seem like a problem at first until I encountered what is the most popular solution for exporting materials in a model: baking. I didn’t understand it at first, so I put some hours into learning to unwrap the UVs, marking the seams, using automatic projection, connecting the texture nodes in the shader, etc. Finally, I was ready to bake some cave systems…

As soon as I pressed BAKE, my computer froze and shut down. Apparently, the sheer amount of polygons ensured that what was being baked was my CPU. I had to tweak the settings a couple times, but it was by no means an intuitive process. The CPU continued to overheat a couple of times doing this, and my rig is by no means low-specs (AMD Ryzen 5 3600 + Nvidia RTX3060).

I tried several configurations and I was finally able to obtain a baked texture without my CPU shooting itself after a couple of hours thanks to using SimpleBake… Here was my new texture:


Uhmm… I think something’s not right.

Ok so this was probably my fault, and fixing the black spaces lead to this:

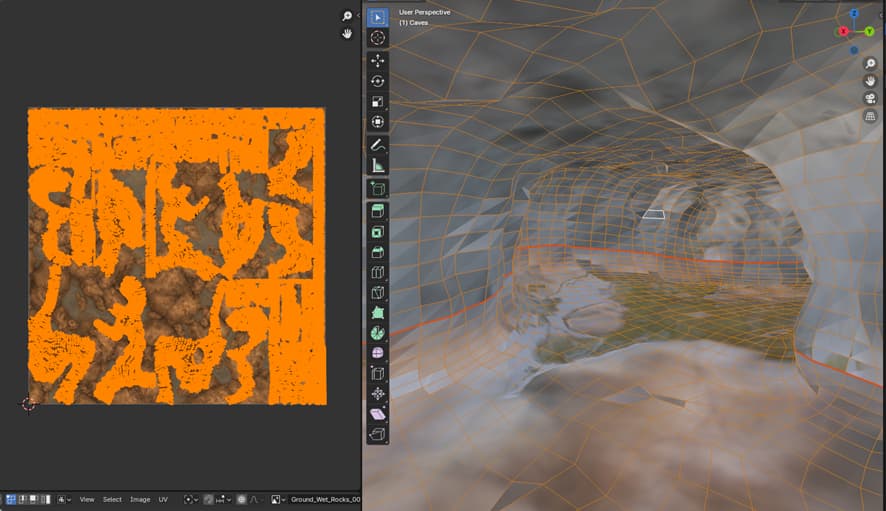
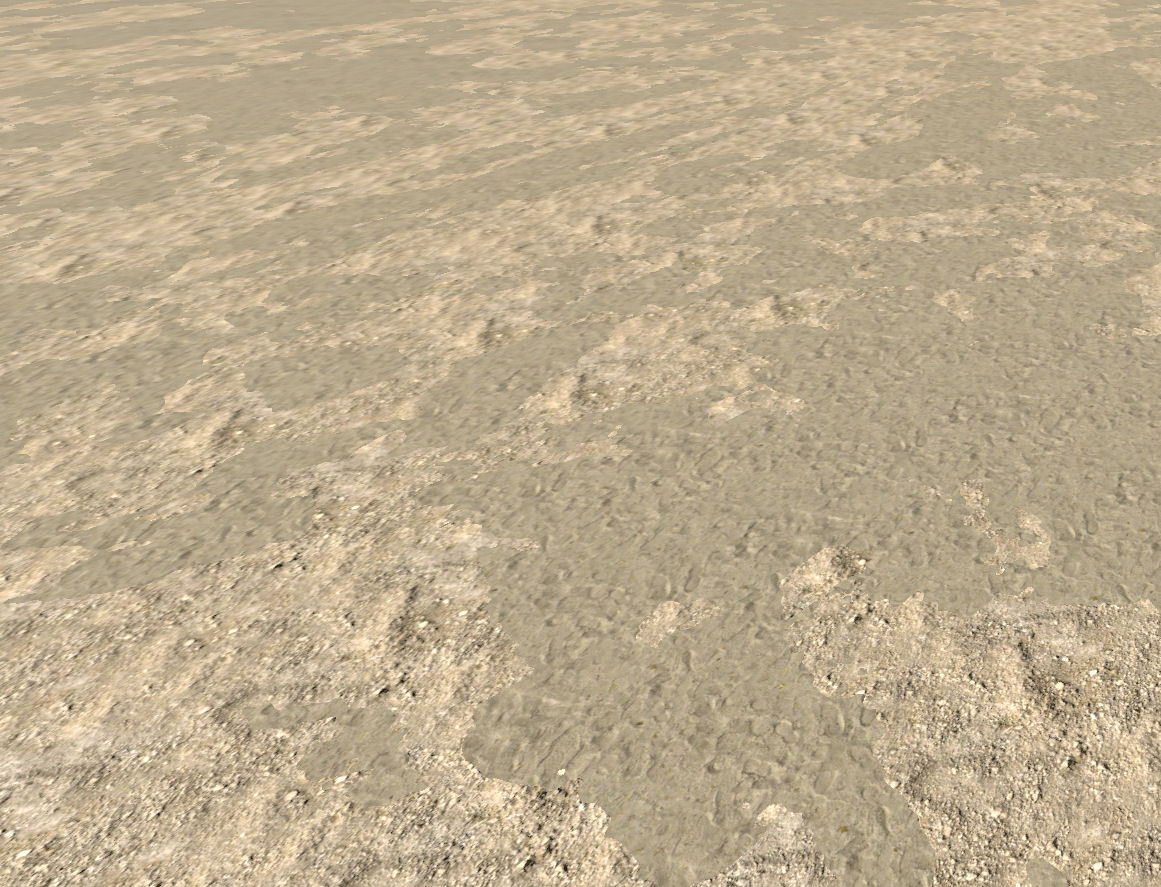
The UV map has been scaled down to fit in the 1k texture, but that leads to every rock and puddle being 15 times their intended size on the model surface, thus the stretched preview on the viewport.

At this point I had no idea what to do. I spent hours googling and looking for tutorials until I found someone on a forum mentioning that you can’t really do what I wanted (baking such small textures into huge models as repeating tiles), so I needed other solutions.

Most tutorials out there teach you to apply a texture to a mesh or surface and be done with it. If you want several textures in one object, assign them individually to each surface. I wanted a more organic look, but without more options I decided to try:


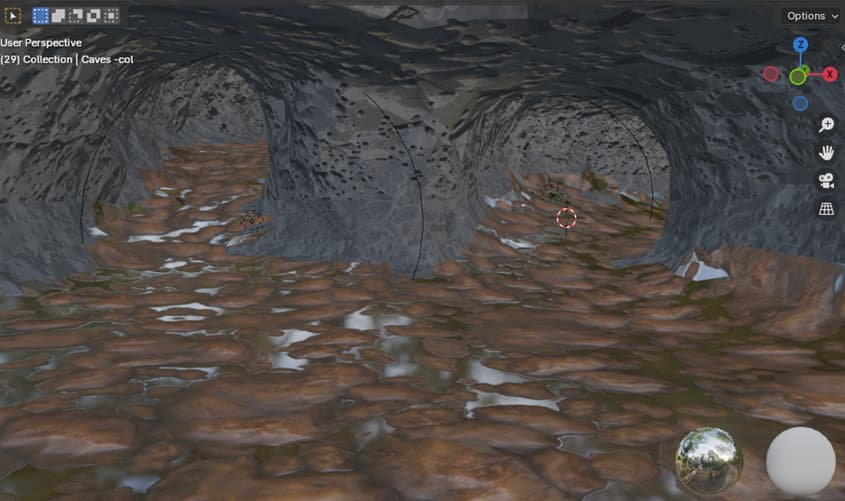
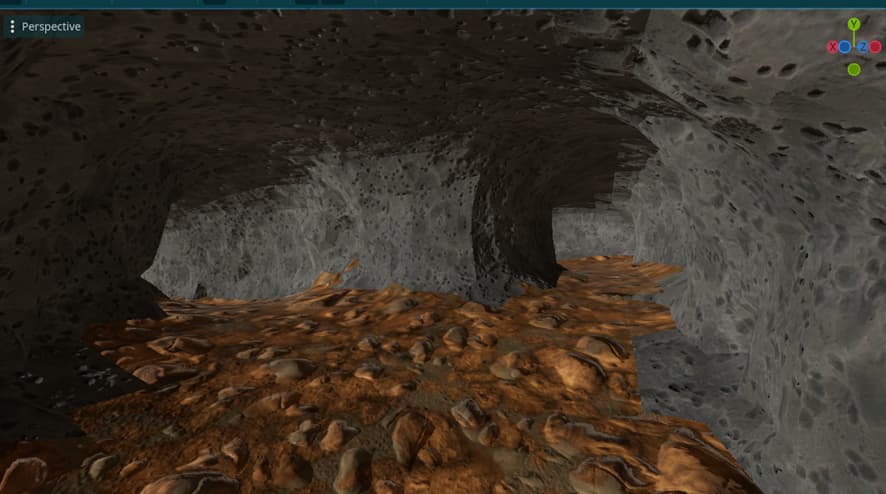
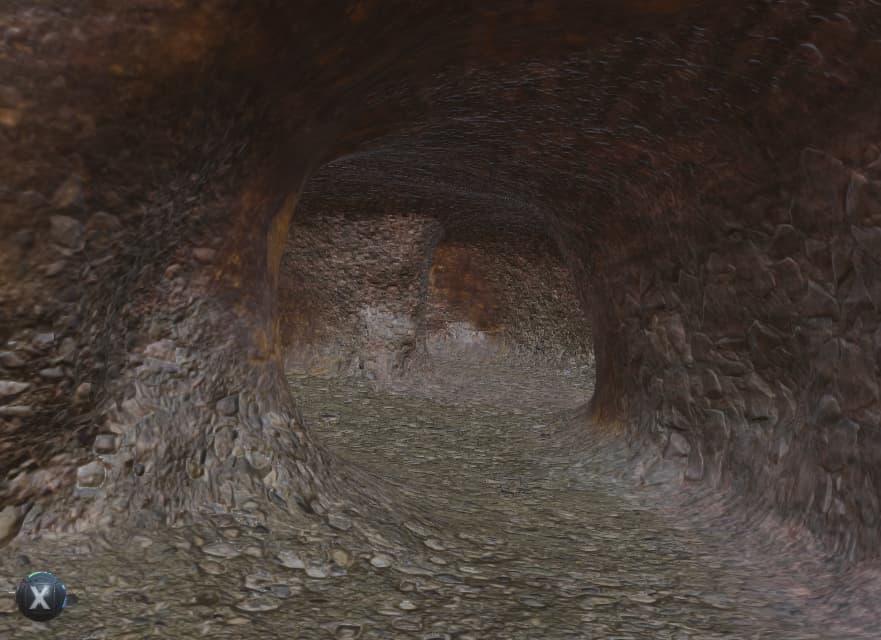
Blender (top) vs Godot (bottom) comparison.

Disregard the lighting since I made no attempt at making it similar in both editors, but do look at the seams between the two textures. I couldn’t find a way to implement the texture interpolation I had achieved before using the vertex painting mask, but I guess it works.

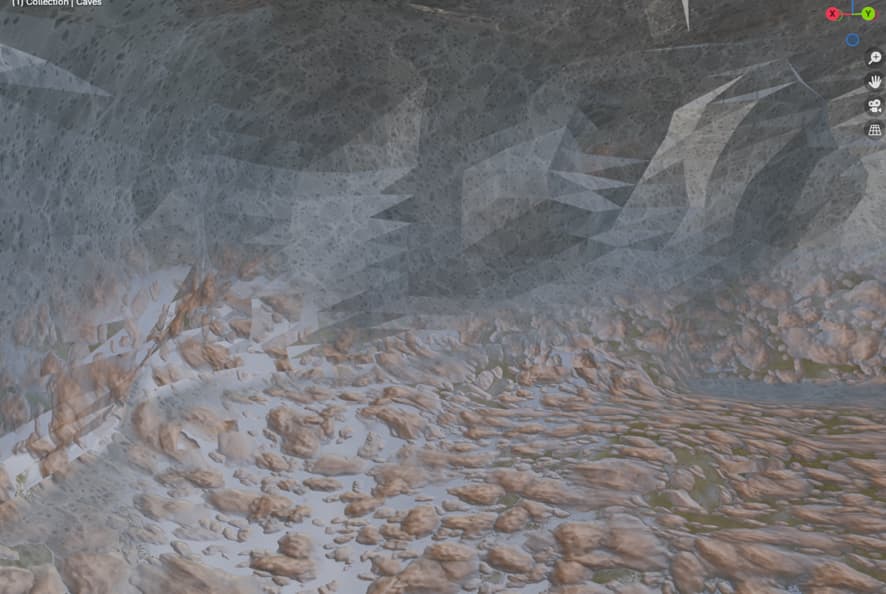
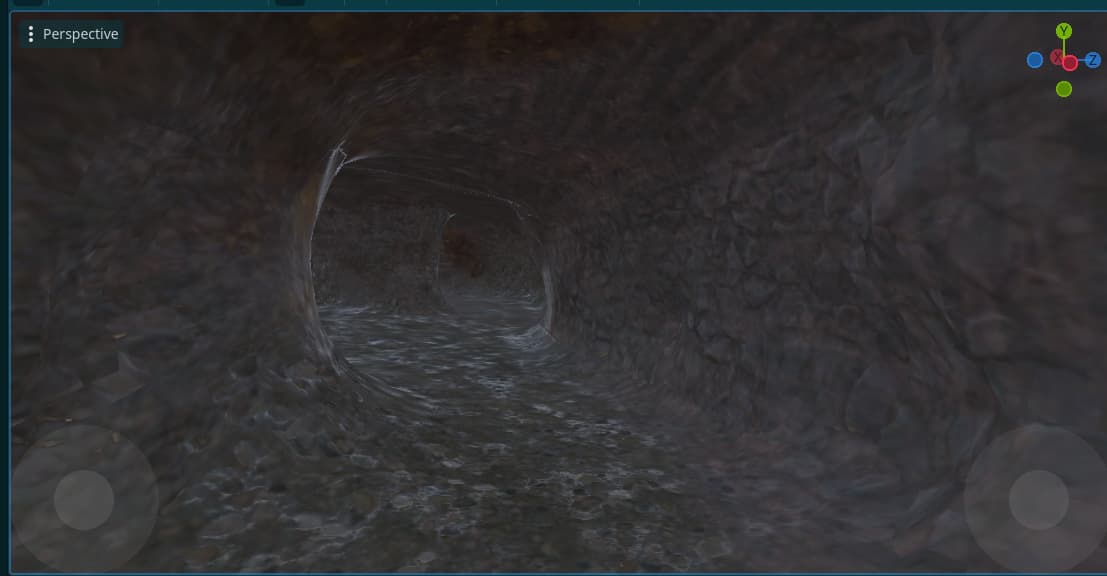
Interpolation between the textures, disregard the weird shading in the geometry.

And this is as far as I got. I am aware I’m just starting out and I have a lot to learn, including the limits of Blender and Godot, but I still need to ask… Is there any way to achieve the interpolation between the two PBR materials that I intended? There has to be, right? AAA games do it all the time. Maybe I need to use Adobe’s Substance 3D Painter? Or InstaMAT studio? Learn Godot shaders?

Hi,
I’m new to this stuff myself, but as far as I can tell, I think you’ll need to go down the “Learn Godot shaders” route. I don’t think the file formats that can be passed between the various packages support PBR, so you end up having to implement it separately in each package. You can pass simple material information in fbx and gltf files, but nothing particularly complex.
I think unreal has it’s own file format which therefore probably allows for PBR data.

This is probably the closest I’ve come to doing something like your “wet stone” look (I think you’ve wet and dry patches, mine is sand and gravel). I ended up making some compromises with it, for instance I use a texture to decide where to mix the two textures I’m using rather than the “noise” I used in blender (couldn’t find equiv in Godot), and it’s mixing 2 sets of textures rather than calculating data (performance of using proper PBR is probably too slow, so you’ll probably need to convert topology you’d create in blender to textures - you can do it by creating and saving them in blender [link the channel outputs to textures, render them instead of the result and save the contents of those textures into files for your albedo, roughness, normal etc], but it’s a right pain, plus my ability to create quality fine detail PBRs was somewhat lacking, so I cheated on the below and downloaded a couple of 1k textures from polyhaven.com). But by doing below mixing of two textures, at least that horrid repeating grid pattern you often see is now less noticeable without needing huge texture images. If you look closely at the image below you can probably see the repeats within the 2 textures, there’s probably over 20 repeats showing from top left corner to bottom right corner.


1 Like

Hey, thanks for the reply. I actually also tried going the visual shader route at some other point, but I really liked the blender workflow, as the tutorials I found for blender were very helpful and looked very professional. I’ll check out InstaMAT studio too just in case, but yeah Godot shaders will be a must anyway.
Regarding using a noise texture in the visual shader, here you can find instructions on how to add your own noise node from the Godot documentation. Alternatively, I think you can add a Texture2Dparameter node and add a fast noise lite from the inspector :slight_smile:

And regarding texture repetition, I have the following video bookmarked that explains 2 methods of avoiding the repetition. I hope it helps :slight_smile:

Thanks, you learn something new every day. That’s a good video. If I want to improve the blending more I might use that rotation technique, as long as it doesn’t compromise performance.
I did that shader a couple of months ago, and after getting something that worked I haven’t really looked at it again. I probably should have looked more at adding node types but I presumed it should have been a standard thing like in Blender or Unity and decided there was enough to do without writing noise routines, and I also missed the creation of a FastNoiseLite within a NoiseTexture2D inside the Texture2D, which I’m now wondering if I came across the NoiseTexture2D but thought it didn’t work? Anyway, I decided at the time that using a texture for it would be relatively fast so that’s what I ended up using at the time.
Anyway, since then I’ve been trying to write shader materials with gdshader scripts as I’m presuming I can optimise their performance better, it’s similar to the adding of the expression in the video. Even with fast GPUs you still need to keep things as quick as possible, which means as few calculations as possible. I’ve found it very easy to write things that lower the frame rate, hard to keep it running fast. I’ve an AMD Ryzen 3960X and RTX2080Ti and I’m struggling to get my project to run at 100fps. I see why a lot of 3rd person games only look down towards a character, you can restrict the draw distance, cull lots of objects and radically reduce the load. With 1st person you can use LOD, multi meshes, lower draw distances and use occluders, but with my setting (where the game is set) it needs quite long draw distances and there isn’t much for the occluders to work with. My game is 3rd person, but it might as well be 1st person for the camera angles. In blender you can create some great looking scenes, but it takes a lot, lot longer than 1/100th of a second to render.

1 Like

Ok, I’m back to report my investigation and findings.

From what I can gather, in order to achieve this type of texture blending, most people use Adobe’s Substance Painter and Substance Designer. However, there is a new kid in town, a new program called InstaMAT which currently offers a free license option for small projects. They provide a lot of similar functionalities as Adobe’s programs.

InstaMAT has lots of options for painting textures and applying masks and I was able to make the cave look like this:

I had some issues (that I discussed in InstaMAT’s forums) but I was finally able to bake the textures and import them to Godot looking like this:

So that’s it. I’m documenting my solutions in case anyone finds this thread in the future and needs help with this.