Godot Version
Godot v.4.1.1.
Question
I’ve created a set of Sprite3Ds that tile to form a hexagonal map, but I think this is a broader question about precisely interlocking/overlapping Sprite3Ds that is applicable outside of strict tiling grids.
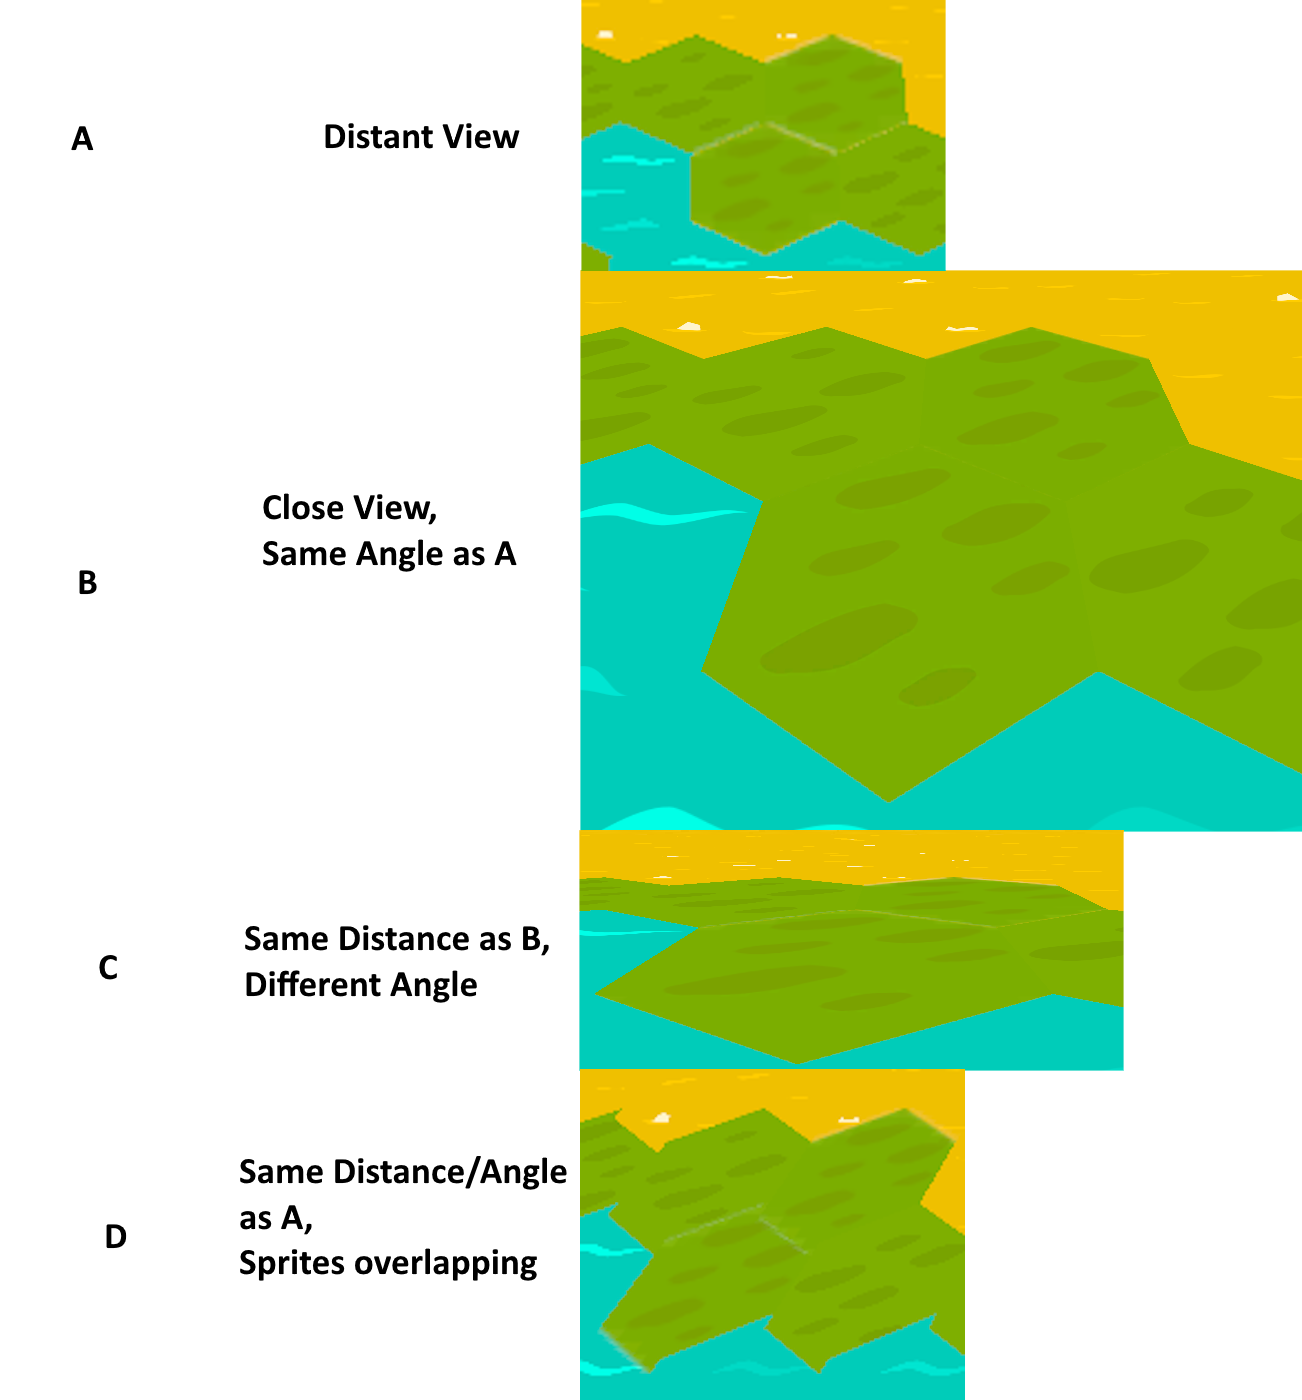
I originally noticed seams between the sprites along the antialiased/not straight edges of the hexagons, so I tried to resolve this by removing semitransparency from my sprites (I made all semitransparent pixels fully opaque), and also by slightly adjusting the position of the sprites such that the edges where I was seeing seams overlapped slightly.
This seems to improve the situation when the camera is fairly close and the sprites are not heavily angled relative to the camera (so basically, when the textures look most like they would look viewed in image editing software). But when I zoom away from the sprites, or when I view then at an extreme angle, the seams reappear.
The thing that really confuses me is that the seams exist even if the sprites are fully overlapping (see the final image, where I’m making them overlap extremely). I’d have maybe expected that if there were any transparency on those edges, but I’ve edited all my sprites to make sure the edges are all fully opaque.
Is this something to do with mipmapping or filtering? I’m not very familiar with those processes.
I should probably specify that I’m using a MaterialOverride ShaderMaterial on the Sprite3Ds that accepts the texture as a parameter (so that I can modify features of the sprites through script later).
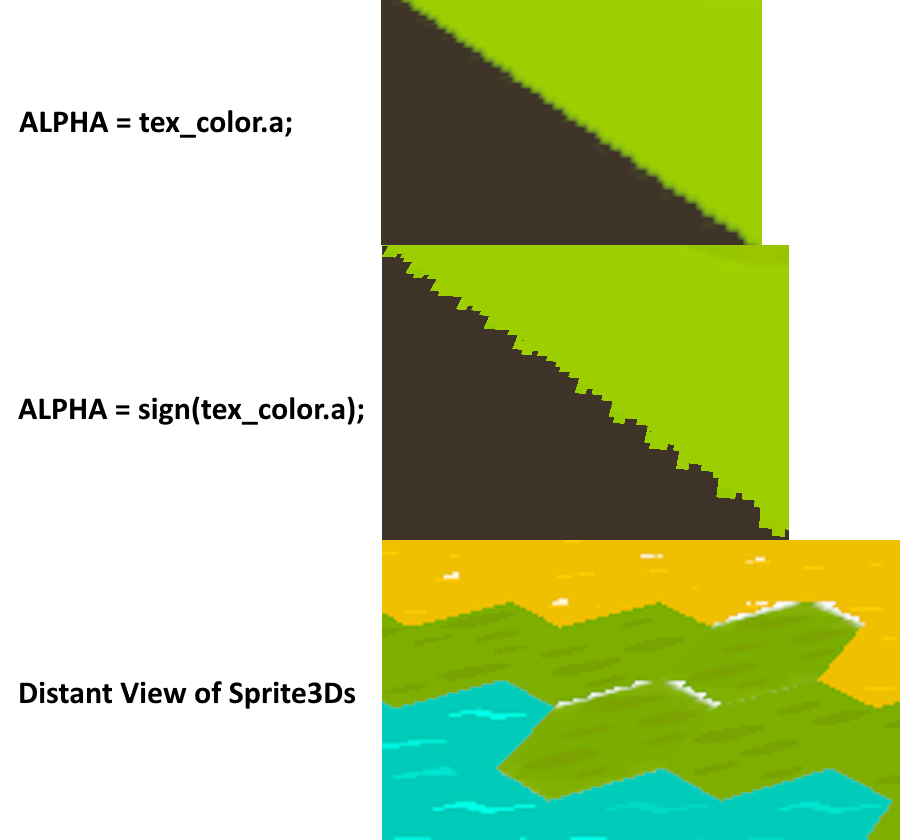
I decided to try playing around with the shader these sprites use, and found something interesting, though I still don’t understand it. I decided to force the alpha to be either 0 or 1 through the shader, and used sign() to force anything above 0.0 to be 1.0. This resulted in jagged pixellated edges, but when I viewed the sprites in-game at a distance, they were filled in with a big white smear along the jagged edge. When I zoom in closer, that white area disappears entirely.
This makes me think that in my previous case, what I thought was a “seam” or an artifact of overlapping/adjacency is actually a faint white tint that would appear on the sprites no matter what they’re next to.
Okay, the artifacting disappears entirely when I change the shader’s filter mode to something that doesn’t use mipmapping. So the problem seems to be with my mipmaps.
I vaguely know mipmaps are useful for visual quality, so I’m guessing turning them off isn’t ideal, but I’m not sure how to proceed. These textures are PNGs (400x462 in size) that are imported as “Compressed Texture2D” according to the editor, and when I view their properties in the editor it says “8 Mipmaps”, but I’m not sure how to view or configure those mipmaps. In my Project Settings, Texture2D has Mipmaps>Generate>On not ticked, so there must be some other flow that controls those mipmaps.
I thought mipmaps were used based on distance, but disabling mipmapping also removes the artifacts when I’m viewing the Sprite3D at a harsh angle. Are mipmaps also used in cases like that?
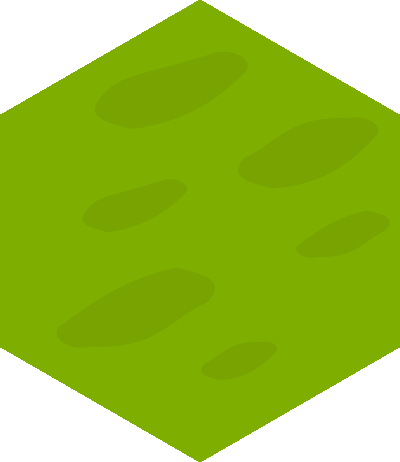
What does your tile texture look like? If it has an alpha channel, show it also without that mask (so there are no masked out parts).
An example of one of the actual textures looks like this:
I’m not sure what the right way is to remove alpha from a PNG, but from color-picking before and after moving the alpha from whatever value it was at to 1.0, I think this is an accurate version of it with alpha removed:

Clearly there’s a bunch of white there. Is that white somehow getting blended into the opaque areas in the mipmap generation process?
Just toying around in Paint.Net, it seems I can make 100% transparent pixels that still read as having other colours, such as red, even after their alpha has been reduced to 0. Is this what I should be doing when making assets, first coloring in all the transparent parts and then manually setting their alpha to 0? If so, I’ll need to figure out a workflow for efficiently doing that when creating the assets, since when I export PNGs right now transparent areas all seem to be transparent white.
So you’ll want to fill that white with something that is representative to what it’d tile to on that side, with yours you’d just fill the white with that base green, then you won’t have to worry about how the alpha border transition is happening, as it’d be harder to get that to match.
You could try using filter_nearest when you sample your tile texture in the shader, but that could lead to other pixelization issues.