Hello everyone! In this tutorial I will show you how to setup the environment and sun to get good lighting for different times of the day and atmospheric conditions (weather) in open levels.
Before we start, we need the following Nodes in our scene:
DirectionalLight3D (our sun)
WorldEnvironment
and of course our level, this part is up to you.
for open spaces I will be using SDFGI, as it’s the only option we have. If your level is small enough you can use a VoxelGI instead, as it will result in higher quality.
Is there day-night cycle in your game?
if your game makes use of day night cycle, it is best to use a procedural sky. but if the scene is fixed in time, if it will always be daylight or morning in your level, you will get better results with an HDR sky instead. you can download one for free from the internet, make sure to match the time of day.
Adding environment
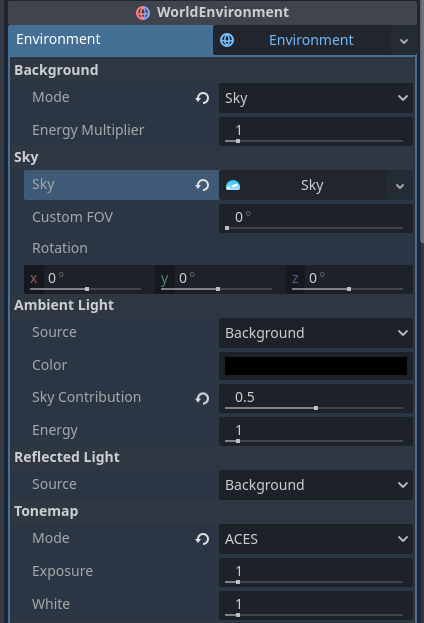
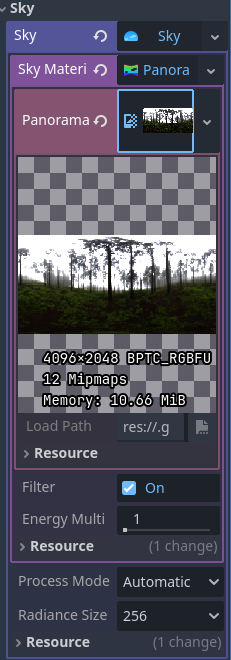
we will start by adding a WorldEnvironment to our scene and setting Background mode to Sky and adding a Sky in Sky.
we will also change our Tonemap to something that fits the style of our game.
For realism, choose either Linear or ACES.
For a stylized look, choose Reinhard or Filmic
It is also a good idea to add volumetric fog to the scene, unless the scene is supposed to be very clear.
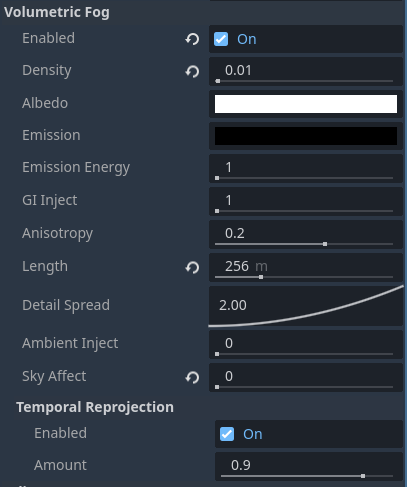
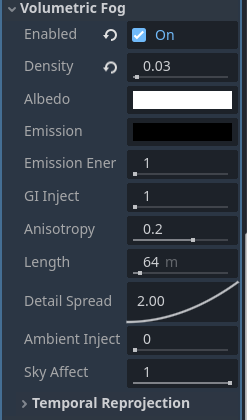
the only option we need to change here is
Density. a value of 0.01 or lower is good for clear scenes, while a higher value can be set for colder scenes, or if you want mist.if we want the fog to cover the sky, we leave
Sky affect at 1.0, but for any other scene we set it to 0.0 to be able to see the sky.
Night
Let’s start with an evening scene.
We will go to our sun and set light energy between 0 and 0.4, and light color to (0.02, 0.02, 0.3) or (5, 5, 77)
we will also leave shadow blur at 1
these settings are for a game with day-night cycle. we can just remove our sun entirely if the scene will always take place at night.
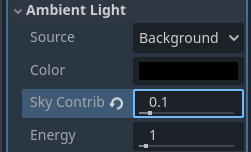
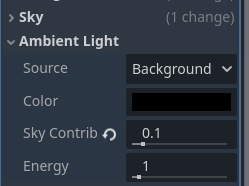
now, on to the Environment:
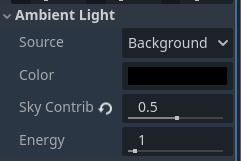
we will set the ambient light sky contribution to 0.1
if we are using a procedural sky, we will set our
sun angle max to 110º, and our sky energy multiplier to 0.1 and our ground energy multiplier to 0.1our sun should also be pointing up.

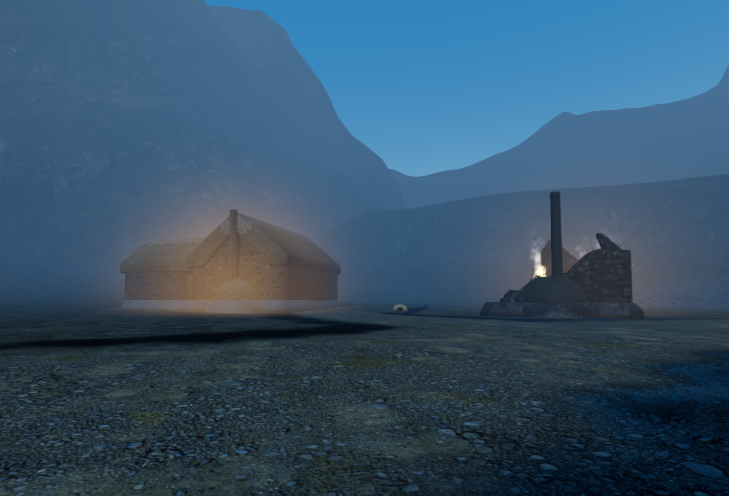
if everything goes right, our scene should look like this:
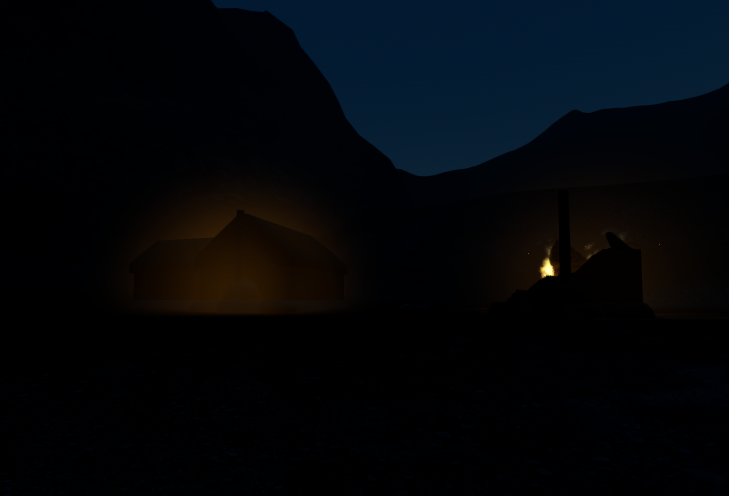
the only light in the scene should come from an HDR sky or from the lights in our scene, like fire or lamps.
Morning
next we will tackle morning. the reason we explained night, is because a scene between night and morning will need values set between these two.
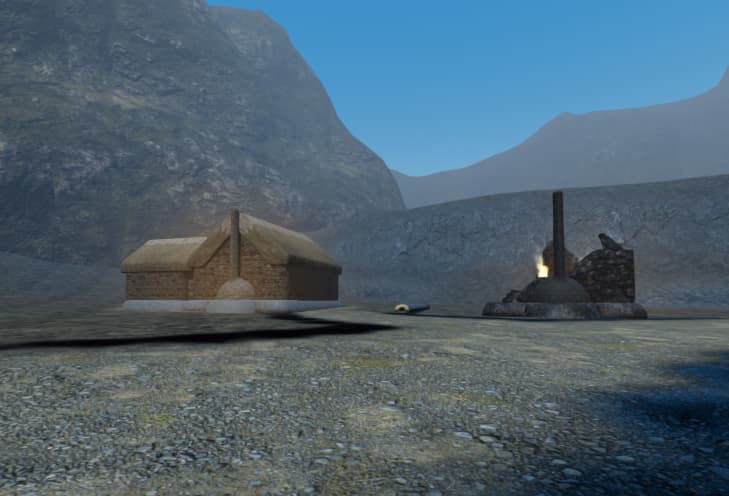
this scene will take place at around 8 am.
we start by rotating our sun, it should be set between
0º and 90º in the X or Z.0º would usually be 6 am, and 90º for 12 am/1 pm, but this could depend on the time of year.we will set our sun
light energy to 0.5.we set out
shadow blur to something between 0.1 and 0.8. shadows should get sharper the closer to noon.and we set out light color to
(0.68, 0.78, 0.88) or (170, 200, 224).

in WorldEnvironment, we will set our
ambient light sky contribution to 0.7. we want more ambient light during morning and softer shadows. this would be reduced as we get to noon.
we set out volumetric fog density to 0.03, there is more fog during the morning and it will make it look colder.
finally, if we have a procedural sky, we set sky energy multiplier to 0.75, ground energy multiplier to 0.1, and sun angle to 50º
Noon
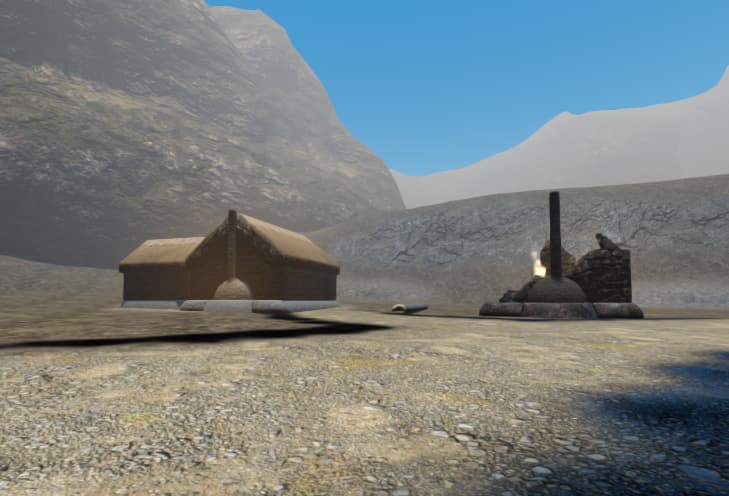
and we finally got to noon!
we will set our sun
light energy to 1.0we set sun
light color to (1.0, 0.96, 0.89) or (255, 245, 227)and we set
shadow blur to 0.1, we want sharp shadows.
in WorldEnvironment we set out ambient light sky contribution to 0.1, we want dark shadows, and reduce fog density back to 0.01
if we use a procedural sky, we set sky energy multiplier to 1.0 and sky sun angle to 30º
and that’s it! we can create scenes between morning and noon or morning and night by mixing the values.
for afternoon we can copy morning mostly, but make the sun light color more red. and sometimes we might also want sharper shadows.
cloudy scenes
for a cloudy scene, we just increase sky contribution and fog density, as shadows tend to be less noticeable.
we might also want to increase light affect if we are using SSAO, as everything should be in shadow. we can alternatively use a plane to cast shadows on the entire scene.
edit: okay, forget that last part. I’m going to go into detail on how to create a cloudy scene.
this part can only be achieved for a static scene, which means no day-night cycle.

for this particular case, SDFGI did not lead to good results, and it’s not needed. we will achieve GI using screen shaders and reflection probes.
first thing we need is a sky. In my case I got an HDR sky from polyhaven, but you can also create your own. or just use a clear sky.
we will set ambient light sky contribution to 0.5
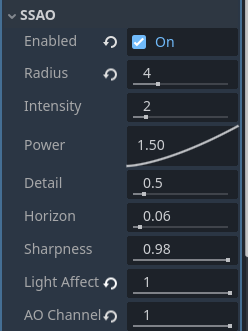
we will then enable SSAO and SSIL. you can opt not to use them, but they can improve the result.
SSAO will darken areas, while SSIL adds small but necessary amounts of real-time GI.
for SSAO we set radius to 4 to make the effect more noticeable. and we want to set Light Affect and AO Channel to 1.0, this will make the effect visible in areas affected by “the sun”, since cloudy scenes are technically in shadow. we can set these to lower values depending on he amount to light that gets through the clouds.
for SSIL we just increase radius to 10.

and we increase volumetric fog density to 0.03 and set Sky Affect to 1.0 to cover the sky.
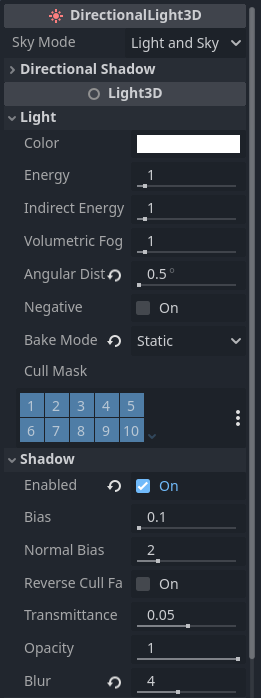
on our sun, we increase Blur to a value between 4 and 10. a value of 10 will be preferable but can lead to artifacts when used with low quality shadows.
we also want to increase Angular Distance to 0.5, this will have a slight performance cost but will create softer shadows. higher values can be better but can also lead to shadowing artifacts.
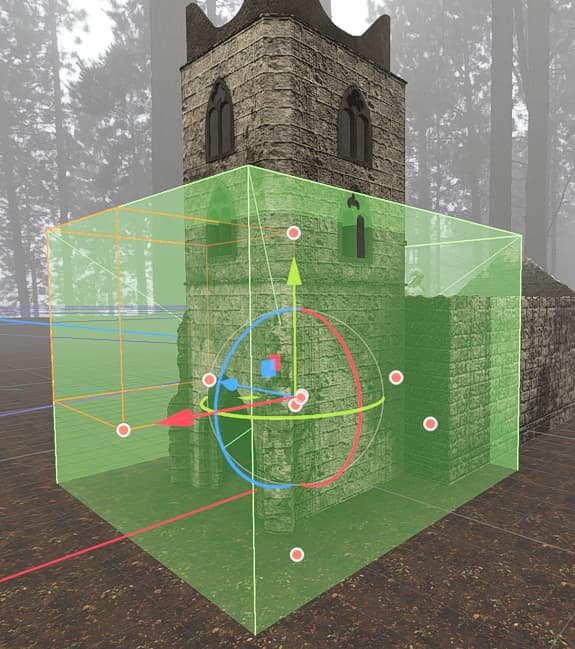
our final step is to add Reflection Probes. Reflection Probes are needed to darken interior areas.
we will add Reflection probes in any and all enclosed areas. if it has 3 walls, it needs a reflection probe. don’t worry about performance, reflection probes are the cheapest form of GI, so you can add one for every room.
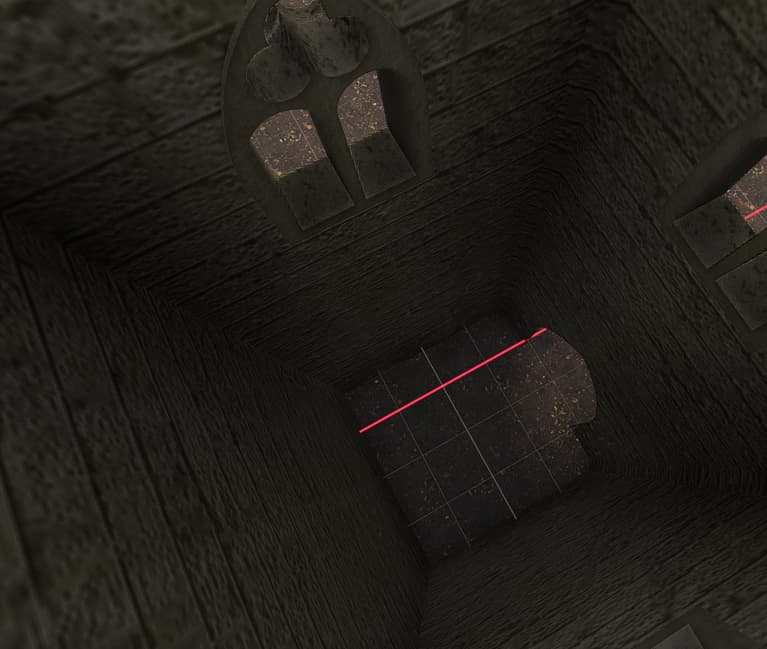
Quality doesn’t matter either. All the reflection probes need to do is add shadows to enclosed spaces.

in this example, the reflection probe is darkening the shadows. without it, the ambient light would flood the area making interior spaces look too bright
first, static reflection probes.
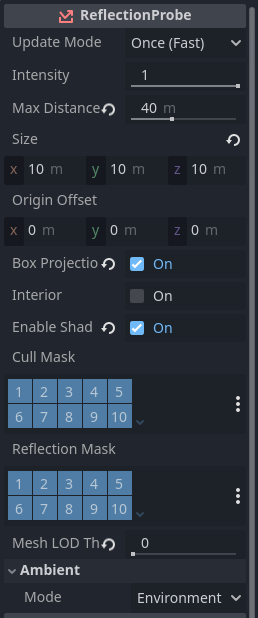
we want to leave our reflection probes to update mode “Once” so they render once at the start. we can set the cull mask to skip the player and other moveable objects.
we can increase Max Distance to prevent visual artifacts. without it, the probe can cut the geometry of the level and render the sky. remember that reflection probes are spheres, so this sphere has to cover the corners of our cube.
For “squared” spaces we enable Box Projection, for other shapes we disable it to make it a sphere.
We can enable shadows since they will only render once, and we can disable Mesh LOD by setting it to 0 to get the best quality.
For spaces that need to change constantly, like flickering lights or moving parts, we can set update mode to always, but we must try not to overdo it, as it has a performance cost. in that case, we can disable shadows, increase LOD and reduce max distance to increase performance.
for a scene with fire or torches that can be turned on and off, I would not do this.
Instead I would have the reflection probes cull the lights, reacting only to the sun.