Part 1:
               #6
                if top == 100 and bottom == 100 and left == 100 and right == material_min and top_left == material_max and bottom_left == 100 and top_left != bottom_2_left < right:
                    pixel_array[index][0] = (material_min * 100 + 0) / 10000 if bottom_2_left is None else (bottom_2_left * 100 + 22) / 10000
                    pixel_array[index][1] = material_min / 255 if top_left is None else top_left / 255
                    pixel_array[index][2] = material_max / 255 if right is None else right / 255
                    completed = True
                #7
                if left == 100 and right == 100 and top == 100 and bottom == material_min and top_right == material_max and top_left == 100 and top_right != top_left_2 < bottom:
                    pixel_array[index][0] = (material_min * 100 + 0) / 10000 if top_left_2 is None else (top_left_2 * 100 + 23) / 10000
                    pixel_array[index][1] = material_min / 255 if top_right is None else top_right / 255
                    pixel_array[index][2] = material_max / 255 if bottom is None else bottom / 255
                    completed = True
                #8
                if left == 100 and right == 100 and bottom == 100 and top == material_min and bottom_left == material_max and bottom_right == 100 and bottom_left != bottom_right_2 < top:
                    pixel_array[index][0] = (material_min * 100 + 0) / 10000 if bottom_right_2 is None else (bottom_right_2 * 100 + 24) / 10000
                    pixel_array[index][1] = material_min / 255 if bottom_left is None else bottom_left / 255
                    pixel_array[index][2] = material_max / 255 if top is None else top / 255
                    completed = True

                # Алгоритмы пересечения 4-х разных материалов
                #1
                if top_left != 100 and top_right != 100 and bottom_left != 100 and bottom_right != 100 and top_left != top_right and top_right != bottom_right and bottom_right != bottom_left and bottom_left != top_left:
                    pixel_array[index][0] = (material_min * 100 + 0) / 10000 if top_left is None else (top_left * 100 + 25) / 10000
                    pixel_array[index][1] = material_min / 255 if top_right is None else top_right / 255
                    pixel_array[index][2] = material_max / 255 if bottom_right is None else bottom_right / 255
                    pixel_array[index][3] = material_max / 255 if bottom_left is None else bottom_left / 255
                    completed = True

                # Алгоритмы постобработки
                #1
                if top == 100 and left == 100 and right == 100 and top_left == 100 and top_right == 100 and bottom == material_min:
                    pixel_array[index][0] = (material_min * 100 + 0) / 10000
                    pixel_array[index][1] = material_max / 255
                    completed = True
                #2
                if left == 100 and top == 100 and bottom == 100 and bottom_left == 100 and top_right == 100 and right == material_min:
                    pixel_array[index][0] = (material_min * 100 + 0) / 10000
                    pixel_array[index][1] = material_max / 255
                    completed = True
                #3
                if right == 100 and top == 100 and bottom == 100 and bottom_right == 100 and top_right == 100 and left == material_min:
                    pixel_array[index][0] = (material_min * 100 + 0) / 10000
                    pixel_array[index][1] = material_max / 255
                    completed = True

            # Назначаем материалы вне стыков
            if polygon_grid[y][x] != 100 and polygon_grid[y][x] != -1:
                pixel_array[index][0] = (polygon_grid[y][x] * 100 + 0) / 10000
                completed = True

            # Непрошедшие не по одному алгоритму, Нулевые
            if completed == False:
                pixel_array[index][0] = (material_min * 100 + 0) / 10000
                pixel_array[index][1] = material_max / 255


    #Вызываем функцию рисованию текстуры
    create_texture(pixel_array, width, height)
#---------------------------------------------------------------------

# Запуск главной функции
border_material()

# Профилирование
#cProfile.run('border_material()')
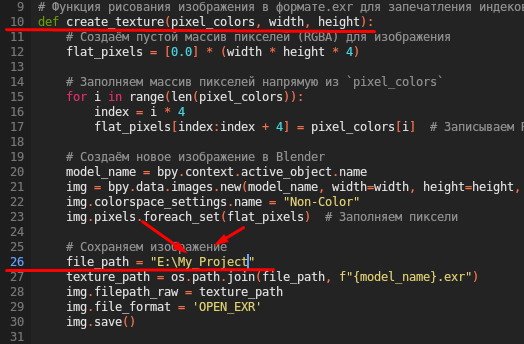
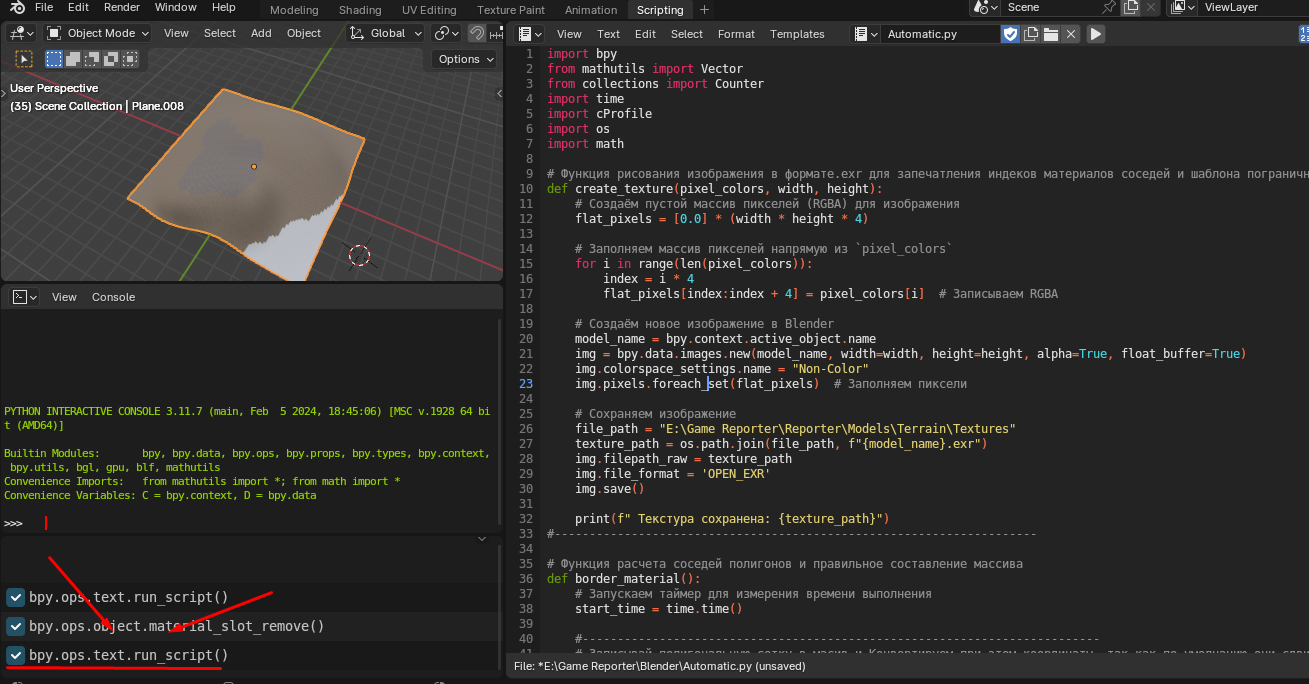
Copy this code and paste it into the file you created in the Scripting workspace.
Very important:
In the create_texture() function, on line 26: file_path = “”, insert the path to the folder where you want to save the texture. I recommend using the folder containing your project’s textures in Godot.
Here’s a brief explanation of how this code works:
- It takes the selected model and reads its UV dimensions. Based on this, it creates a two-dimensional array where the cells’ values correspond to the material names (letter-named materials are ignored).
I avoid directly reading the model dimensions using dimension() due to limitations with the z-axis. - It then iterates through the values of this 2D array, finds the boundaries between materials, and changes the cell values at these junctions to 100.
- Next It pre-processes the created borders.
- The finished array is sent to the function containing the algorithms, where data is encoded based on neighboring cells and written to a new array for pixels.
- This pixel array is sent to the texture creation function, where the data is encoded into image pixels, and the resulting image is saved in .exr format to the specified folder.
I’ve tried to make this code very fast, so performance complaints will not be accepted.
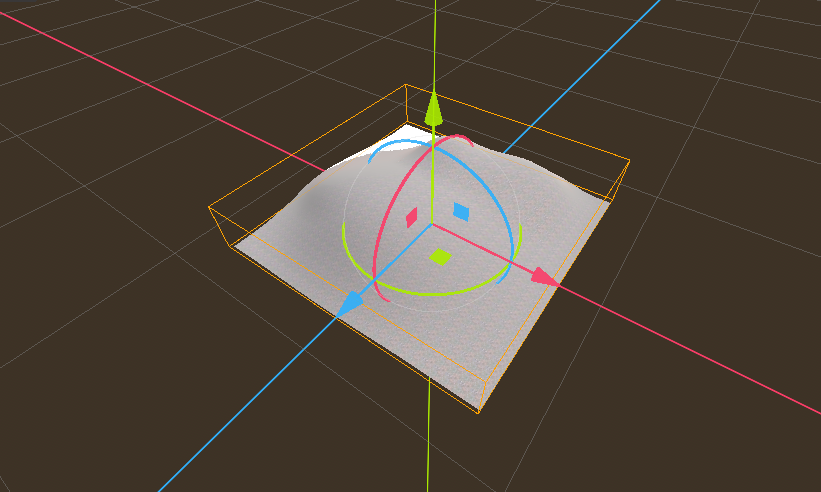
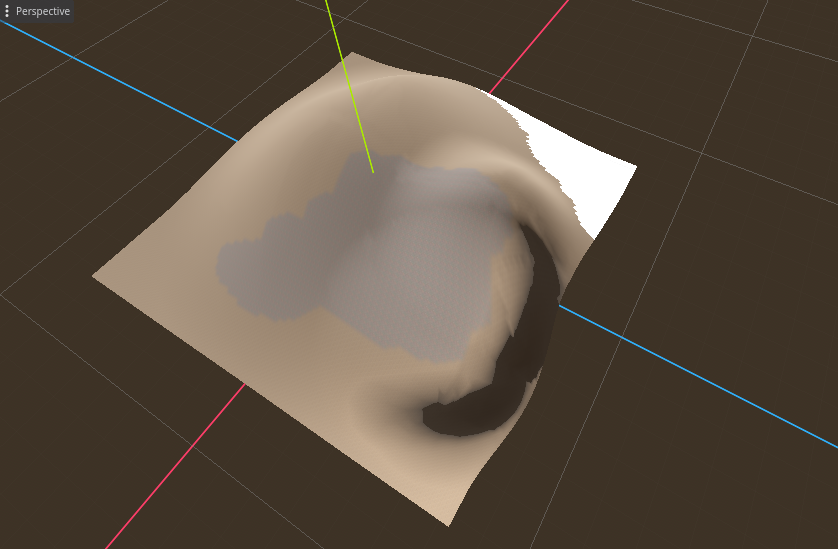
After you’ve copied the code and edited the save path, select your model in Object Mode and click this button:

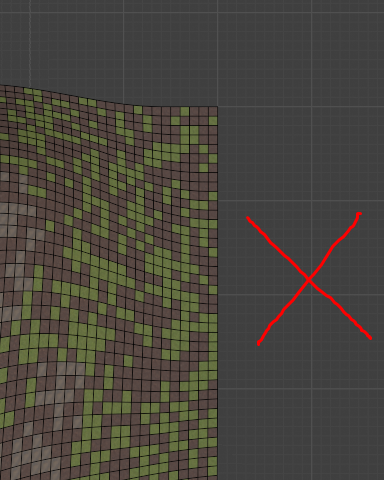
If you see such an error, it means that you have screwed up somewhere with the placement of materials on the border of the object.
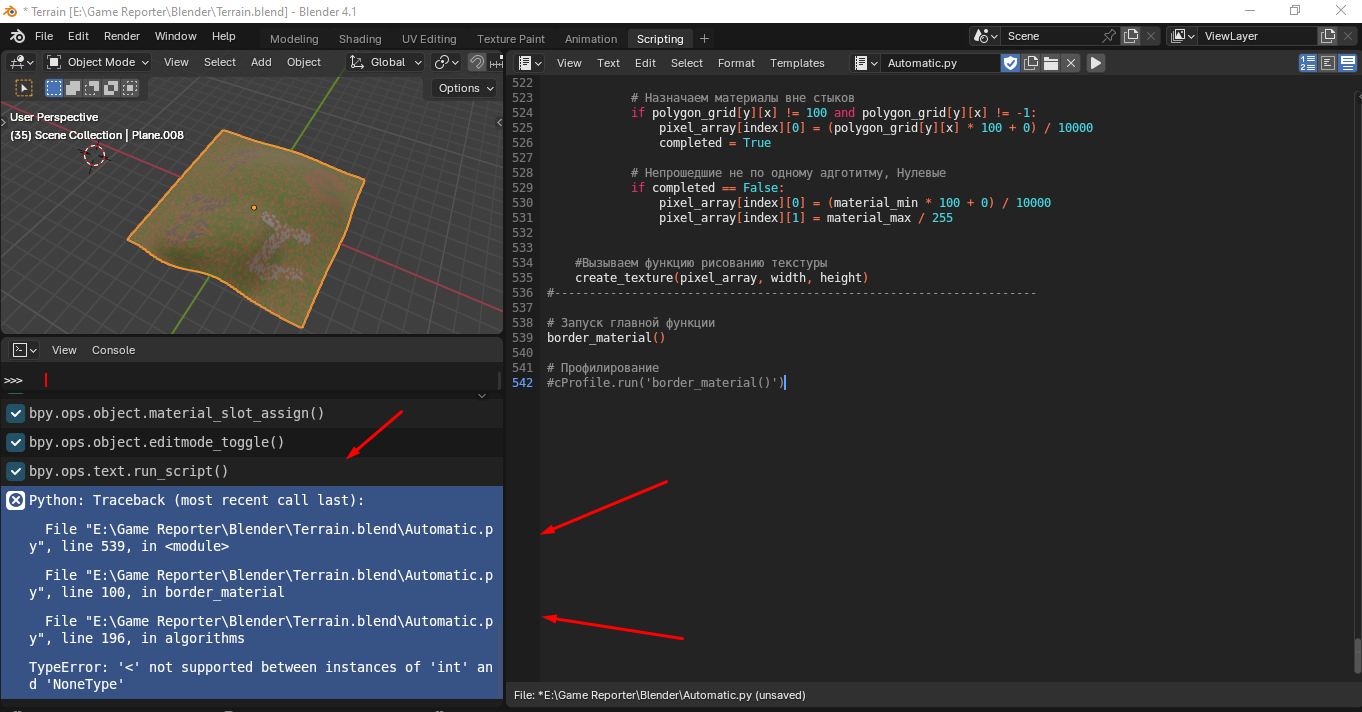
While this code allows for material placement on borders, it has limitations. It’s difficult to pinpoint the exact scenarios that trigger errors. You can typically create simple roads without problems, but more complex patterns like mosaics lead to errors with about a 50% probability.
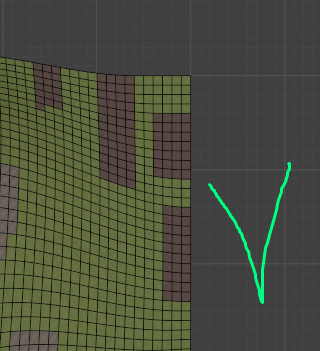
If you see this message, it means everything has worked correctly.
Next you can proceed to export.
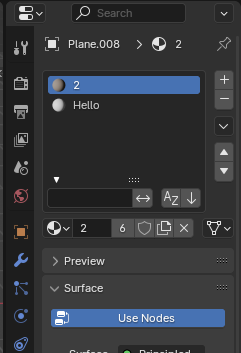
Before exporting the model to Godot, delete all materials from the object except one with a numeric name. Alternatively, you can create a new material that covers the entire area previously occupied by the numeric materials (in my case, “2”). Do not delete materials with letter names because they do not participate in textures transitions.
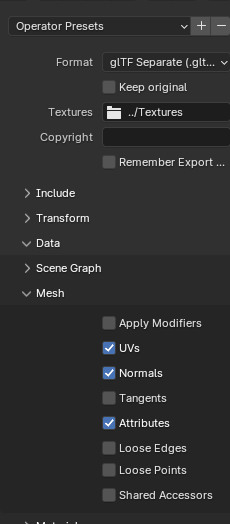
Next, export the model.
I’m not sure what export settings you typically use, but here are mine, just in case they’re helpful:
Part 2: Godot
I am using Godot v.4.4
Next, insert the exported object into the scene:
Now, bring the texture atlas you created into your Godot project and convert it to a Texture Array.
If you saved the texture to a different folder, go there and copy the generated texture file (it will have your model’s name) to your Godot project as well.
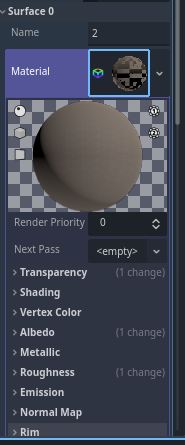
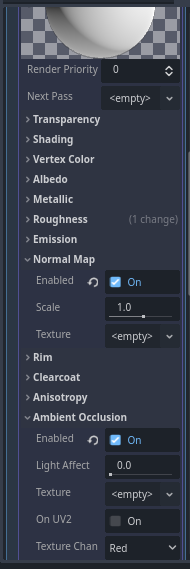
After that, go to the materials of your object, find the one with a number in its name, and set it up. You can configure the other properties as you like, but make sure to turn on Normal Map and Ambient Occlusion, as the shader relies on these. Finally, convert this material to a shader and open it in the shader editor.
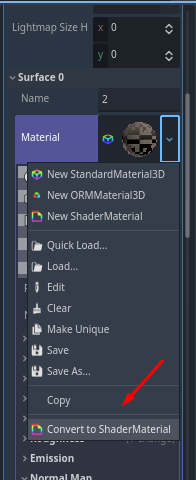
Next, copy and paste the following shader code.
This code was developed in collaboration with AI.
shader_type spatial;
render_mode blend_mix, depth_draw_opaque, cull_back, diffuse_burley, specular_schlick_ggx;

uniform vec4 albedo : source_color;
uniform sampler2DArray texture_albedo : source_color, filter_linear_mipmap, repeat_enable;
uniform ivec2 albedo_texture_size;
uniform float point_size : hint_range(0.1, 128.0, 0.1);

uniform float roughness : hint_range(0.0, 1.0);
uniform sampler2DArray texture_metallic : hint_default_white, filter_linear_mipmap, repeat_enable;
uniform vec4 metallic_texture_channel;
uniform sampler2DArray texture_roughness : hint_roughness_r, filter_linear_mipmap, repeat_enable;

uniform float specular : hint_range(0.0, 1.0, 0.01);
uniform float metallic : hint_range(0.0, 1.0, 0.01);

uniform sampler2DArray texture_normal : hint_roughness_normal, filter_linear_mipmap, repeat_enable;
uniform float normal_scale : hint_range(-16.0, 16.0);

uniform sampler2DArray texture_ambient_occlusion : hint_default_white, filter_linear_mipmap, repeat_enable;
uniform vec4 ao_texture_channel;
uniform float ao_light_affect : hint_range(0.0, 1.0, 0.01);

uniform vec3 uv1_scale;
uniform vec3 uv1_offset;
uniform vec3 uv2_scale;
uniform vec3 uv2_offset;

uniform sampler2D main_texture;

uniform vec2 material_repeate[100];
uniform vec4 material_mrna[100];

uniform int tile_x_count;
uniform int tile_y_count;
uniform int tile_y_index;
uniform int tile_x_index;

void vertex() {
}

// Функция смешивания для 2-х материалов
float blend_texture_2(int index, float local_x,float local_y){
	//Алгоритмы покраски
	if(index == 1){
		return smoothstep(-0.1, 1.1, local_y);
	}
	if(index == 2){
		return smoothstep(1.1, -0.1, local_y);
	}
	if(index == 3){
		return smoothstep(-0.1, 1.1, local_x);
	}
	if(index == 4){
		return smoothstep(1.1, -0.1, local_x);
	}
	if(index == 5 || index == 13 || index == 15 || index == 25){
		return smoothstep(-0.1, 1.1, local_x * local_y);
	}
	if(index == 6 || index == 16){
		return smoothstep(-0.1, 1.1, (1.0 - local_x) * local_y);
	}
	if(index == 7 || index == 14){
		return smoothstep(-0.1, 1.1, local_x * (1.0 - local_y));
	}
	if(index == 8){
		return smoothstep(-0.1, 1.1, (1.0 - local_x) * (1.0 - local_y));
	}
	if(index == 9 || index == 17 || index == 23){
		return smoothstep(1.1, -0.1, (1.0 - local_x) * (1.0 - local_y));
	}
	if(index == 10 || index == 20 || index == 21){
		return smoothstep(1.1, -0.1, local_x * (1.0 - local_y));
	}
	if(index == 11 || index == 19 || index == 22){
		return smoothstep(1.1, -0.1, (1.0 - local_x) * local_y);
	}
	if(index == 12 || index == 18 || index == 24){
		return smoothstep(1.1, -0.1, local_x * local_y);
	}
	return smoothstep(0.0, 0.0, local_x);
}
// Функция смешивания для 3-х материалов
float blend_texture_3(int index, float local_x,float local_y){
	if(index == 13 || index == 17 || index == 24 || index == 25){
		return smoothstep(-0.1, 1.1, (1.0 - local_x) * local_y);
	}
	if(index == 14 || index == 16 || index == 20 || index == 22){
		return smoothstep(-0.1, 1.1, (1.0 - local_x) * (1.0 - local_y));
	}
	if(index == 15 || index == 18 || index == 23){
		return smoothstep(-0.1, 1.1, local_x * (1.0 - local_y));
	}
	if(index == 19 || index == 21){
		return smoothstep(-0.1, 1.1, local_x * local_y);
	}
}
// Функция смешивания для 4-х материалов
float blend_texture_4(int index, float local_x,float local_y){
	if(index == 25){
		return smoothstep(-0.1, 1.1, (local_x) * (1.0 - (local_y)));
	}
}
// Функция смешивания 2-4 материалов для пользовательских параметров
vec4 blend_multiple_mrn(mat4 mrna_value, float blends[3], int count) {
    if (count == 2) {
        return mix(mrna_value[1], mrna_value[0], blends[0]);
    }
	else if (count == 3) {
        vec4 mixed1 = mix(mrna_value[0], mrna_value[2], blends[0]);
		return mix(mixed1, mrna_value[1], blends[1]);
    }
	else if (count == 4) {
        vec4 mixed1 = mix(mrna_value[0], mrna_value[2], blends[0]);
		vec4 mixed2 = mix(mixed1, mrna_value[3], blends[1]);
		return mix(mixed2, mrna_value[1], blends[2]);
    }
	return mrna_value[0];
}
// Функция смешивания 2-4 материалов для создания переходов + смешивание при пользовательский повторениях
vec4 blend_multiple_maps(sampler2DArray tex, vec2 uv, vec2 uv2, vec2 uv3, vec2 uv4, float materials[4], float blends[3], int count) {
    if (count == 2) {
        return mix(texture(tex, vec3(uv2, materials[1])), texture(tex, vec3(uv, materials[0])), blends[0]);
    }
	else if (count == 3) {
        vec4 mixed1 = mix(texture(tex, vec3(uv, materials[0])), texture(tex, vec3(uv3, materials[2])), blends[0]);
        return mix(mixed1, texture(tex, vec3(uv2, materials[1])), blends[1]);
    }
	else if (count == 4) {
        vec4 mixed1 = mix(texture(tex, vec3(uv, materials[0])), texture(tex, vec3(uv3, materials[2])), blends[0]);
        vec4 mixed2 = mix(mixed1, texture(tex, vec3(uv4, materials[3])), blends[1]);
        return mix(mixed2, texture(tex, vec3(uv2, materials[1])), blends[2]);
    }
    return texture(tex, vec3(uv, materials[0])); // По умолчанию возвращаем основной материал
}
// Функция декодировки изображения и вычисления нужного индекса массива текстур
void fragment() {
	// Переменная смешивания
	float blend_factor = 0.0;
	// Переменные типов текстур
	vec4 final_color = vec4(0.0);
	vec4 final_normal = vec4(0.0);
	vec4 final_metallic = vec4(0.0);
	vec4 final_roughness = vec4(0.0);
	vec4 final_ao = vec4(0.0);
	vec4 final_mrna = vec4(0.0);
	// Параметры тайлинга
	vec2 tile_size = vec2(1.0 / float(tile_x_count), 1.0 / float(tile_y_count));
	vec2 tile_offset = vec2(float((tile_x_index - 1) * 100) * tile_size.x, float((tile_y_index - 1) * 100) * tile_size.y);
	// Передаем данные UV и объявляем переменные
	vec2 base_uv = UV * uv1_scale.xy + uv1_offset.xy;
	// Если разбивается на тайлы, то применяем тайловое вмещение к base_uv
	if (tile_y_index != 0 && tile_x_index != 0){
		base_uv = (UV * uv1_scale.xy + uv1_offset.xy) * tile_size + tile_offset;
	}
	// Продолжаем объявлять base_uv
	vec2 base_uv2 = vec2(0.0);
	vec2 base_uv3 = vec2(0.0);
	vec2 base_uv4 = vec2(0.0);
	// Высчитываем локальные координаты
	float local_x = fract(base_uv.x);
	float local_y = fract(base_uv.y);
	// Вычисляем координаты пикселей изображения (целочисленные)
	ivec2 texel_coords = ivec2(base_uv);
	// Записываем данные пикселя
	vec4 pixel = texelFetch(main_texture, texel_coords, 0);
	// Декодируем данные пикселей в индексы материалов и шаблонов
	float material_1 = floor(pixel.r * 100.0); // Соседний материал 1
	float blend_index = round(mod((pixel.r * 100.0), material_1) * 100.0); // Индекс для шаблона смешивания
	float material_2 = round(pixel.g * 255.0); // Соседний материал 2
	float material_3 = round(pixel.b * 255.0); // Соседний материал 3
	float material_4 = round(pixel.a * 255.0); // Соседний материал 4
	// Матрица для хранения стандартных повторений типов текстур материала
    vec2 repeat_1 = vec2(uv1_scale.xy); // Значение uv1_scale по умолчанию для материала 1
    vec2 repeat_2 = vec2(uv1_scale.xy); // Значение uv1_scale по умолчанию для материала 2
    vec2 repeat_3 = vec2(uv1_scale.xy); // Значение uv1_scale по умолчанию для материала 1
    vec2 repeat_4 = vec2(uv1_scale.xy); // Значение uv1_scale по умолчанию для материала 2
	// Матрица для хранения стандартных параметров типов текстур материала
    mat4 mrna_value;
	mrna_value[0] = vec4(roughness, specular, metallic, normal_scale);
	mrna_value[1] = vec4(roughness, specular, metallic, normal_scale);
	mrna_value[2] = vec4(roughness, specular, metallic, normal_scale);
	mrna_value[3] = vec4(roughness, specular, metallic, normal_scale);
	// Если есть редактирования параметров материала то запускаем высчитывание пользовательских параметров
	if (material_mrna[int(material_1)] != vec4(0.0, 0.0, 0.0, 0.0)){
		mrna_value[0] = material_mrna[int(material_1)];
	};
	if (material_mrna[int(material_2)] != vec4(0.0, 0.0, 0.0, 0.0)){
		mrna_value[1] = material_mrna[int(material_2)];
	};
	if (material_mrna[int(material_3)] != vec4(0.0, 0.0, 0.0, 0.0)){
		mrna_value[2] = material_mrna[int(material_3)];
	};
	if (material_mrna[int(material_4)] != vec4(0.0, 0.0, 0.0, 0.0)){
		mrna_value[3] = material_mrna[int(material_4)];
	};
	// Если есть редактирования повторений то запускаем высчитывание пользовательских повторений
	if (material_repeate[int(material_1)] != vec2(0.0, 0.0)) {
		repeat_1 = material_repeate[int(material_1)];
	}
	if (material_repeate[int(material_2)] != vec2(0.0, 0.0)) {
		repeat_2 = material_repeate[int(material_2)];
	}
	if (material_repeate[int(material_3)] != vec2(0.0, 0.0)) {
		repeat_3 = material_repeate[int(material_3)];
	}
	if (material_repeate[int(material_4)] != vec2(0.0, 0.0)) {
		repeat_4 = material_repeate[int(material_4)];
	}
	// Передаем UV
    base_uv = UV * repeat_1 + uv1_offset.xy;
    base_uv2 = UV * repeat_2 + uv1_offset.xy;
	base_uv3 = UV * repeat_3 + uv1_offset.xy;
    base_uv4 = UV * repeat_4 + uv1_offset.xy;

	// Создание переменных для дальнейших расчетов
    float materials[4] = {material_1, 0.0, 0.0, 0.0}; // Инициализация с основным материалом
    float blend_factors[3] = {0.0, 0.0, 0.0};
    int neighbor_count = 1;

    materials[0] = material_1; // Основной материал
	// Смешиваем материалы
    if (material_3 == 0.0 && material_4 == 255.0) {
        materials[1] = material_2;
        blend_factors[0] = blend_texture_2(int(blend_index), local_x, local_y);
        neighbor_count = 2;
    } else if (material_3 != 0.0 && material_4 == 255.0) {
        materials[1] = material_2;
        materials[2] = material_3;
        blend_factors[0] = blend_texture_2(int(blend_index), local_x, local_y);
        blend_factors[1] = blend_texture_3(int(blend_index), local_x, local_y);
        neighbor_count = 3;
    } else if (material_3 != 0.0 && material_4 != 255.0) {
        materials[1] = material_2;
        materials[2] = material_3;
        materials[3] = material_4;
        blend_factors[0] = blend_texture_2(int(blend_index), local_x, local_y);
        blend_factors[1] = blend_texture_3(int(blend_index), local_x, local_y);
        blend_factors[2] = blend_texture_4(int(blend_index), local_x, local_y);
        neighbor_count = 4;
    }
	// Применяемые типы текстур
    final_color = blend_multiple_maps(texture_albedo, base_uv, base_uv2, base_uv3, base_uv4, materials, blend_factors, neighbor_count);
    final_normal = blend_multiple_maps(texture_normal, base_uv, base_uv2, base_uv3, base_uv4, materials, blend_factors, neighbor_count);
    final_roughness = blend_multiple_maps(texture_roughness, base_uv, base_uv2, base_uv3, base_uv4, materials, blend_factors, neighbor_count);
    final_ao = blend_multiple_maps(texture_ambient_occlusion, base_uv, base_uv2, base_uv3, base_uv4, materials, blend_factors, neighbor_count);
	final_metallic = blend_multiple_maps(texture_metallic, base_uv, base_uv2, base_uv3, base_uv4, materials, blend_factors, neighbor_count);
	// Смешиваем параметры материалов
	final_mrna = blend_multiple_mrn(mrna_value, blend_factors, neighbor_count);

	// Смешиваем текстуры с учетом градиента
	ALBEDO = albedo.rgb * final_color.rgb;

	// Metallic
	float metallic_tex = dot(final_metallic, metallic_texture_channel);
	METALLIC = metallic_tex * final_mrna.z;
	SPECULAR = final_mrna.y;

	// Roughness
	vec4 roughness_texture_channel = vec4(1.0, 0.0, 0.0, 0.0);
	float roughness_tex = dot(final_roughness, roughness_texture_channel);
	ROUGHNESS = roughness_tex * final_mrna.x;

	// Normal Map
	NORMAL_MAP = final_normal.rgb;
	NORMAL_MAP_DEPTH = final_mrna.w;

	// Ambient Occlusion
	AO = dot(final_ao, ao_texture_channel);
	AO_LIGHT_AFFECT = ao_light_affect;
}
Be sure to save the shader itself so you don’t lose it.
I’ll tell you briefly how this shader works:
- reads and decodes pixel data from the created texture
- determines the number of transitions
- passes data to the functions, which create procedural transitions based on the received data
Now, let’s set up the shader.
Part 3. Shader Paremeters
This shader supports 5 texture types that are most often needed for PBR materials: Albedo, Roughness, Metallic, Normal and Ambient Occlusion. Remember that you can only load them as texture arrays.

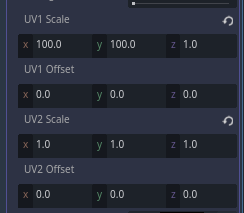
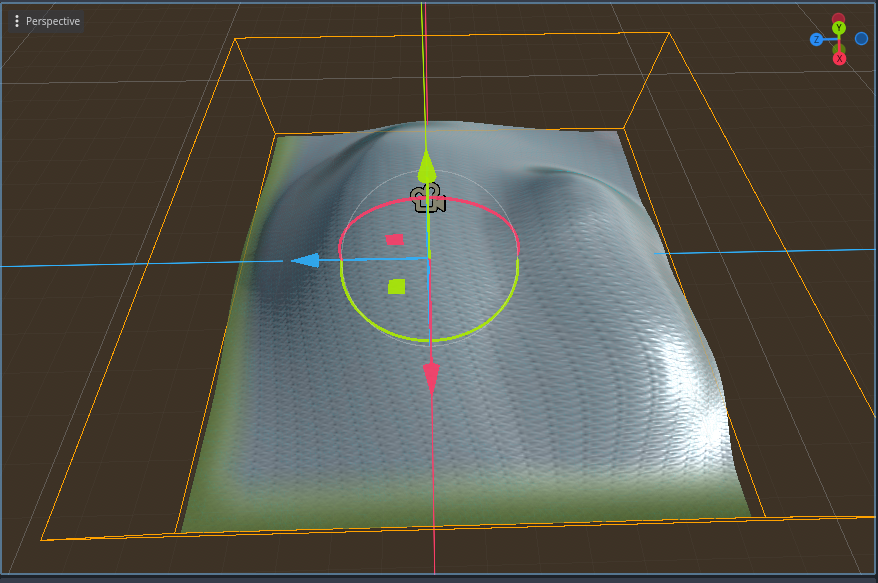
UV1 Scale should match the number of polygons in your model along the X and Y axes. In my case, it is 100 * 100.
Leave the rest of the values as default.
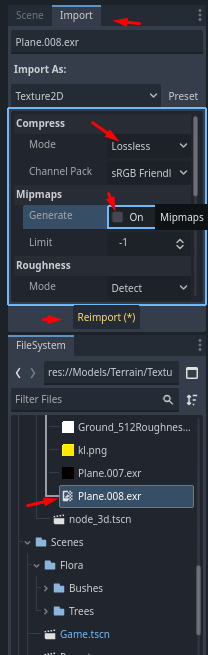
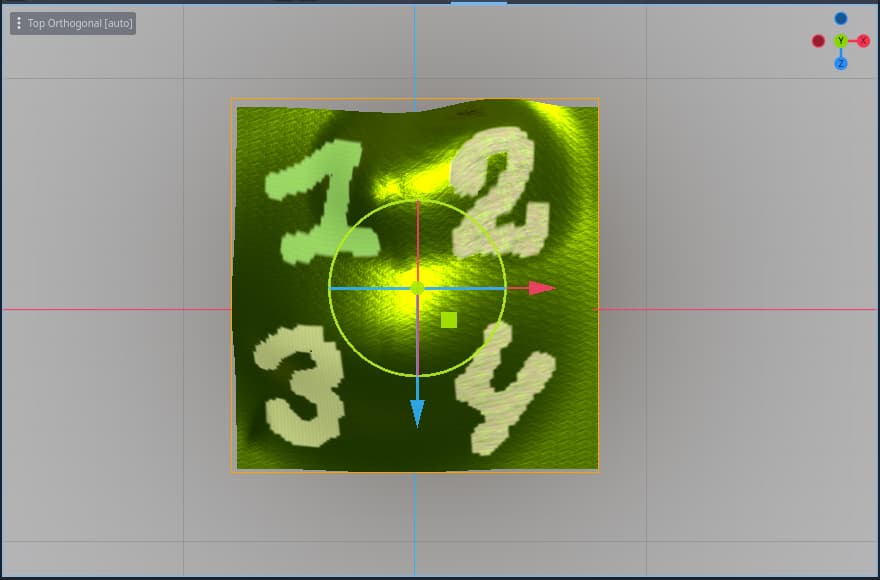
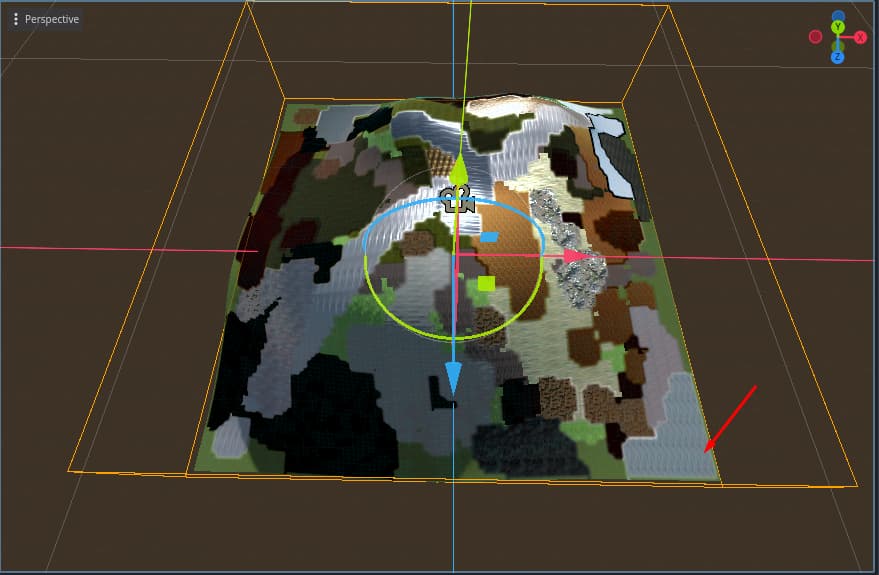
In Main Texture, select the .exr texture file that Blender generated. To ensure easy dynamic updates of your model in Godot, make sure the save path in your Blender code points to the texture folder within your Godot project.

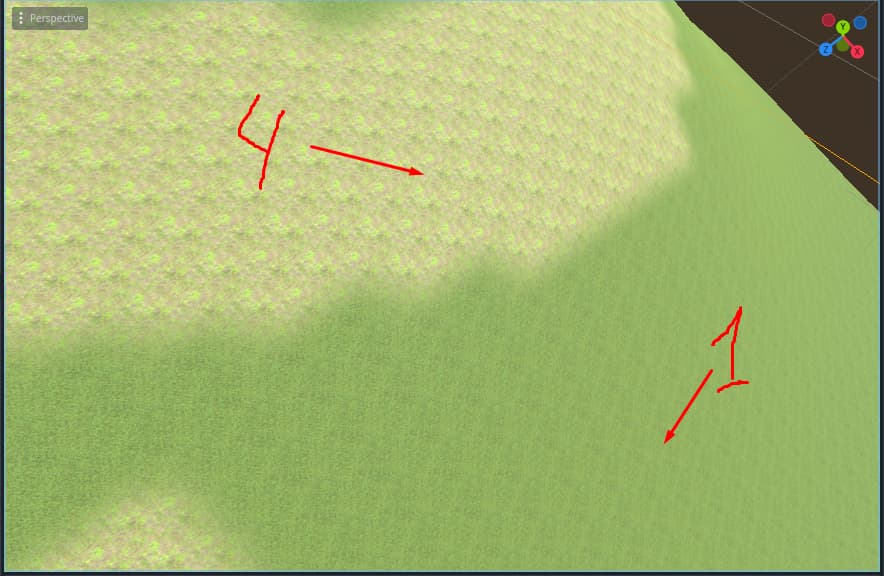
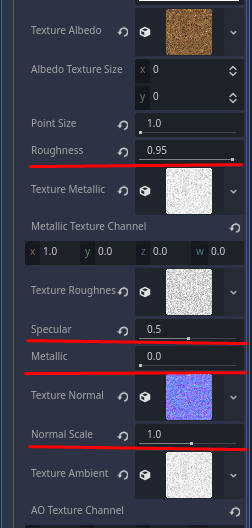
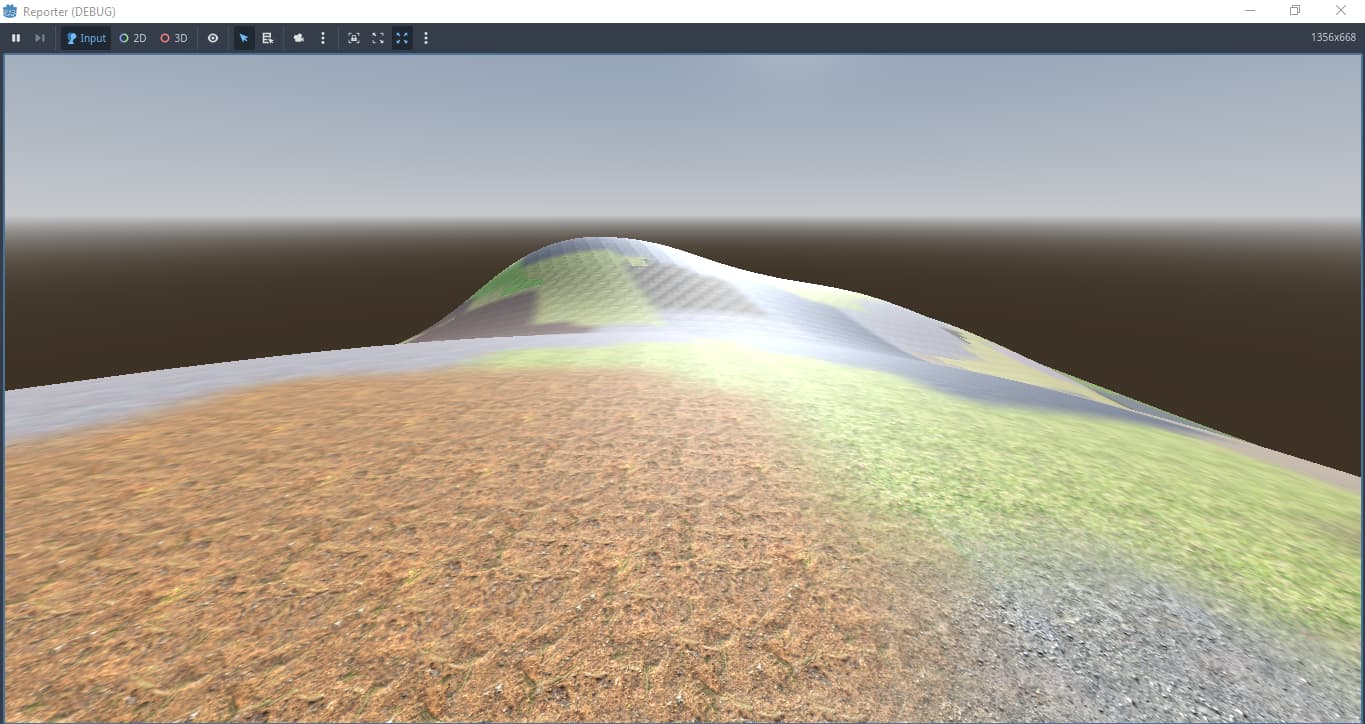
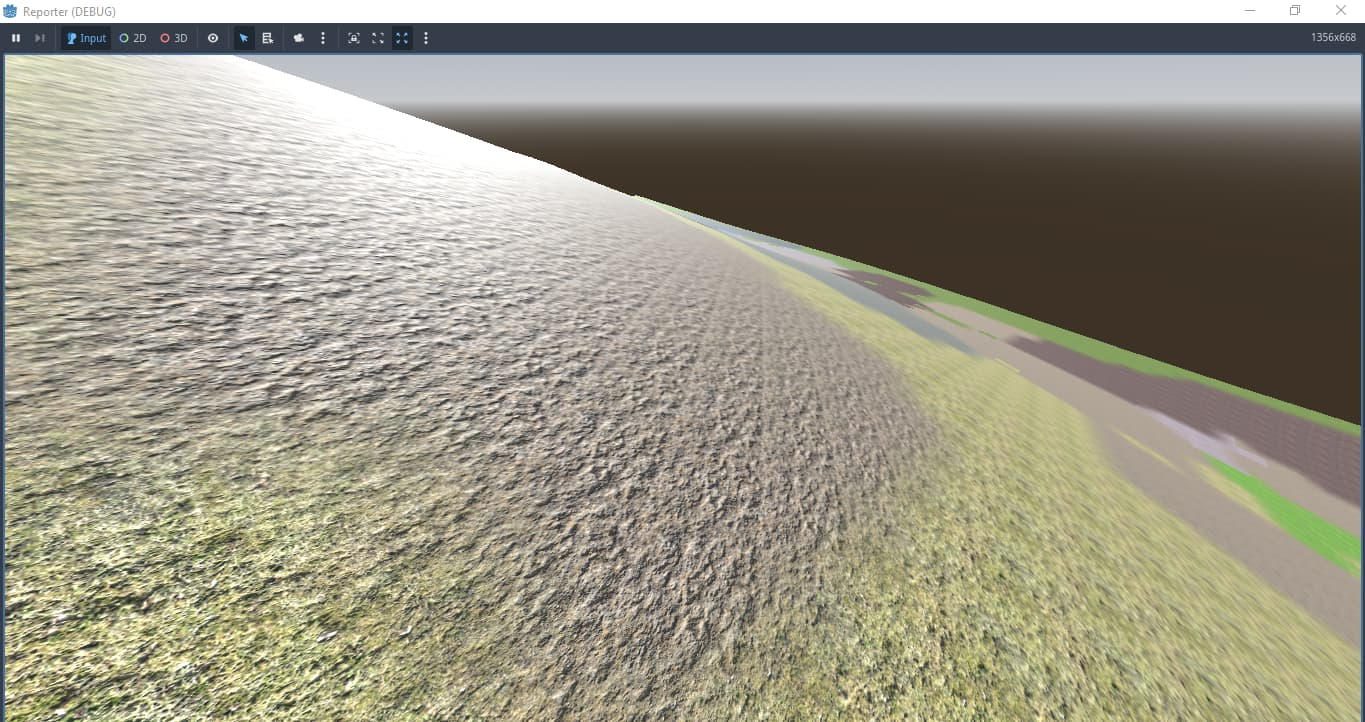
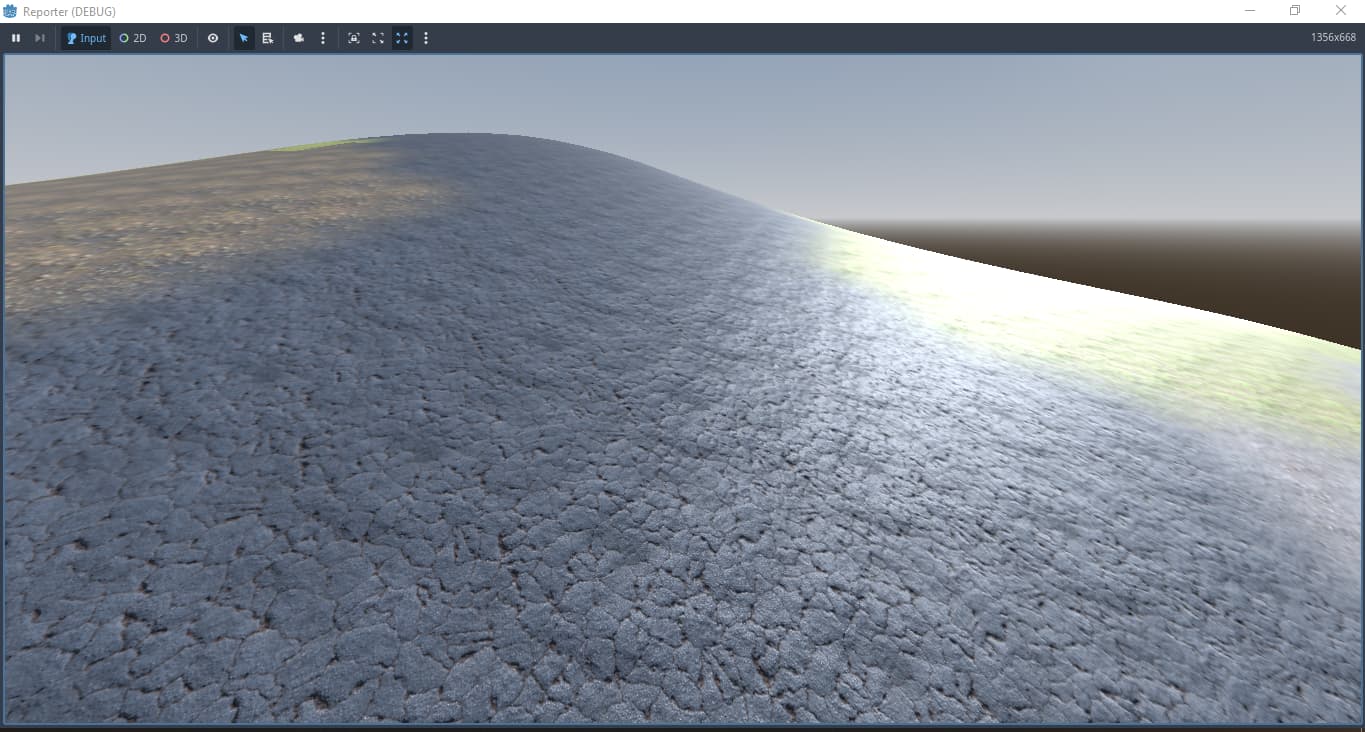
You just need to adjust these three shader parameters to get the result like in Blender but already with texture transitions:
Very important: when you first apply the created texture, because of the .exr format it is re-imported, so select it and re-import it again, if you don’t do this, everything will break when you re-enter the project.
Okay, let’s take a look at the other settings that let you use this shader like a “Multishader,” a “Megatexture,” or stuff like that.
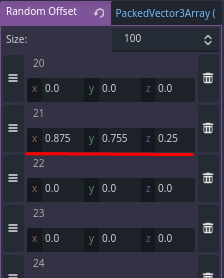
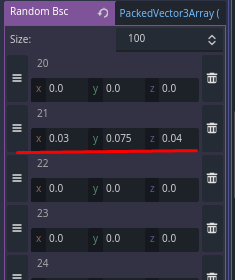
Open the “Material Repeat” setting, and you’ll see 100 slots ready for you. You can set up repeat amounts for 99 materials here; the first one (index 0) doesn’t count.
![]()
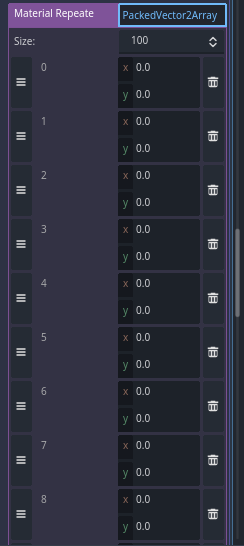
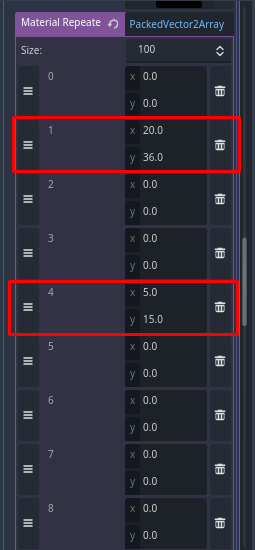
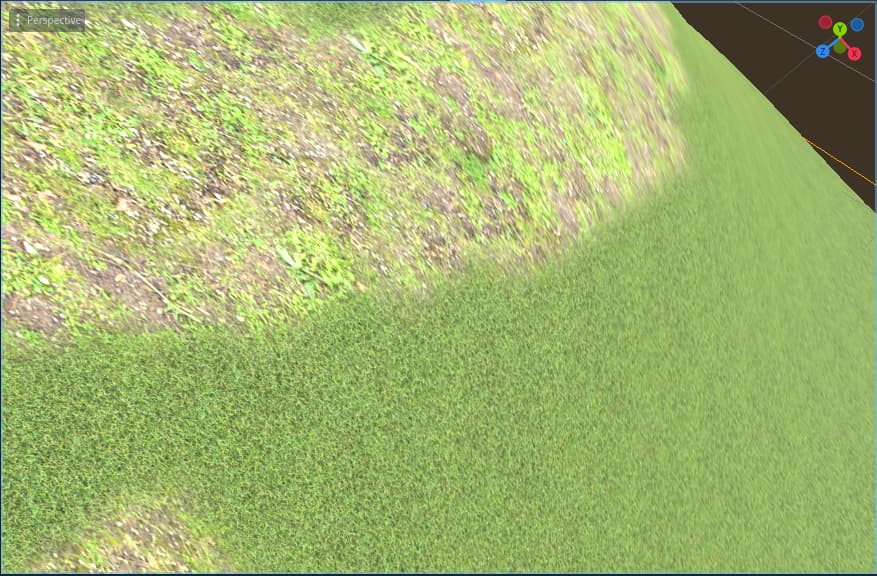
This parameter allows you to adjust the tiling (repetition) of each material individually. By default, the values are X:0.0 Y:0.0, which corresponds to the 100x100 tiling set in UV1 Scale. For example, to give material “1” a tiling of 20x36 and material “4” a tiling of 5x15, you would enter those values:
Next is the “Material Mrna” parameter. Open it, and you’ll find 100 cells, one for each of your 100 materials.
![]()
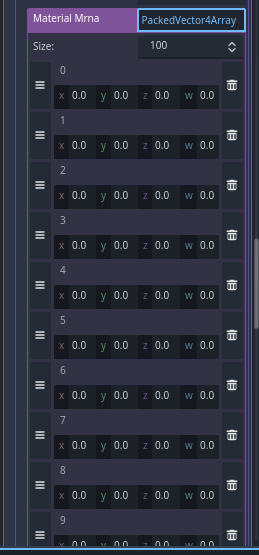
This shader lets you control individual effect settings for each material: X for roughness, Y for specular, Z for metallic, and W for normal scale. By default, all these values are 0.0, which means the shader’s built-in default values are used.

Let’s say I want to make material “1” very metallic, and material “4” very “flat”:
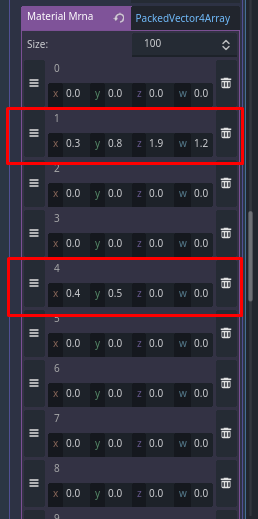
I think you get the gist), ha-ha
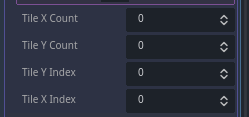
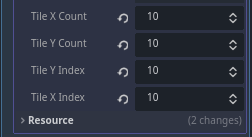
Finally, the last parameter.
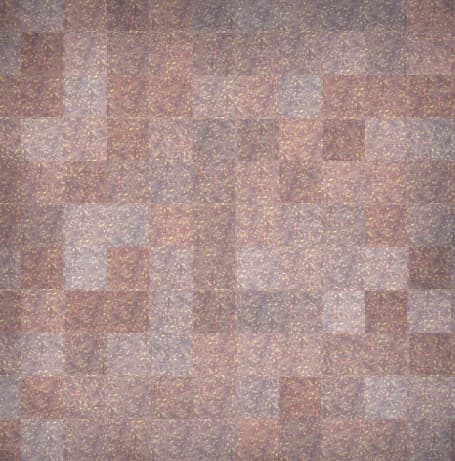
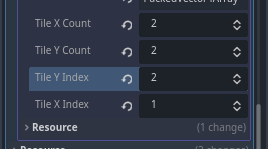
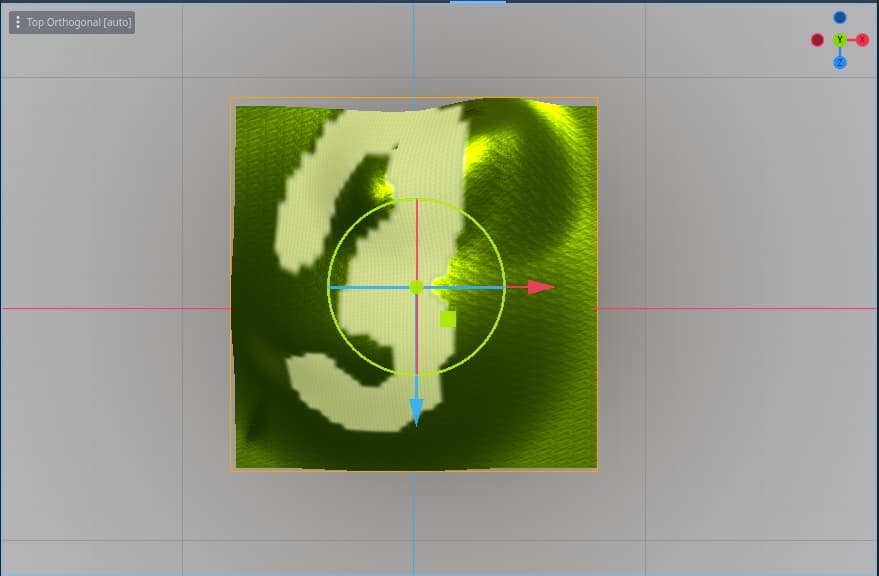
This is necessary when you intend to use only a portion of the .exr texture, rather than the entire image. For example, if you’ve created a 1000px by 1000px landscape texture and want to apply 100px by 100px sections of it to individual landscape tiles.
Let’s say I want to use the third quarter of the total texture:
We’re done with the shader and its settings.
Part 4. Performance tests
I will test the code on my old ultra-budget laptop:
CPU: AMD A6-6310 APU with AMD Radeon R4 Graphics 1.80 GHz (2.4 GHz)
RAM: DDR3 1600MHz 8Gb (Single) (6,95 Gb available)
SSD: 960 Gb
Windows: 10 Pro 22H2
Let’s start with Blender code speed tests.
10,000 polygon figure with 31 materials.
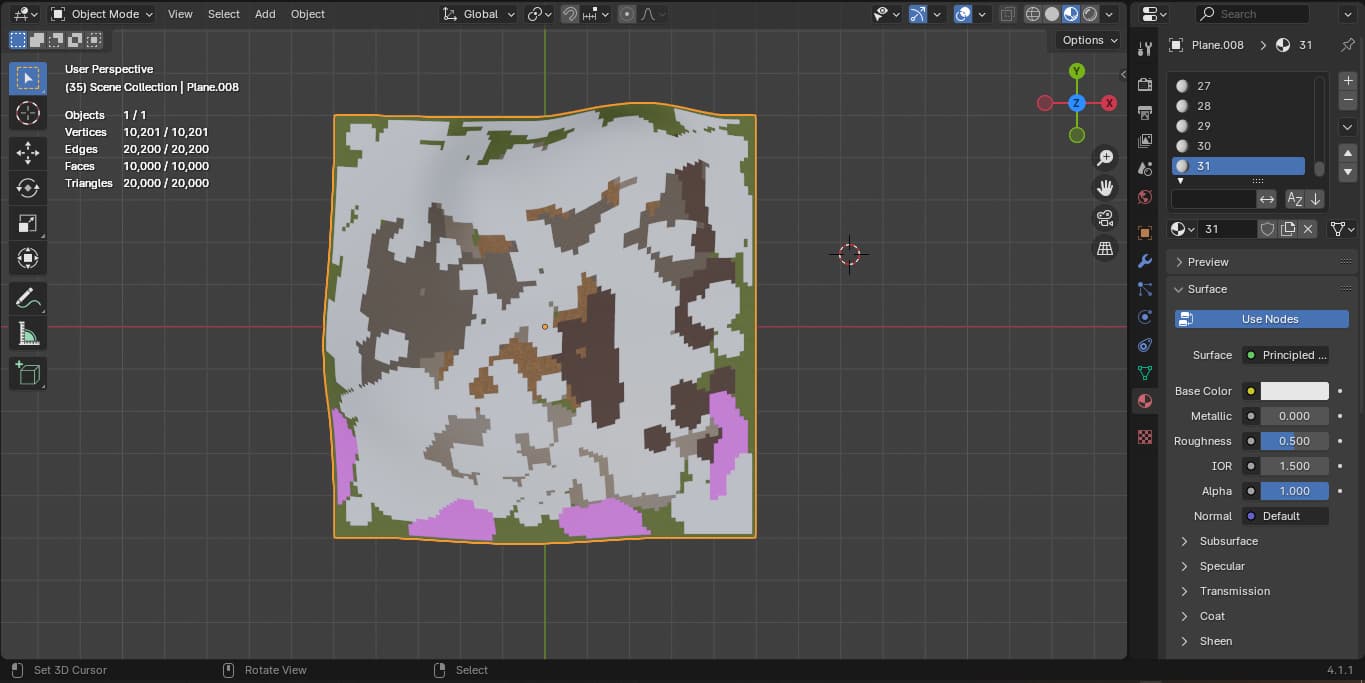
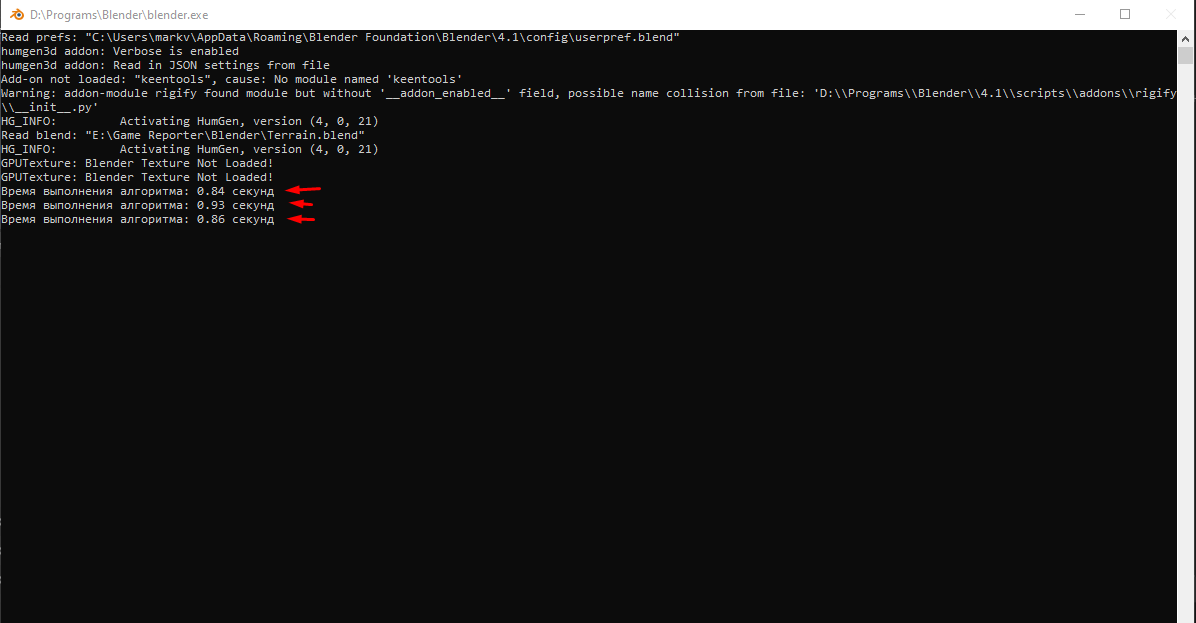
Average execution time: 0.87666
Considering the hardware on which this is being tested, the result is simply fantastic!
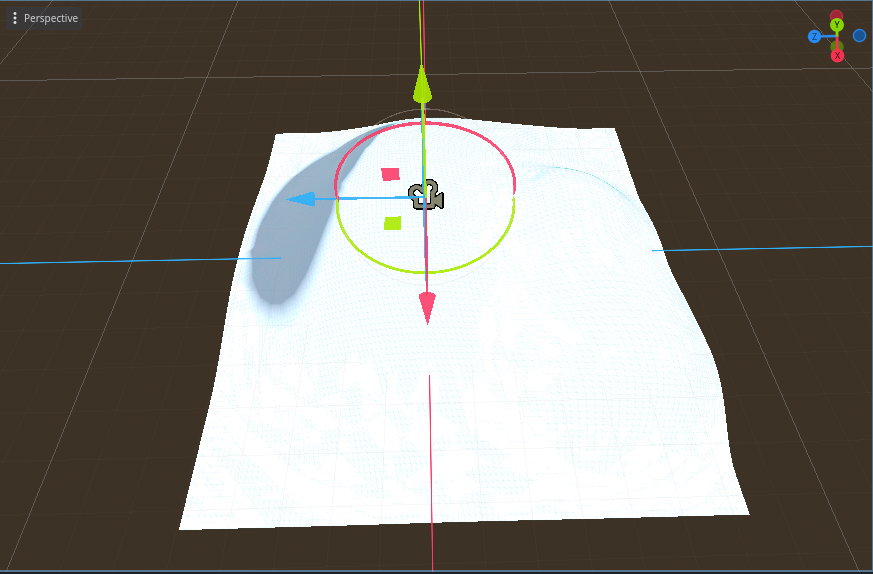
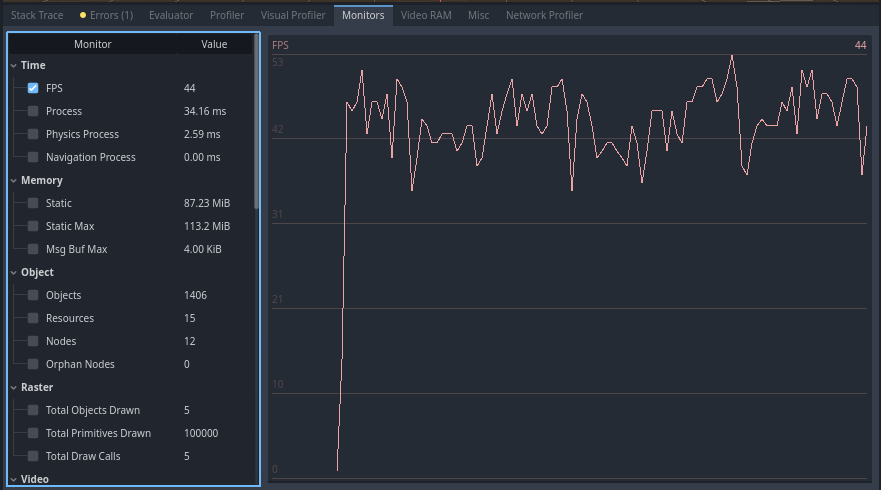
Next, let’s look at the tests within Godot itself. First, we’ll test an empty object.
Render: Compatibility:
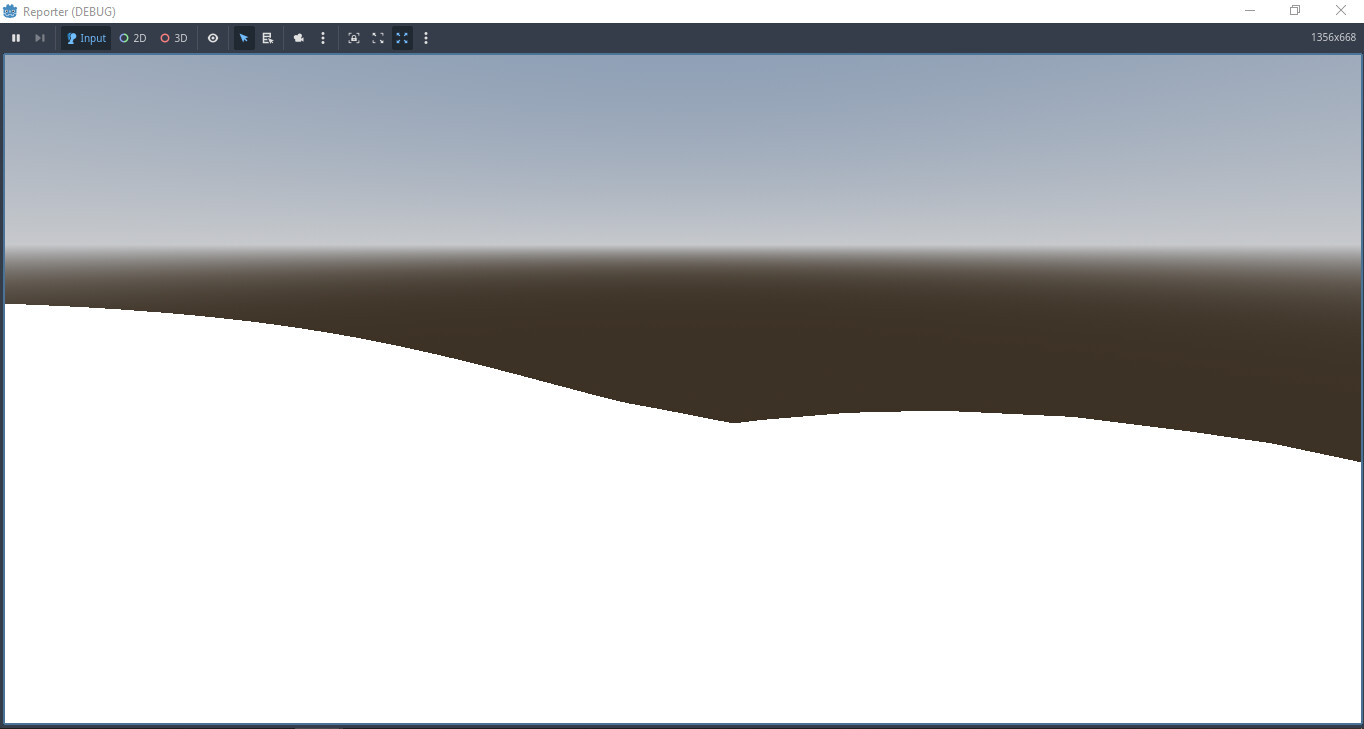

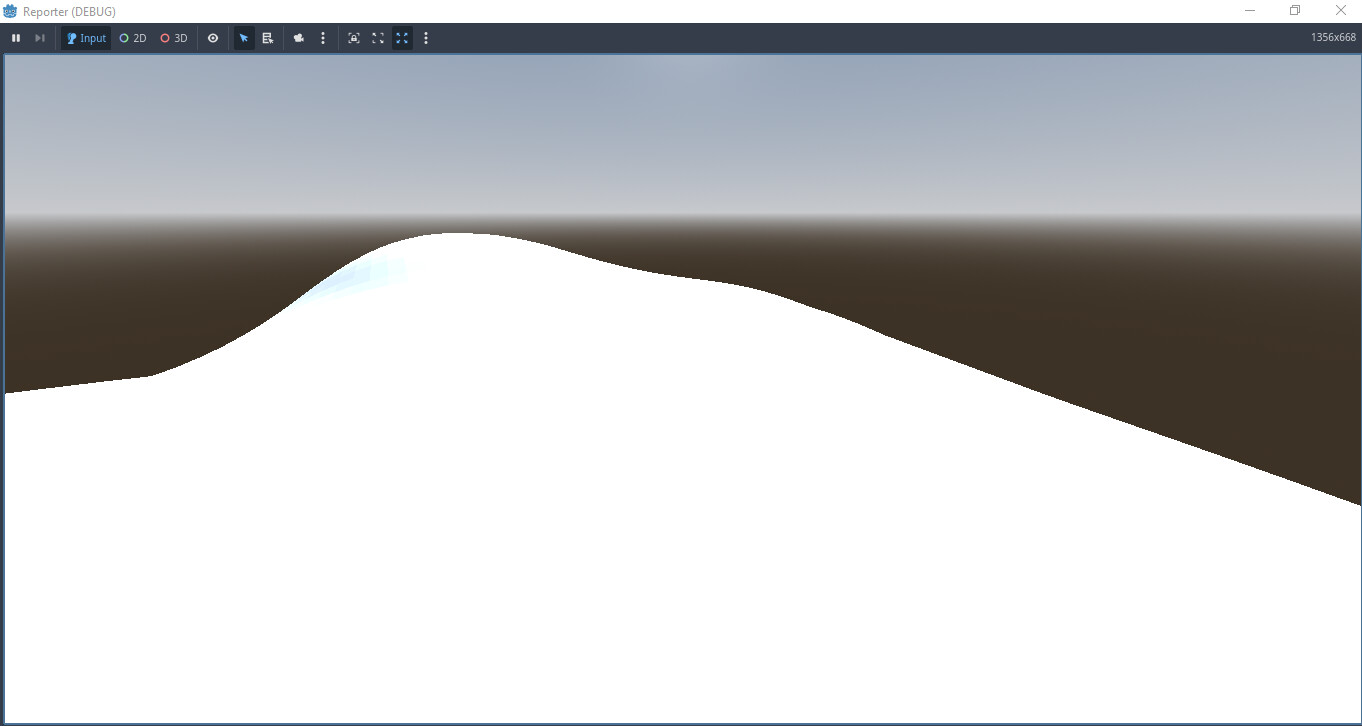
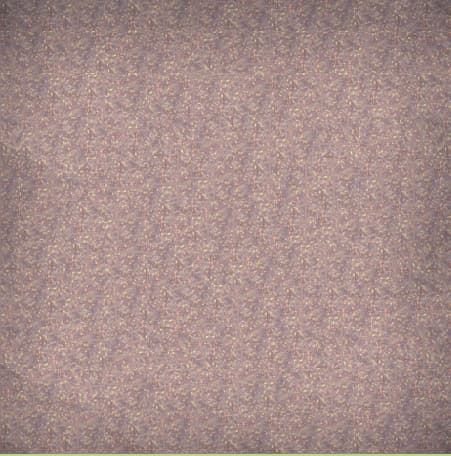
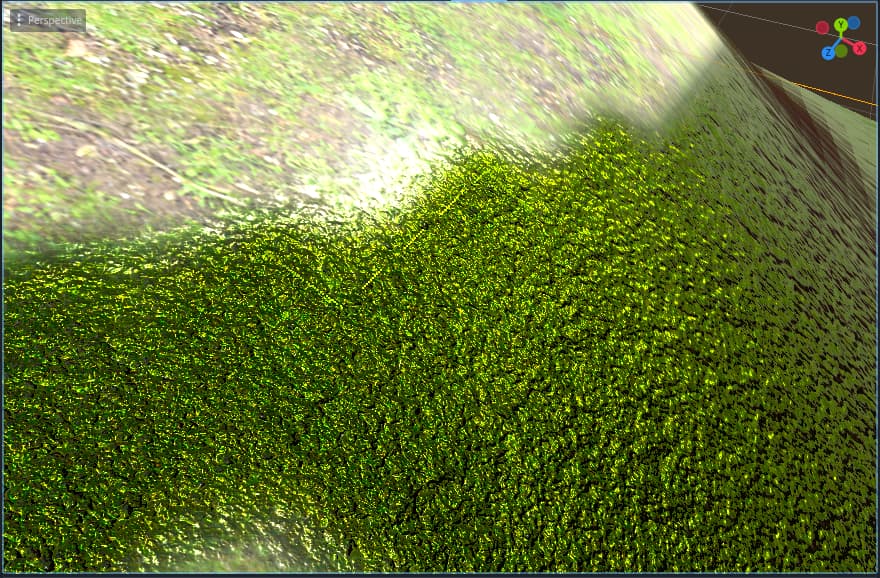
Now let’s restore the original 31 materials using albedo, roughness, normal and AO texture arrays, texture resolution 512*512:


The initial game load, which I believe included shader compilation, took 18 seconds. After that, everything loaded instantly, at least within the engine itself.
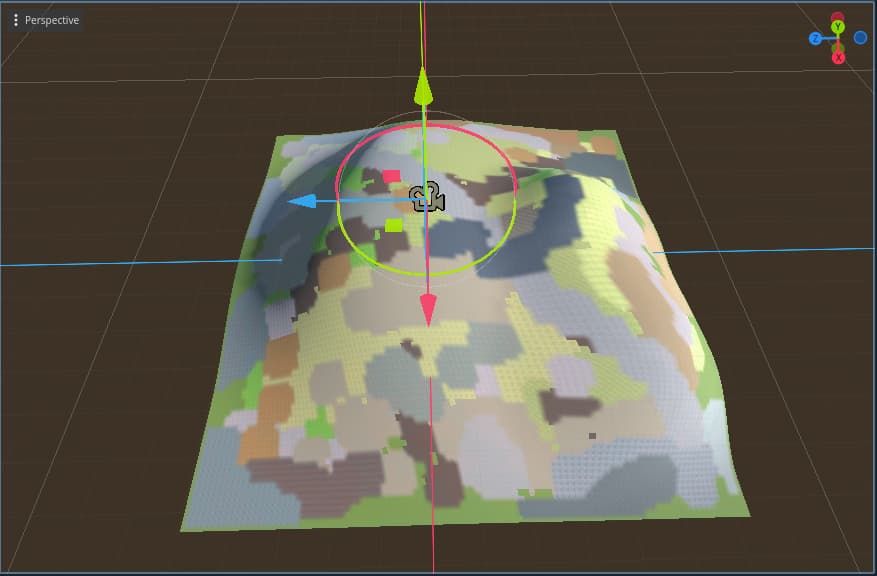
Now let’s use additional shader parameters for each material so that the code does not run idle.
I will use random values:


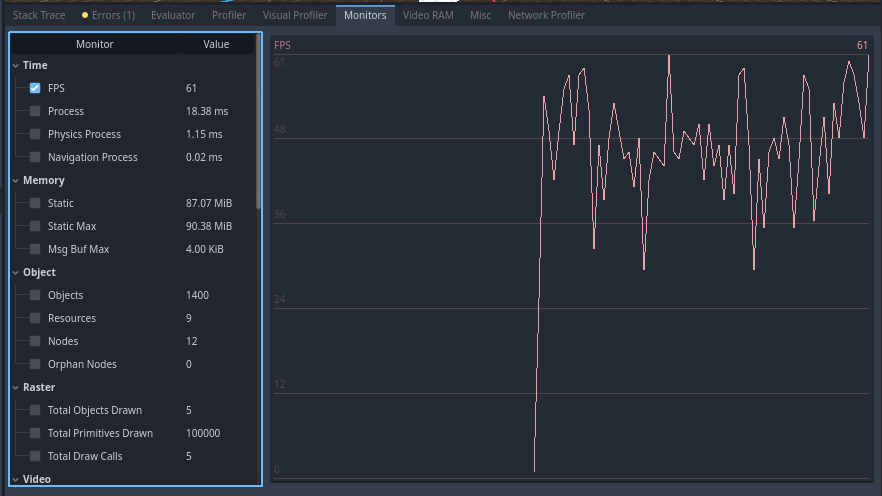
Used division into “tiles”. I wonder what the result will be:


As expected, the FPS is slightly higher. This indicates that “tiling” only processes the currently rendered tile, rather than the entire image.
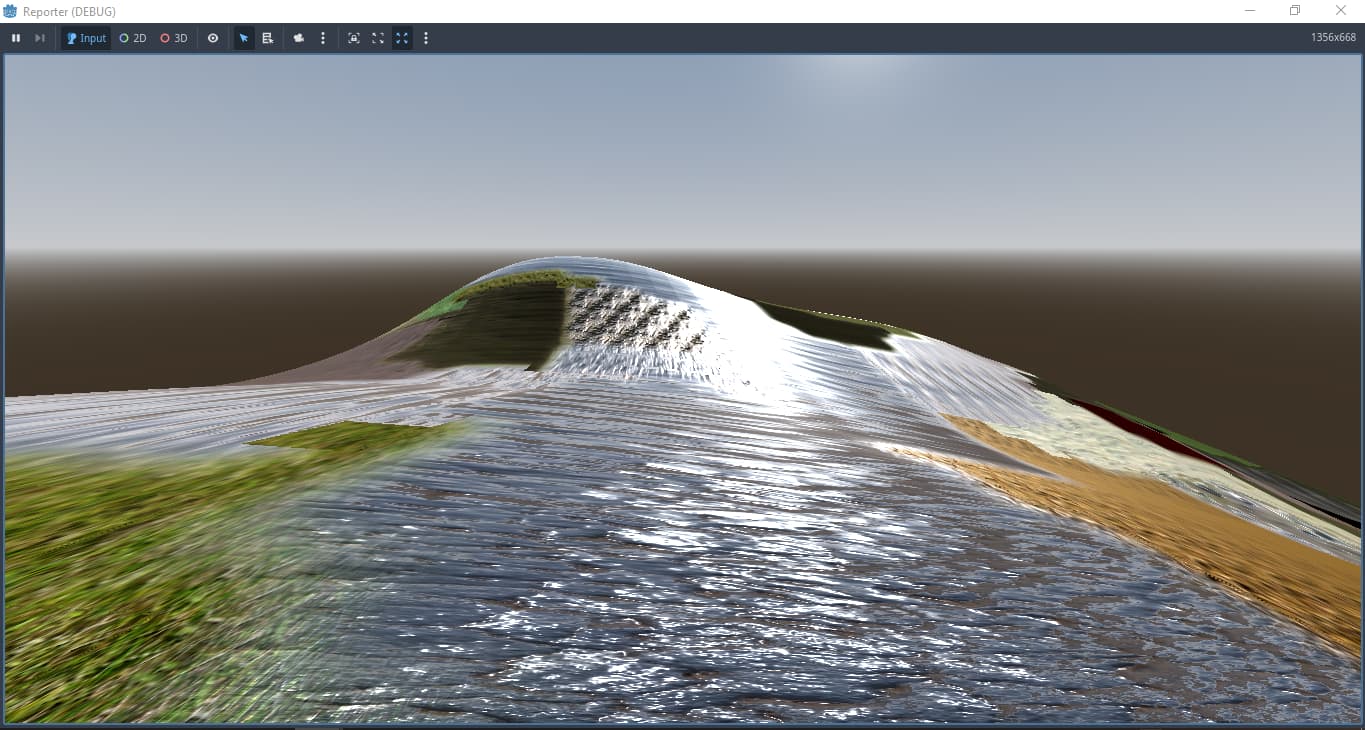
Results: with an average frame rate decrease of 17-18 FPS, the performance is impressive given my system’s specifications and the shader’s ability to handle 31 (99) materials in one. Consequently, a PC just 10% stronger than mine should easily maintain a smooth 60 FPS.
I hope I’ve explained and demonstrated everything clearly. However, if you didn’t understand something or the shader isn’t working for you, take a break and review the guide again. Now, let’s just move on to chatting!
Chapter 5. Afterword
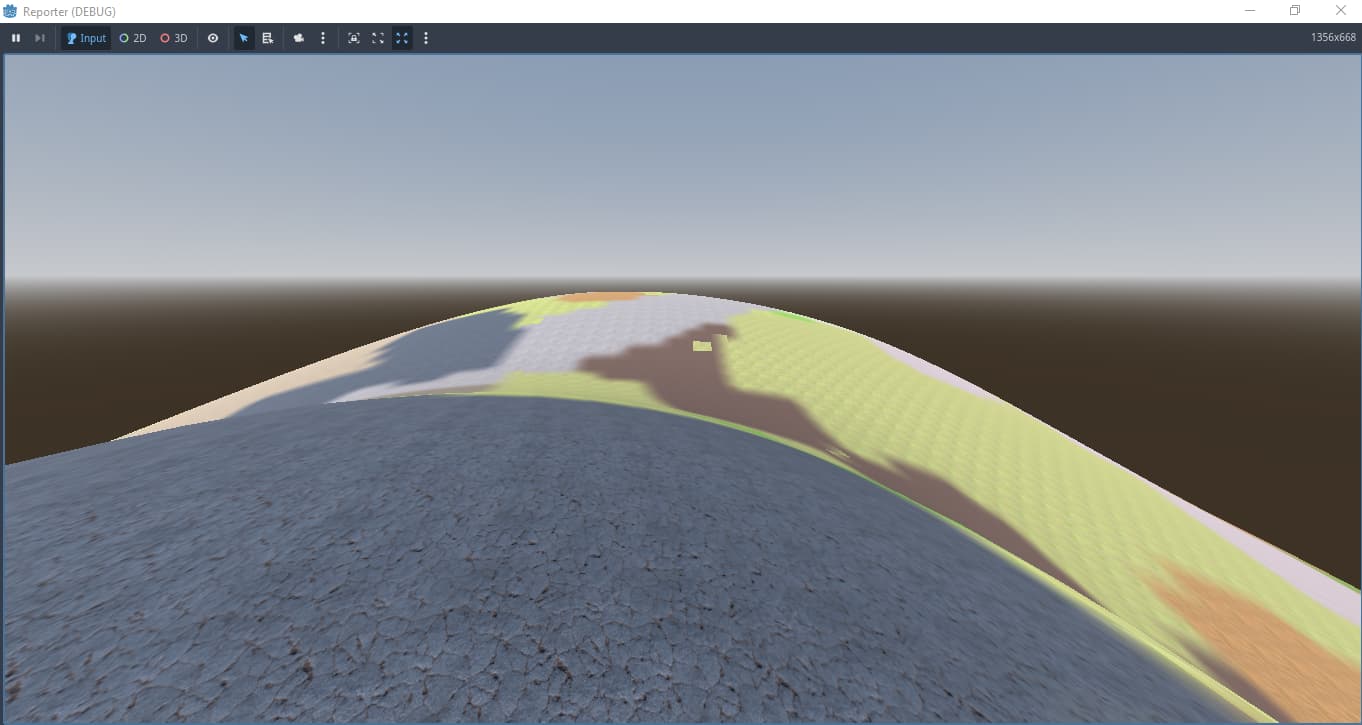
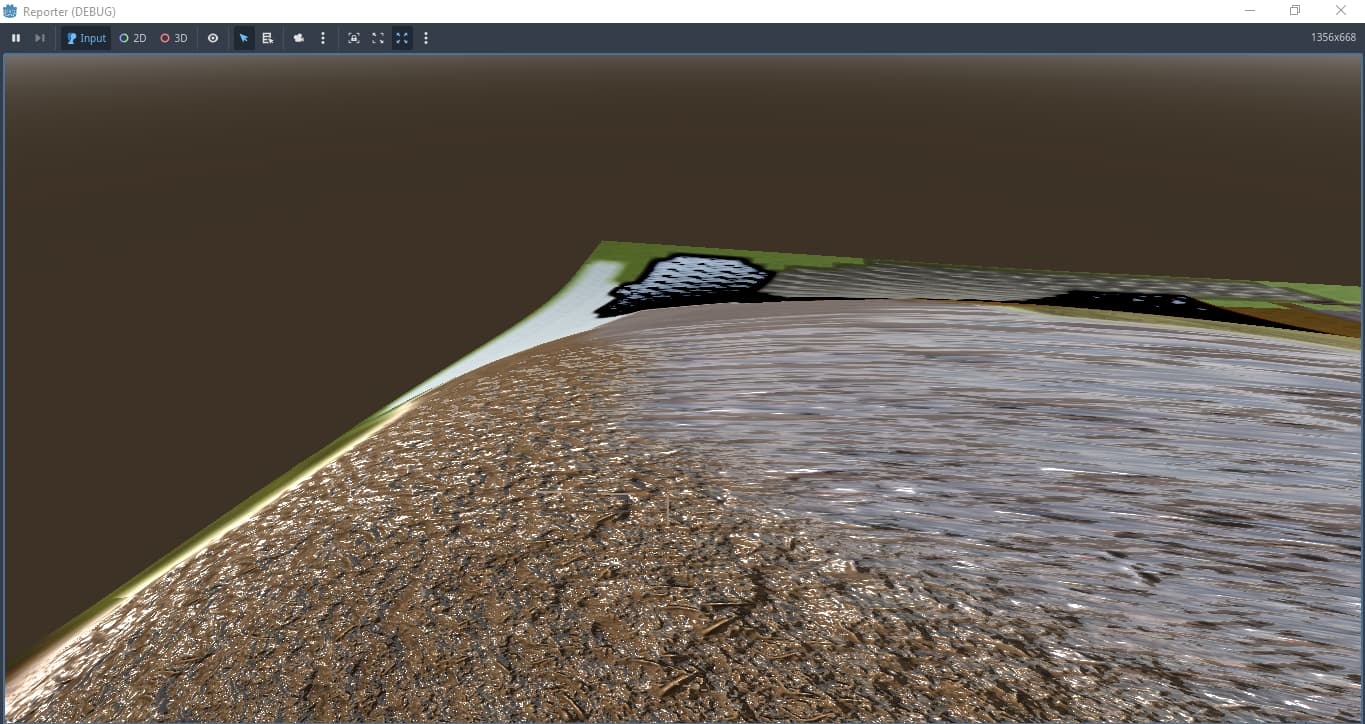
Of course, this method isn’t perfect. It has many limitations, and it often produces errors. You’ll often have to slightly change the arrangement of materials to make the errors disappear, because although I’ve taken into account the most common transitions and the conditions for their appearance, further correction and expansion of the Blender code will only break the previous algorithms, so this code cannot be called 100% automatic.
So, what’s the point of using this method if it has so many limitations?
I developed this “technology” for myself, for my own needs, so I can say from my personal experience:
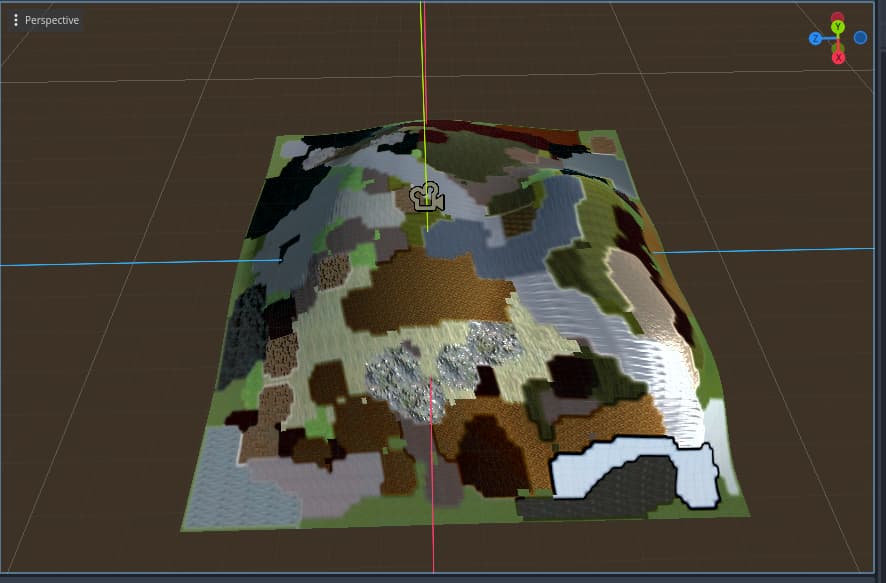
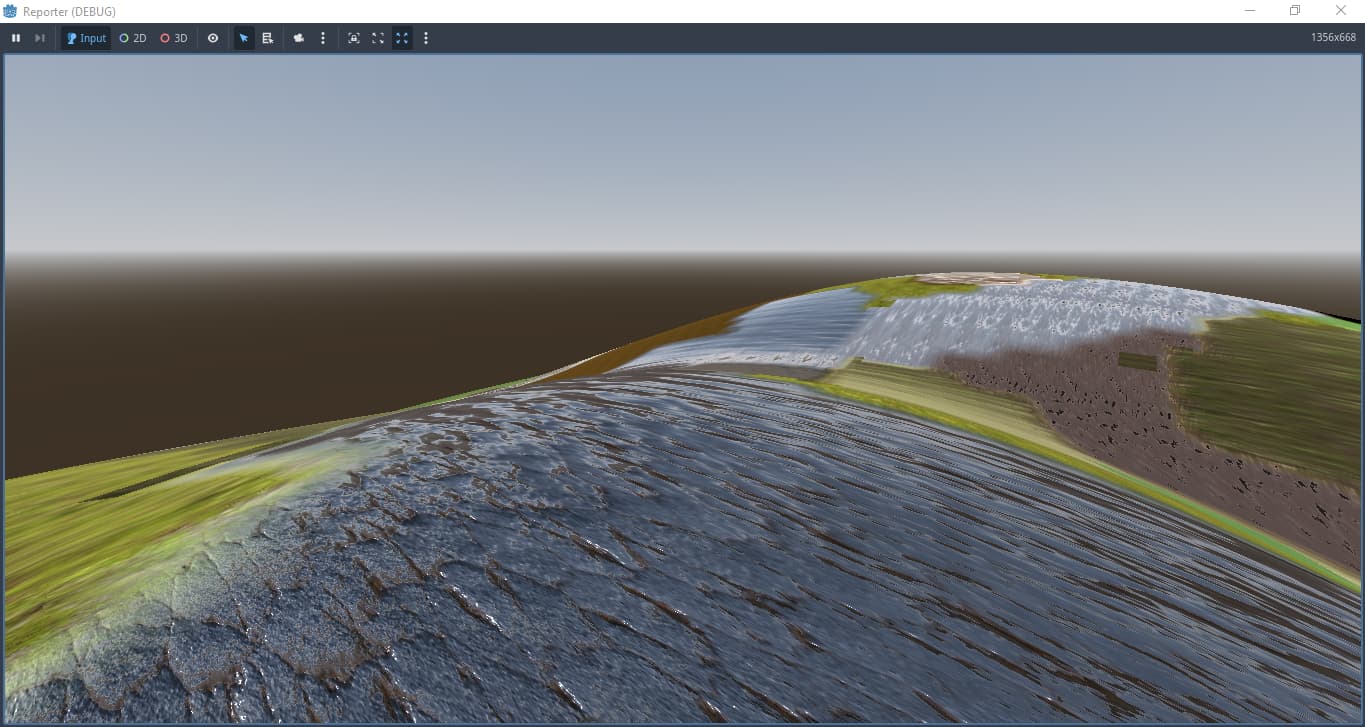
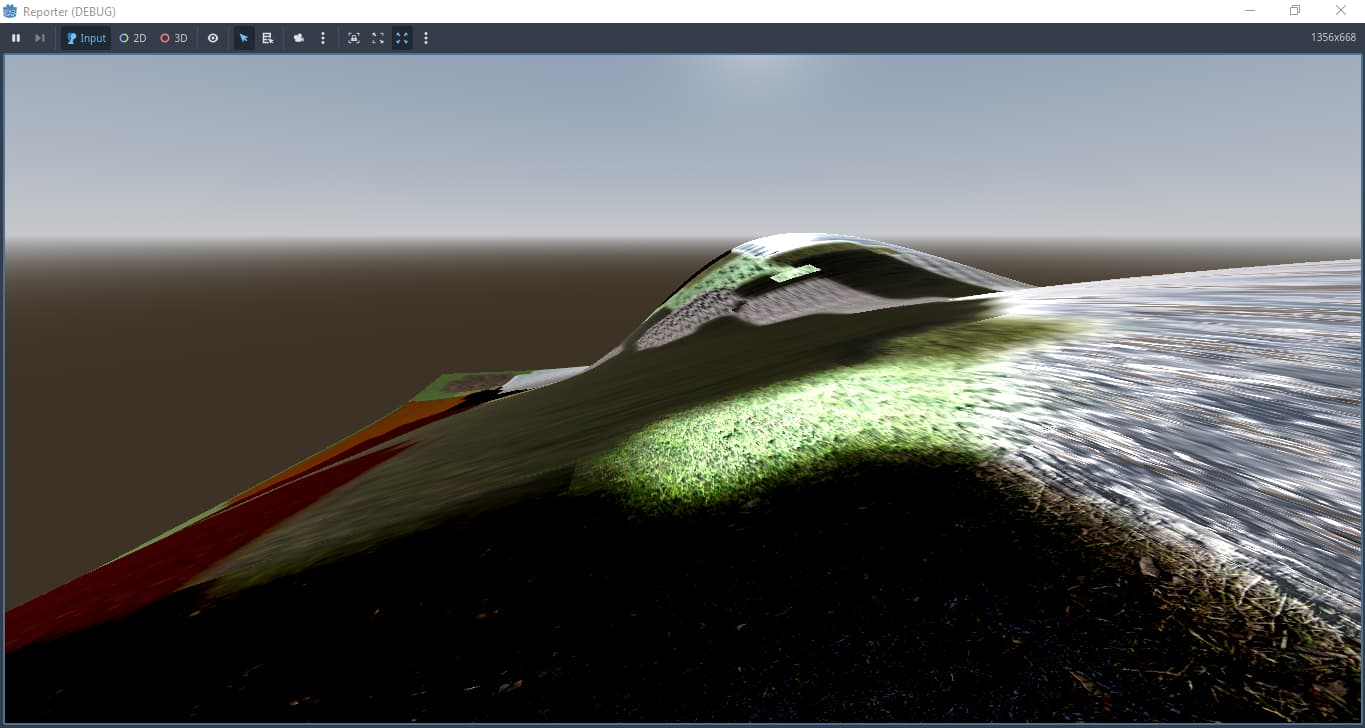
- It’s ideal for texturing landscapes, although not without its quirks.
- It solves the problem of transitions, although not perfectly.
- It resolves the issue of managing dozens of different materials by using only one shader and minimum one texture array which has a very positive impact on performance.
Yes, maybe this is a clunky, unfinished “technology” that a seasoned programmer would never touch. So be it. What matters to me is that it gets my job done; the rest doesn’t concern me.
Then why share such code?
It’s simple: I believe knowledge should be free. Therefore, feel free to do whatever you want with this code.
Personally, I found ABSOLUTELY NOTHING online about texture transitions. And the few scraps I did find always ended with: “But of course, nobody’s going to show you the full source code.” So, if my method of detecting and generating transitions helps even one person, I’ll be truly glad, because freely shared knowledge is what accelerates progress.
What is the value of my code, since I developed it together with AI?
Ooooh, ha-ha-ha-ha), believe me, neural networks are of course good. They are endless sources of information; they can answer any question and write any code, yes. But trust my experience, without a human, they wouldn’t have written the code that I shared even for the 100 years. I don’t know why this is so. So, for me, AI is just a very high-quality, all-knowing assistant that simply speeds up the work.
But I am still grateful to neural networks for their help. Copilot, Gemini, thank you very much! Please don’t send me to digital hell in 100 years for this criticism), ha-ha!
That’s all, thank you. Bye;