Note: This is my first tutorial ever, so please provide feedback if you can! I learned a lot from the community (thank you to Baz and Normalized especially, who I won’t ping unnecessarily), and decided it’d be the right thing to do to give back, so I’m giving it back! Video version coming soon!
Introduction
Hi, I’m BalaDeSilver, and I make shaders, sometimes. Today we’re making the beginnings of a datamosh corruption/glitch effect.
In this part 1, we will make just the ping pong buffer, or how to store a texture in one frame to sample it next frame.
One little thing that you will need to know about is how to work with compositor effects in the Godot engine. While I will explain it as best I can here, I don’t think I’m better than the official Godot documentation at it. Please at least skim through the The Compositor page, and the Running Code in the Editor page in the documentation before you follow this tutorial.
And, lastly, there is a paid version of the shader we will be creating here. It is fully commented and goes in way more depth in glitchy effects, to a degree this tutorial won’t cover.
Setup
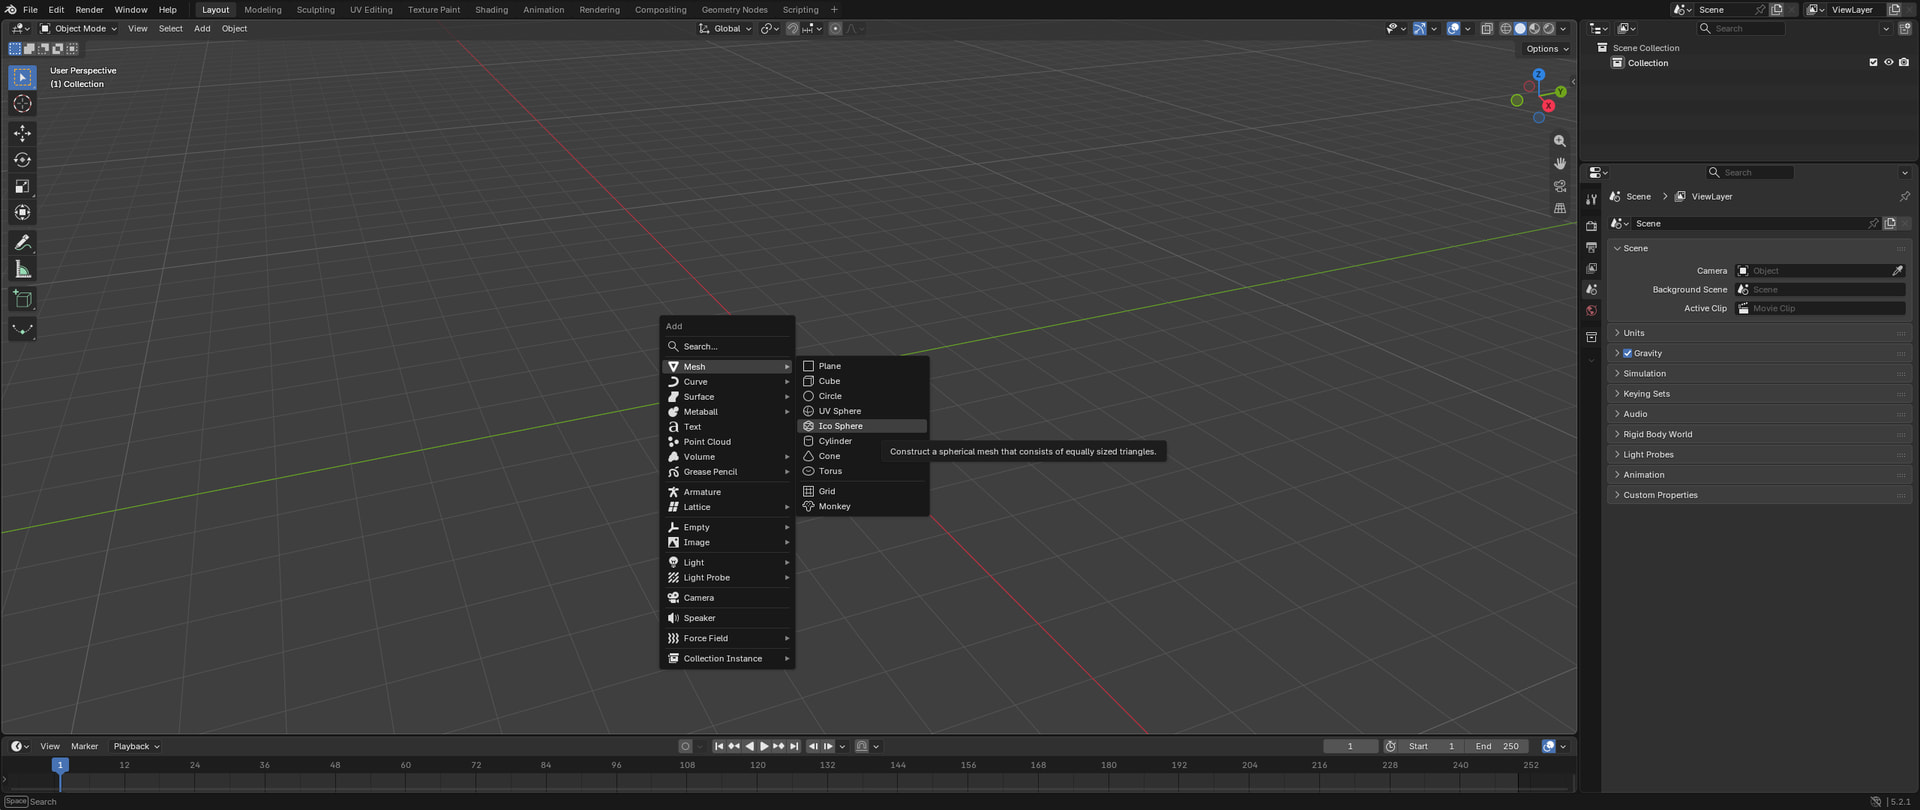
Now, we will start from a clean Godot project. I won’t organize any of it, that is up to you. I’ll add an icosphere I made in blender that is just a low poly icosahedron. Literally press Shift + A, select Ico Sphere, and export that. That will be our affected mesh for the effect. Make sure to export it as .GLB so Godot can properly import it.
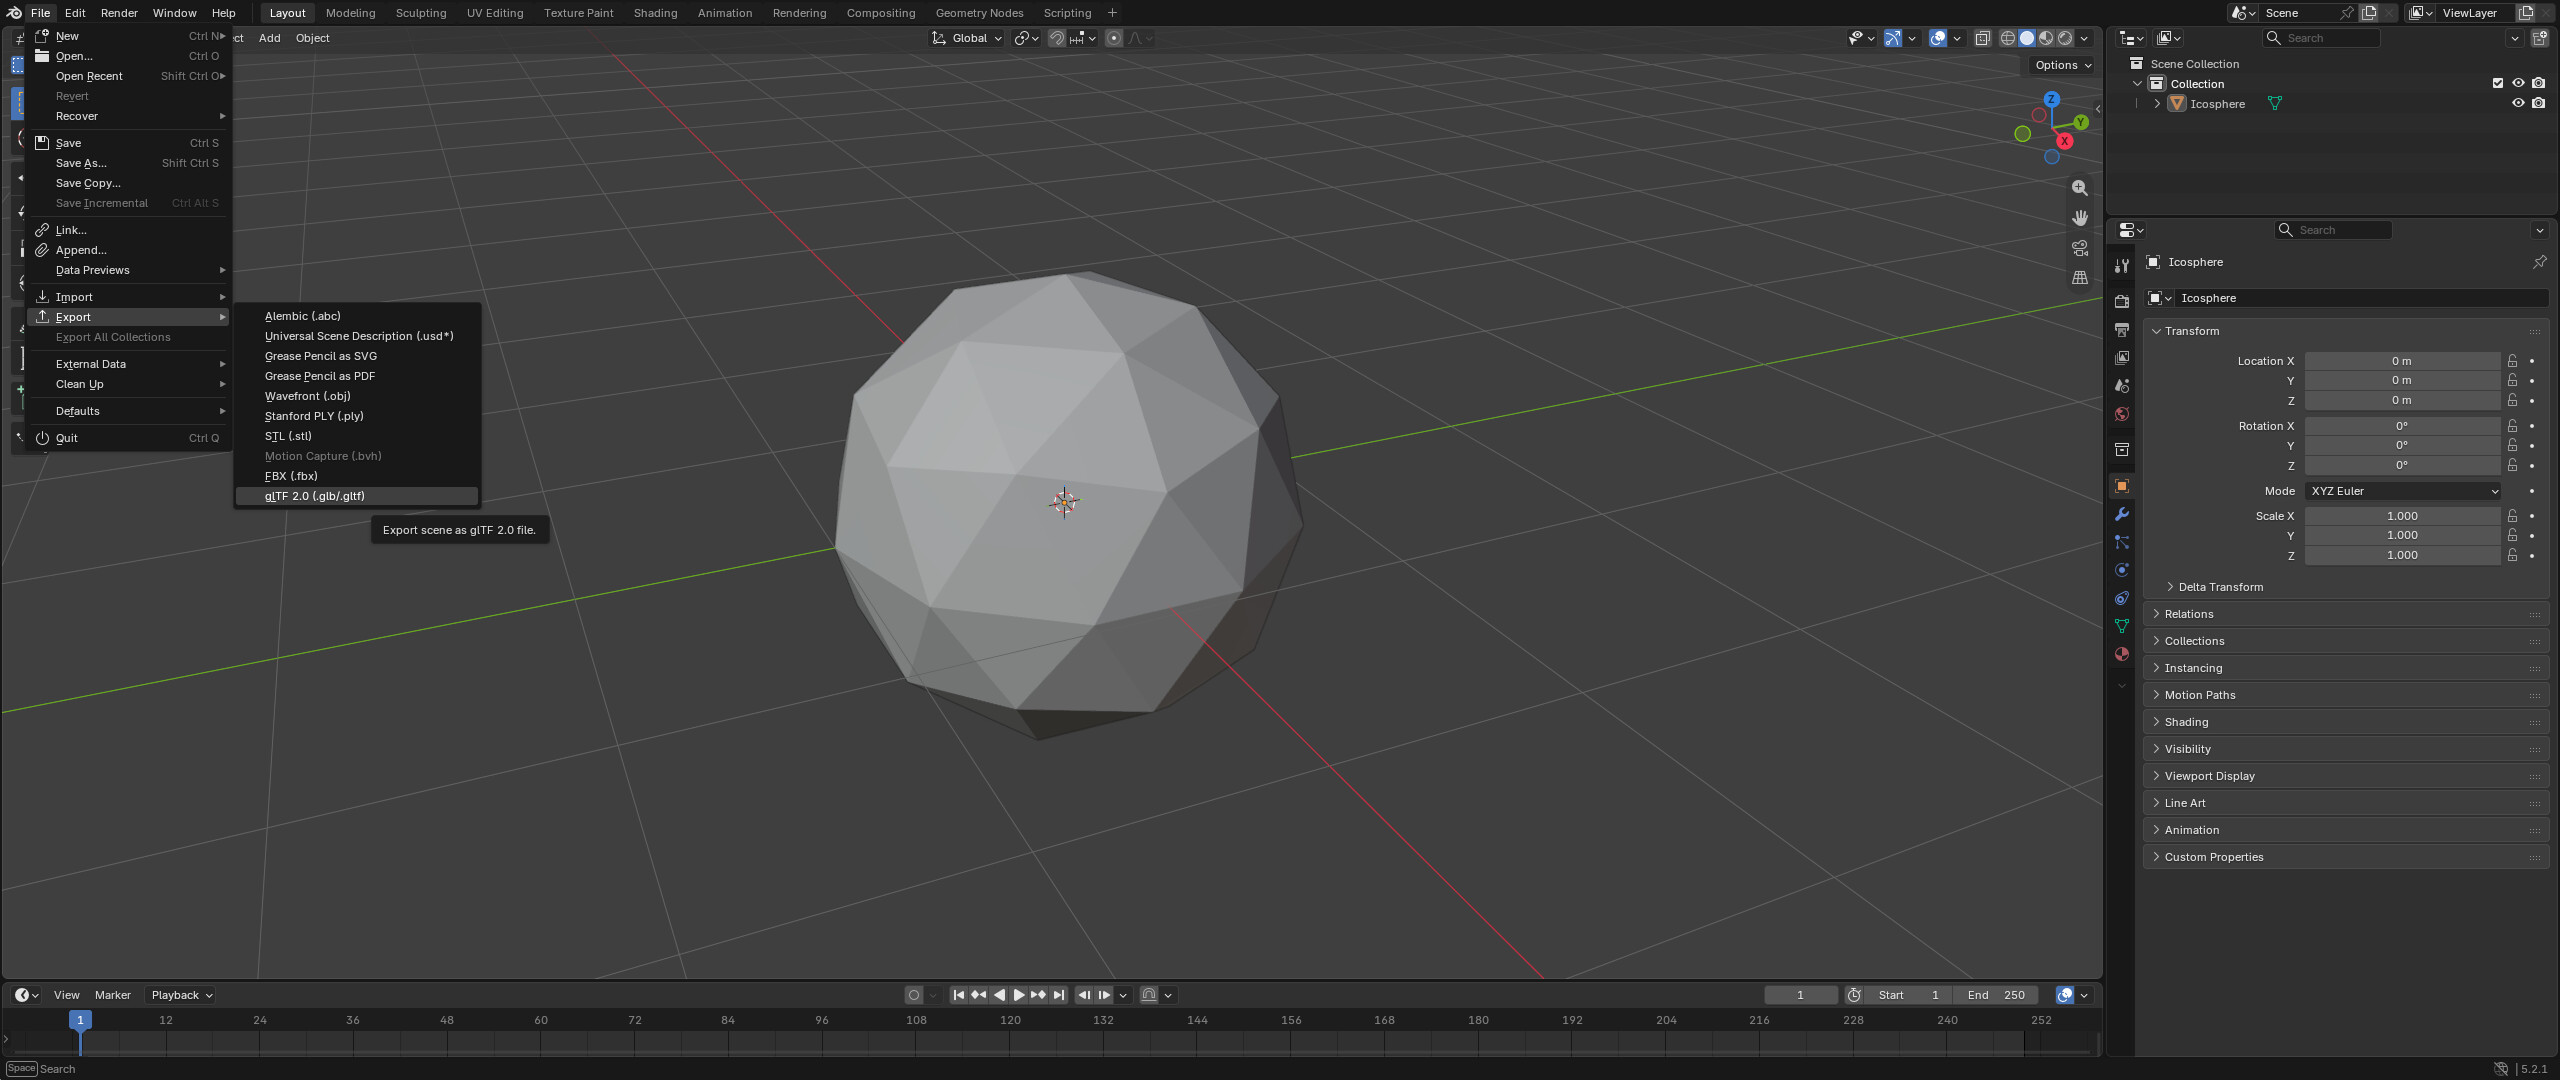
You could also use any mesh of your liking for this tutorial, however, with a more spherical shape, it is easier to demonstrate the effect working in a tutorial like this.
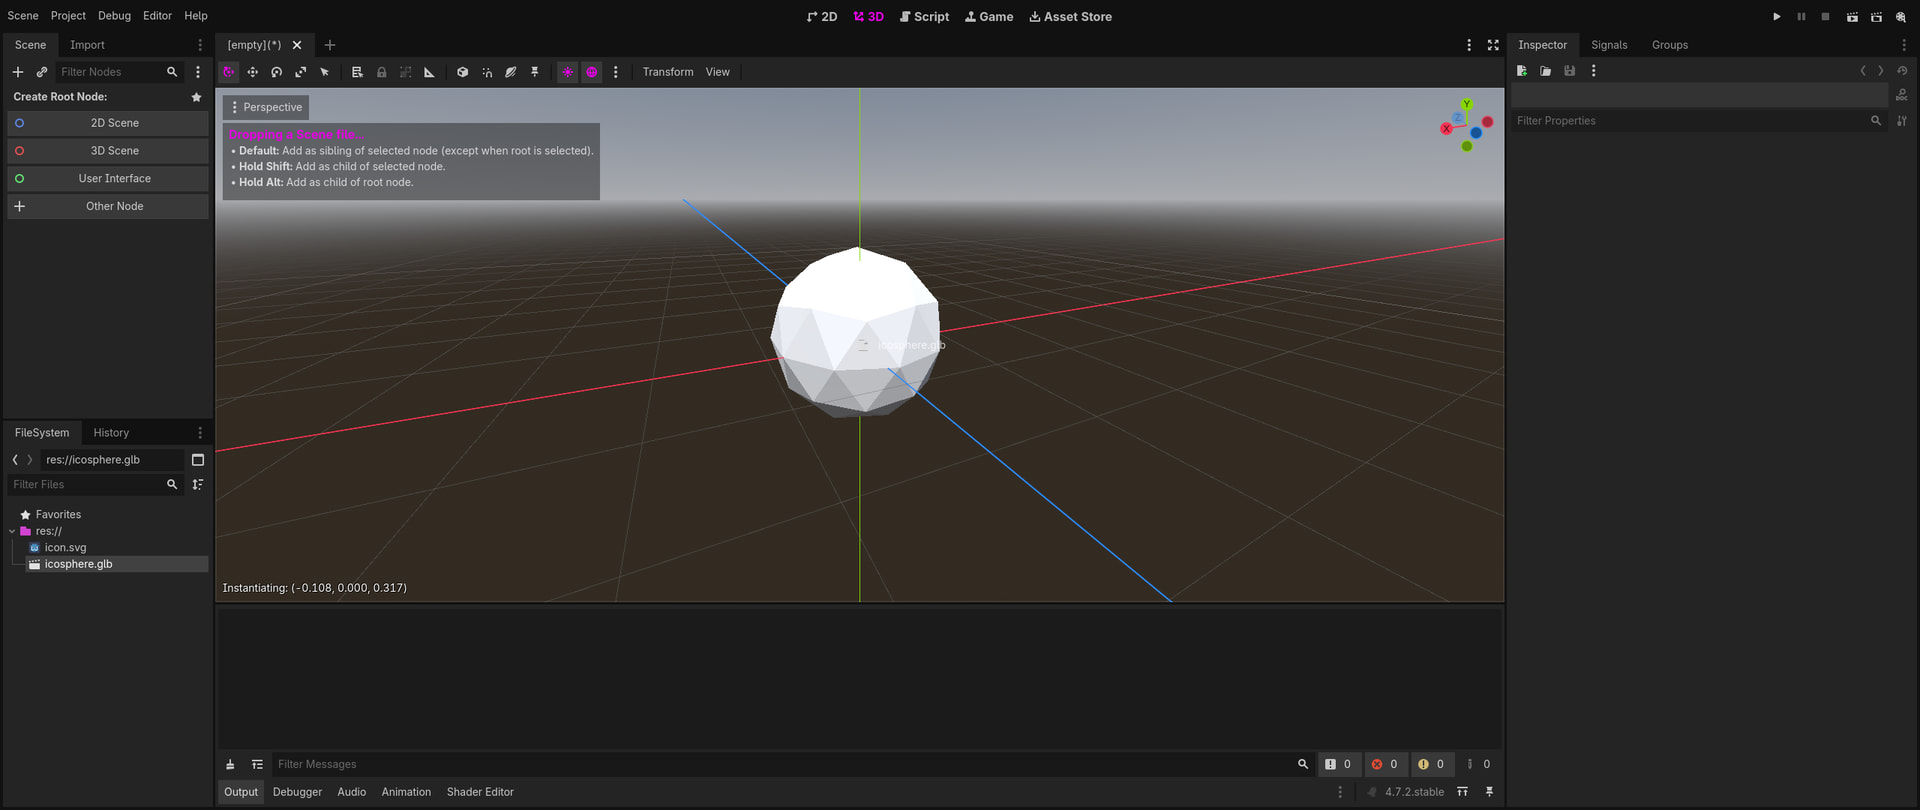
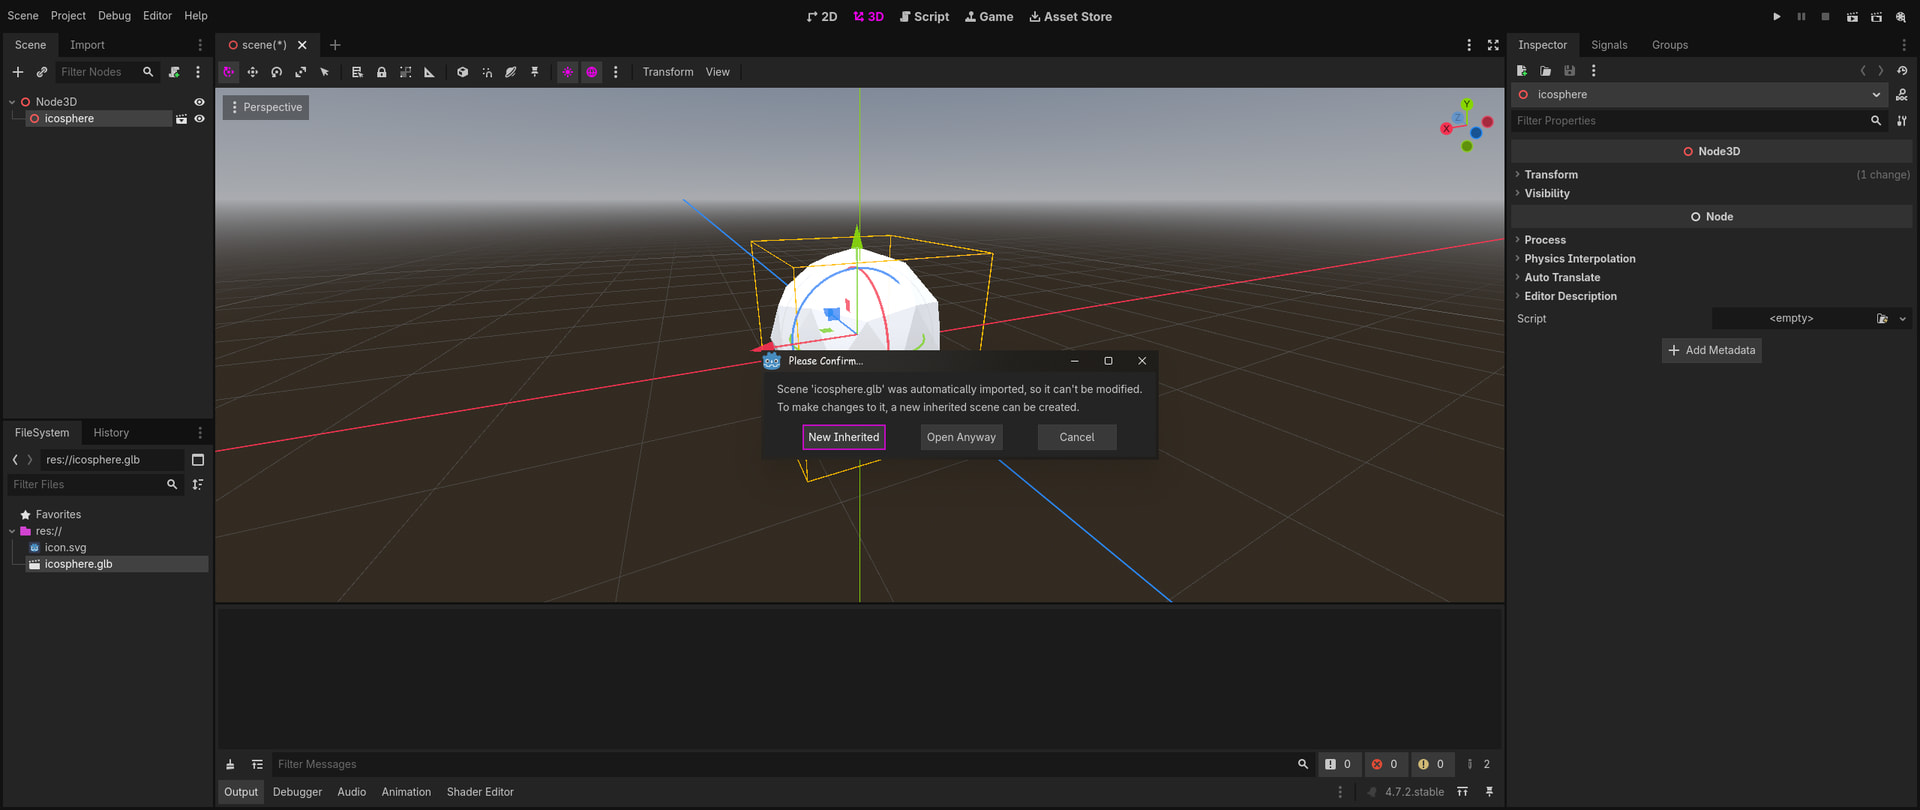
A neat trick to import assets from .GLB to Godot and separate it from the file it comes attached to, is to instance the scene by dragging it into the opened scene and then click the little clapperboard icon to open the instanced scene, clicking open anyway, then copying the MeshInstance3D node, and finally pasting it into the main scene. Please note that this probably isn’t the best method to import meshes with rigs and animations, but it does the trick for this use case.
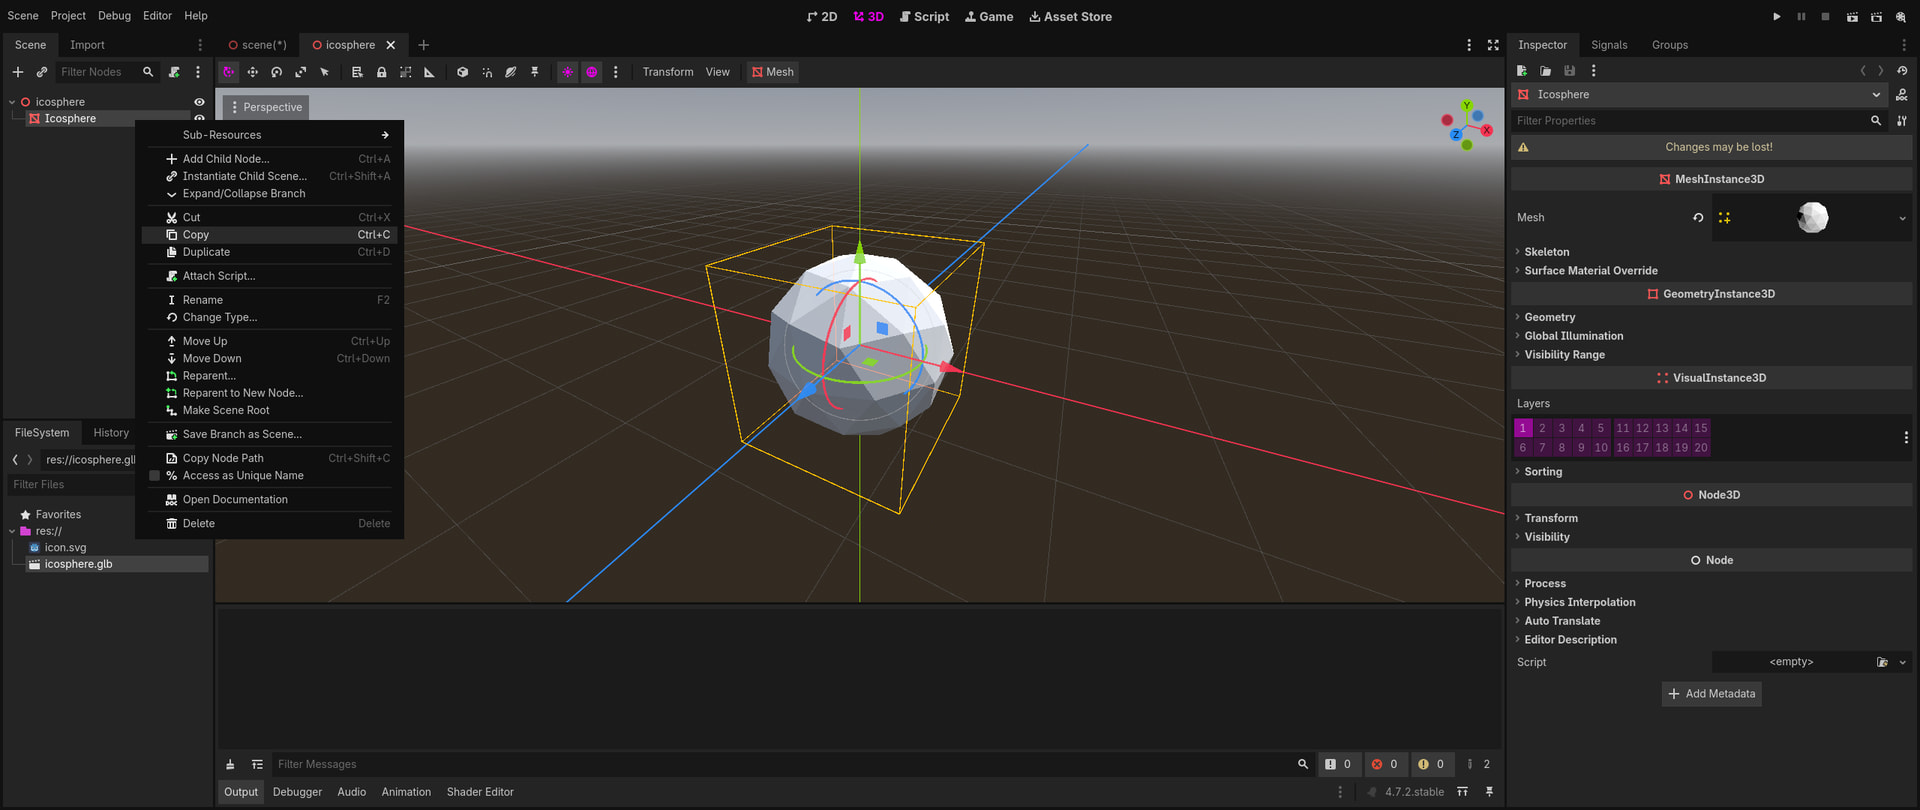
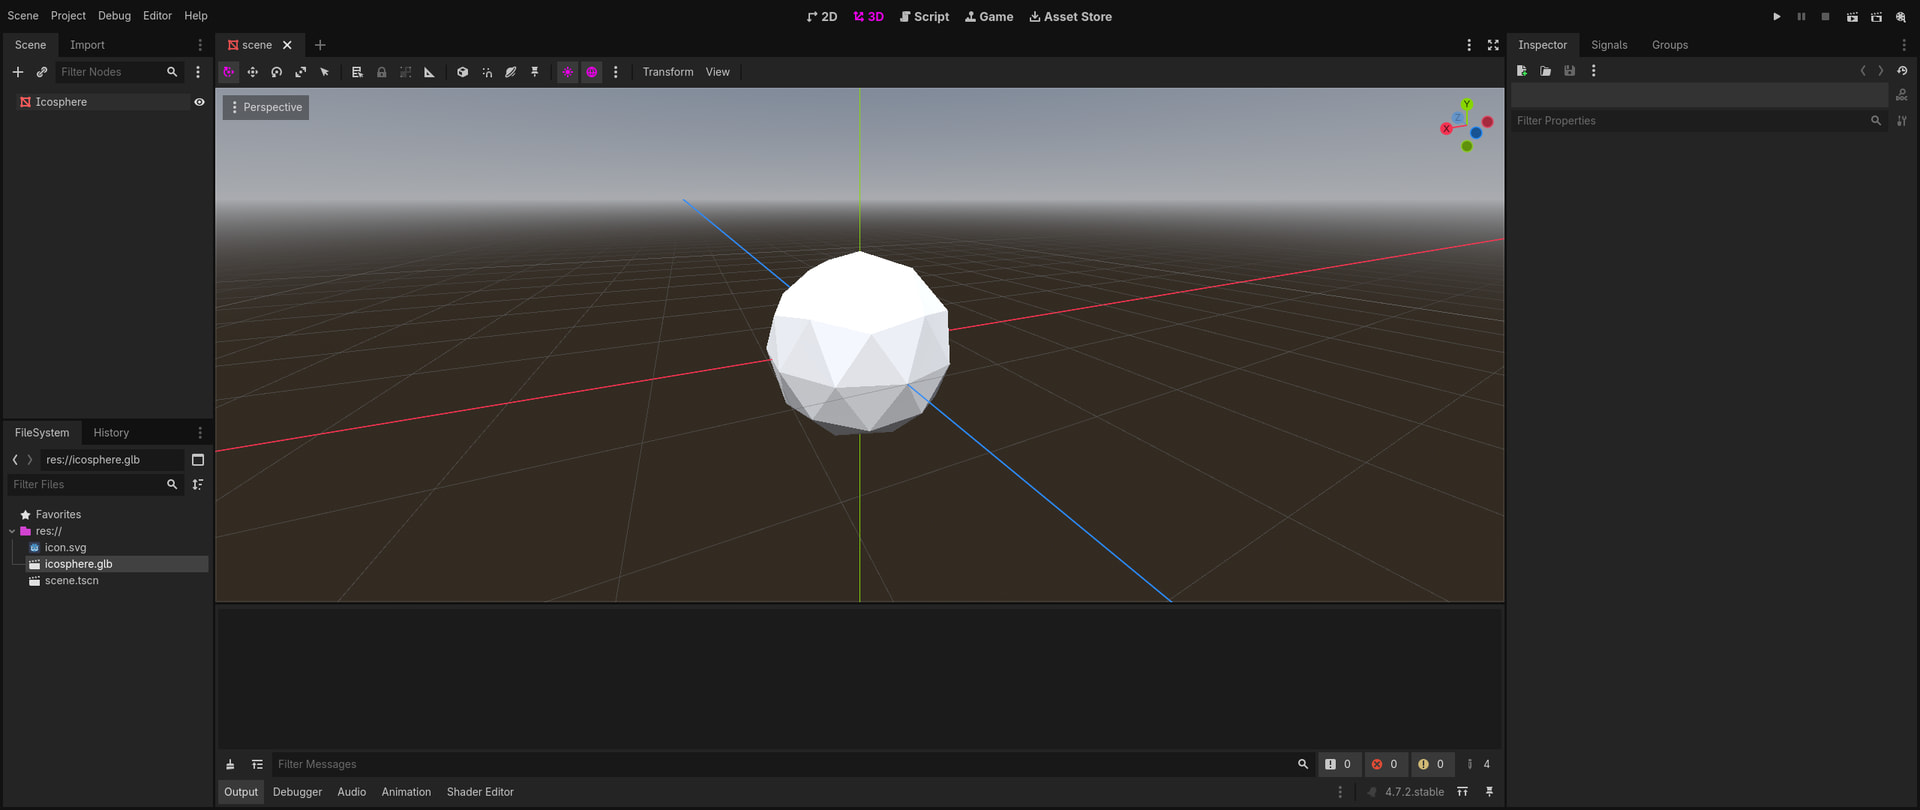
In order for our datamosh shader to work, it’ll need movement in the screen. One way to achieve that for demonstration purposes is to simply add a rotation to this icosphere mesh every frame. Making the script a @tool makes it so the rotation also happens in the editor. I also happen to like the word “banana”. I gave it the name “icosphere.gd”.
@tool
extends MeshInstance3D

@export var rerandomize_rotation: bool = false:
        set(value):
                if value:
                        bananba = Vector3(rng.randfn(0.0, 80.0), rng.randfn(0.0, 80.0), rng.randfn(0.0, 80.0))
                rerandomize_rotation = false

var rng: RandomNumberGenerator = RandomNumberGenerator.new()
## Oooo banana :)
var bananba: Vector3

func _ready() -> void:
        rng.randomize()
        bananba = Vector3(rng.randfn(0.0, 80.0), rng.randfn(0.0, 80.0), rng.randfn(0.0, 80.0))


func _process(delta: float) -> void:
        rotation_degrees += bananba * delta
In the above code, notice the rerandomize_rotation variable. It is made in that specific way, with a setter that automatically sets it to false, so that it works as a makeshift button, since the @tool keyword makes it run in the editor!
With this, after you reload your project to load the script as a @tool, the icosahedron should rotate on its own. Don’t like the rotation speed or direction? Just toggle the rerandomize_rotation variable, and watch it change rotation!
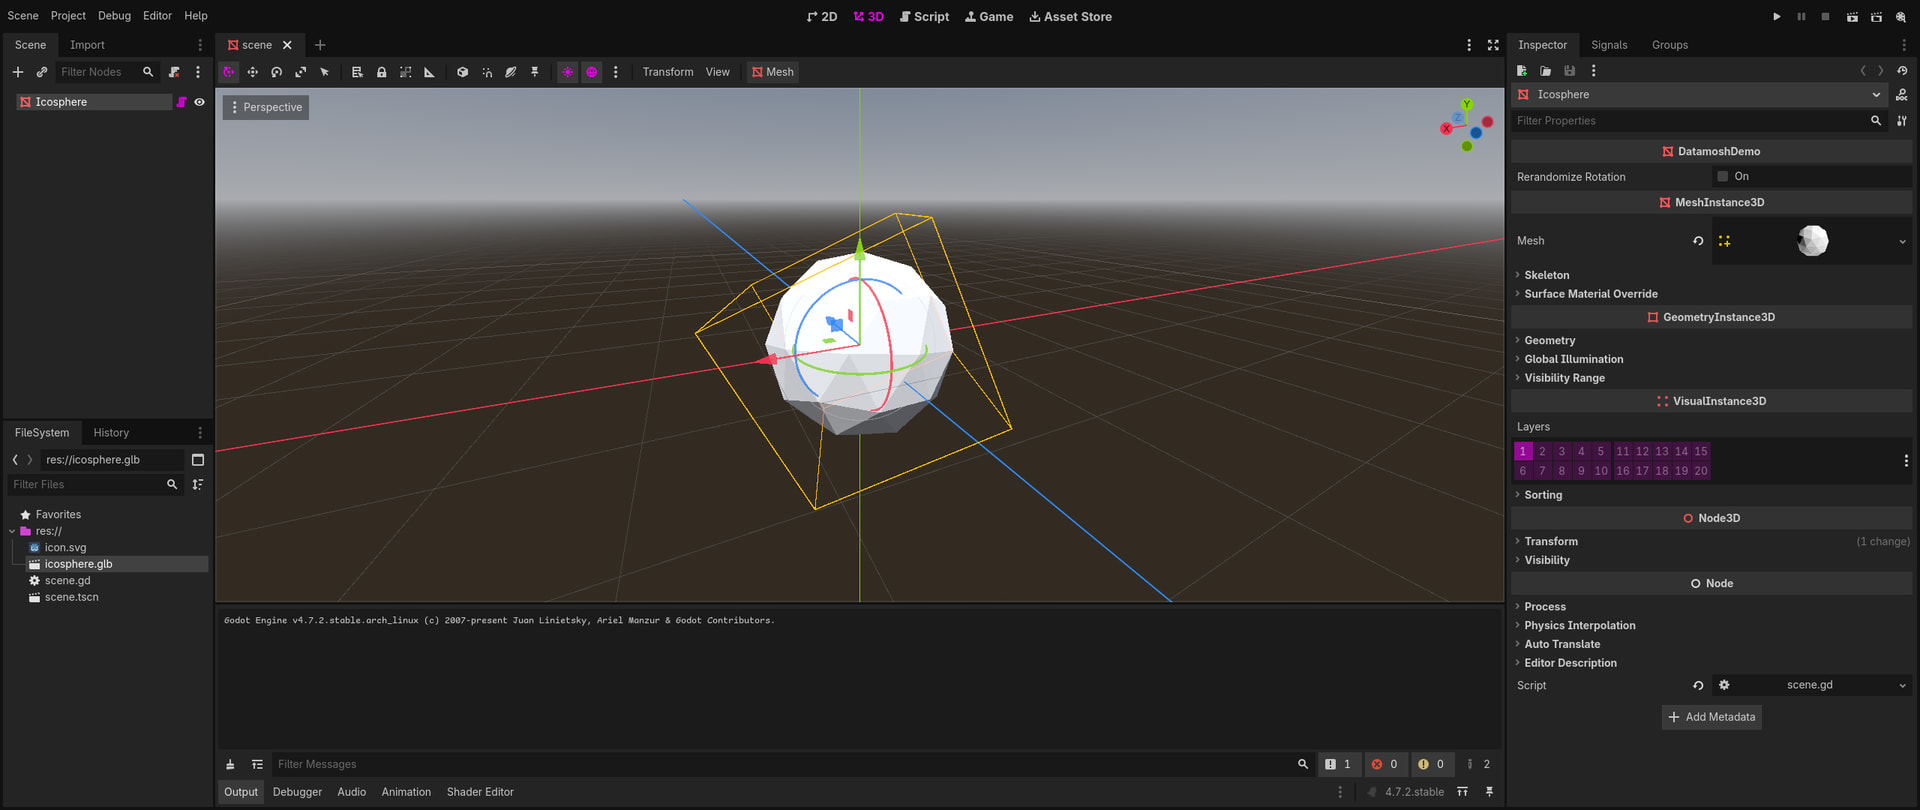
Now, the last step. The boilerplate code that our compute shader will need. We will be dispatching 2 compute shaders per rendered frame, so we need to declare 2 shaders and 2 pipelines. This means the boilerplate is even more of a colossus than it normally is. We will save it on a file called “datamosh.gd”. You can comment the print() lines if you want.
@tool
class_name DatamoshDemo extends CompositorEffect

var rendering_device: RenderingDevice

var main_shader: RID
var main_pipeline: RID

var nearest_sampler: RID
var linear_sampler: RID

var fmt: RDTextureFormat
var size: Vector2i = Vector2i(1920, 1080)

func _notification(what: int) -> void:
	if what == NOTIFICATION_PREDELETE:
		if main_shader and main_shader.is_valid():
			RenderingServer.free_rid(main_shader)

		if main_pipeline and main_pipeline.is_valid():
			RenderingServer.free_rid(main_pipeline)

		if linear_sampler:
			RenderingServer.free_rid(linear_sampler)

		if nearest_sampler:
			RenderingServer.free_rid(nearest_sampler)


func initialize_cs() -> void:
	rendering_device = RenderingServer.get_rendering_device()

	if not rendering_device:
		print("Failed to get RenderingDevice.")
		return
	print("RenderingDevice fot successfully.")

	var glsl_file: RDShaderFile = load("")
	main_shader = rendering_device.shader_create_from_spirv(glsl_file.get_spirv())
	if not main_shader:
		print("Failed to get main shader.")
		return
	print("Main shader got successfully.")

	main_pipeline = rendering_device.compute_pipeline_create(main_shader)
	if not main_pipeline:
		print("Failed to get main pipeline.")
		return
	print("Main pipeline got successfully.")


func _init() -> void:
	needs_motion_vectors = false
	RenderingServer.call_on_render_thread(initialize_cs)

	var sampler_state: RDSamplerState = RDSamplerState.new()
	sampler_state.min_filter = RenderingDevice.SAMPLER_FILTER_NEAREST
	sampler_state.mag_filter = RenderingDevice.SAMPLER_FILTER_NEAREST
	nearest_sampler = rendering_device.sampler_create(sampler_state)

	sampler_state = RDSamplerState.new()
	sampler_state.min_filter = RenderingDevice.SAMPLER_FILTER_LINEAR
	sampler_state.mag_filter = RenderingDevice.SAMPLER_FILTER_LINEAR
	linear_sampler = rendering_device.sampler_create(sampler_state)

	fmt = RDTextureFormat.new()
	fmt.width = 1920
	fmt.height = 1080
	fmt.format = RenderingDevice.DATA_FORMAT_R16G16B16A16_SFLOAT
	fmt.usage_bits = RenderingDevice.TEXTURE_USAGE_CAN_UPDATE_BIT \
					| RenderingDevice.TEXTURE_USAGE_STORAGE_BIT \
					| RenderingDevice.TEXTURE_USAGE_CAN_COPY_FROM_BIT \
					| RenderingDevice.TEXTURE_USAGE_CPU_READ_BIT \
					| RenderingDevice.TEXTURE_USAGE_SAMPLING_BIT

func _render_callback(_effect_callback_type: int, render_data: RenderData) -> void:
	if not main_pipeline or not rendering_device or not main_shader:
		initialize_cs()
		return

	var scene_buffers: RenderSceneBuffersRD = render_data.get_render_scene_buffers()
	if not scene_buffers: return

	var view_count: int = scene_buffers.get_view_count()
	for view in view_count:
		size = scene_buffers.get_internal_size()

		fmt.width = size.x
		fmt.height = size.y

		@warning_ignore_start("integer_division")
		var x_groups: int = (size.x - 1) / 8 + 1
		var y_groups: int = (size.y - 1) / 8 + 1
		@warning_ignore_restore("integer_division")

		var push_constants: PackedFloat32Array

		push_constants.append(size.x)
		push_constants.append(size.y)

		var uniform_screen: RDUniform = RDUniform.new()
		uniform_screen.uniform_type = RenderingDevice.UNIFORM_TYPE_IMAGE
		uniform_screen.binding = 0
		uniform_screen.add_id(scene_buffers.get_color_layer(view))

		var image_uniform_set: RID
		image_uniform_set = UniformSetCacheRD.get_cache(main_shader, 0, [uniform_screen])

		var compute_list: int = rendering_device.compute_list_begin()
		rendering_device.compute_list_bind_compute_pipeline(compute_list, main_pipeline)
		rendering_device.compute_list_bind_uniform_set(compute_list, image_uniform_set, 0)
		rendering_device.compute_list_set_push_constant(compute_list, push_constants.to_byte_array(),
				push_constants.size() * 4)
		rendering_device.compute_list_dispatch(compute_list, x_groups, y_groups, 1)
		rendering_device.compute_list_end()
In function order, they do the following:
notification(): Is called automatically whenever there is a notification from the engine to the script. If the notification is to delete the shader, it must free all data it has in order to avoid a memory leak.initialize_cs(): It stands for “initialize compute shader”, and it initializes our compute shader with all it needs to work. Note that this function can only be safely called within_render_callback(). If you want to call this function someplace else (which we do), you must useRenderingServer.call_on_render_thread(initialize_cs)._init(): As all other_init()functions, it’s called automatically whenever the script of the compositor effect is first instanced. We callinitialize_cs()here, but only inside the render thread, as previously stated._render_callback(): Is called automatically whenever it’s time to render a frame. This is where the magic actually happens.
I promised you that we’ll be loading more than one shader per frame, but let’s go smaller first, and expand later.
Now, all the preparations are done, so we can start the shader part.
Creating an empty compositor effect
Now to actually create our shader files. First, we need to choose whether it will be a separate GLSL file, or a String variable. I’m going with a separate file because that’s what is shown in the documentation, but I don’t know if it is the best method, or if it is any faster or slower than a String.
Please note that you cannot create a glsl file from within the Godot editor. You’ll need to create one from your file editor in your operational system.
Here’s the full main file I’ll use. It’s not too long, but it’s densely packed:
#[compute]
#version 450

layout(local_size_x = 8, local_size_y = 8, local_size_z = 1) in;

layout(rgba16f, binding = 0, set = 0) uniform image2D screen_tex;

layout(push_constant, std430) readonly uniform Params
{
    vec2 screen_size;
} variables;

void main() {
    ivec2 uv = ivec2(gl_GlobalInvocationID.xy);
    vec2 size = variables.screen_size;
    vec2 one_over_size = 1.0 / size;

    vec4 screen = imageLoad(screen_tex, uv);

    if(!any(isnan(screen)))
    {
        imageStore(screen_tex, uv, screen);
    }
}
The first 2 lines are for Godot’s import, and to set which version of OpenGL variables
First, we declare our local group size. It is like a cube, where you multiply x by y by z, and the volume size will be how many threads we will run the shader in. These numbers must match the ones in the x, y, and z groups we set in gdscript. Since we’re setting the zgroups to a constant 1, these lines should have the same number as the local_size_, respectively:
@warning_ignore_start("integer_division")
var x_groups: int = (size.x - 1) / 8 + 1
var y_groups: int = (size.y - 1) / 8 + 1
@warning_ignore_restore("integer_division")
The constant 8 in that @warning_ignore matches the constant 8 in the glsl local size. 8 for x and 8 for y. You can set whatever numbers here, but the x should match with x, and y with y.
After that, we declare that the shader will need an image2D to be passed to it. We declare our push constants, and then the main() function starts.
In main(), we’re precomputing 1.0 / size beforehand, as we’ll need this value more than a couple times, in the future, and multiplications are cheaper than divisions to make. To save an inconsequential amount of time, we make one division, and many multiplications further down the line.
We’re also checking if the color is NaN, or Not a Number, before writing it. This is a command that will avoid bugs further down the line.
The last thing we need to do is update our gdscript code with the correct path to our compute shader. I called mine “cool_effect.glsl”
func initialize_cs() -> void:
[…]
	var glsl_file: RDShaderFile = load("res://cool_effect.glsl")
	main_shader = rendering_device.shader_create_from_spirv(glsl_file.get_spirv())
	if not main_shader:
		print("Failed to get main shader.")
		return
	print("Main shader got successfully.")
Now, we should be able to click the 3 dots on the center of the main Godot viewport to show the sun and environment nodes. Click “Add Environment to Scene”, so we can add a compositor effect to the environment.
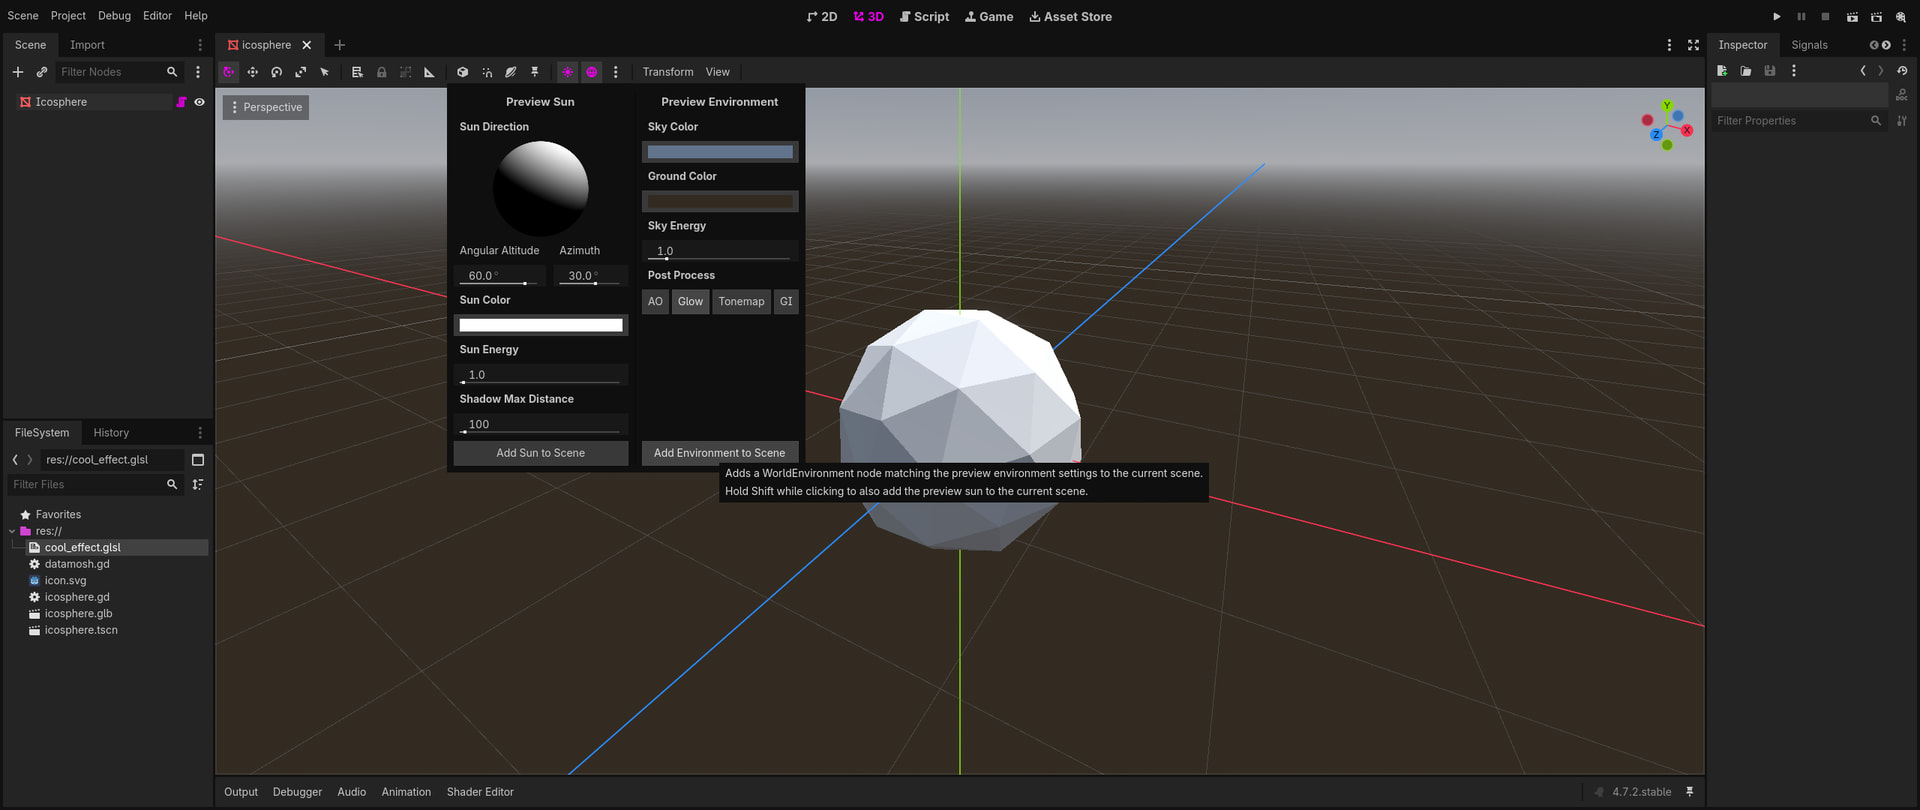
Now click the environment to select it, then click the compositor property on the inspector, and create a new compositor for this node.
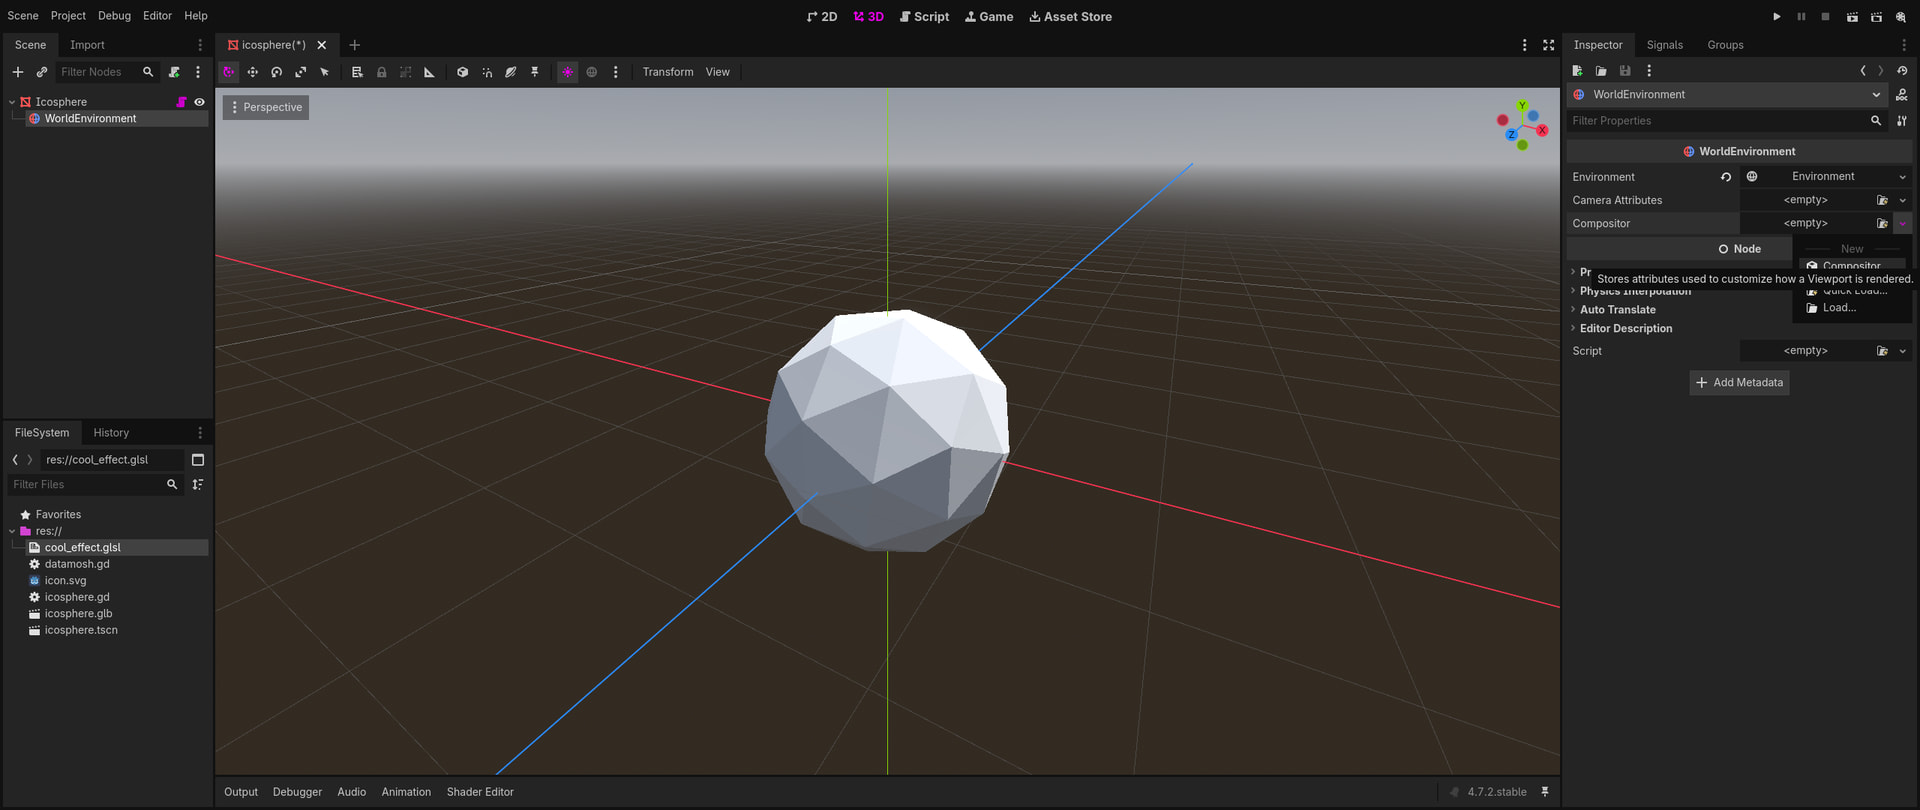
Next, open up the compositor property by clicking it, and click to add an element on the compositor effects array. With this, you should see the gdscript file we created show up in the little window when you click the empty slot.
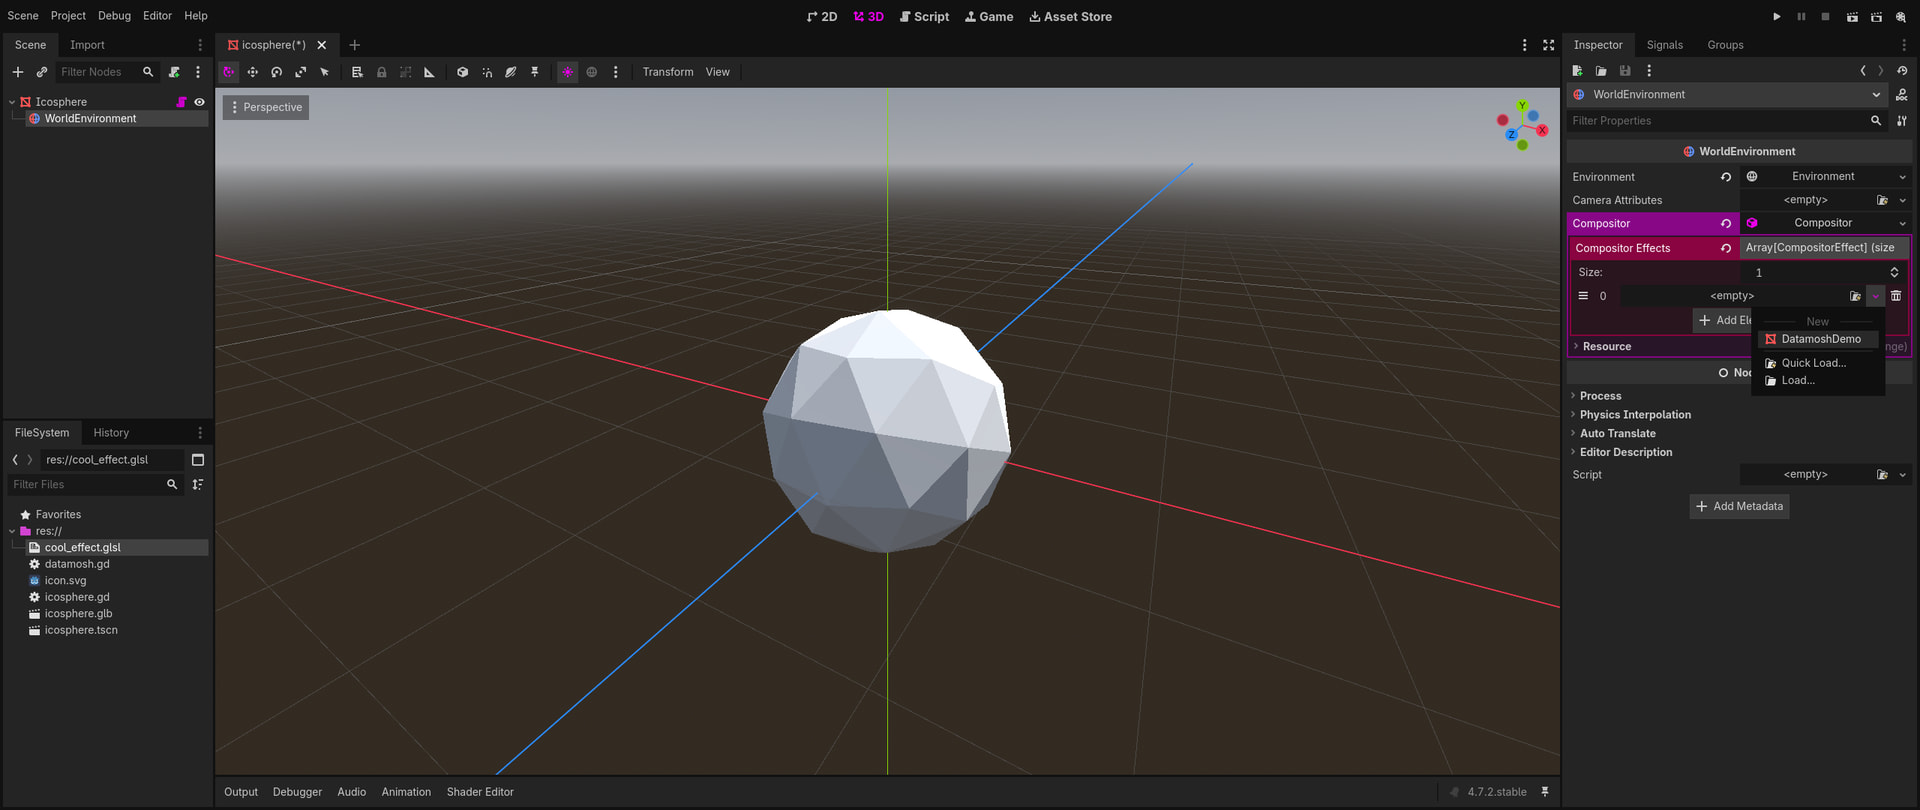
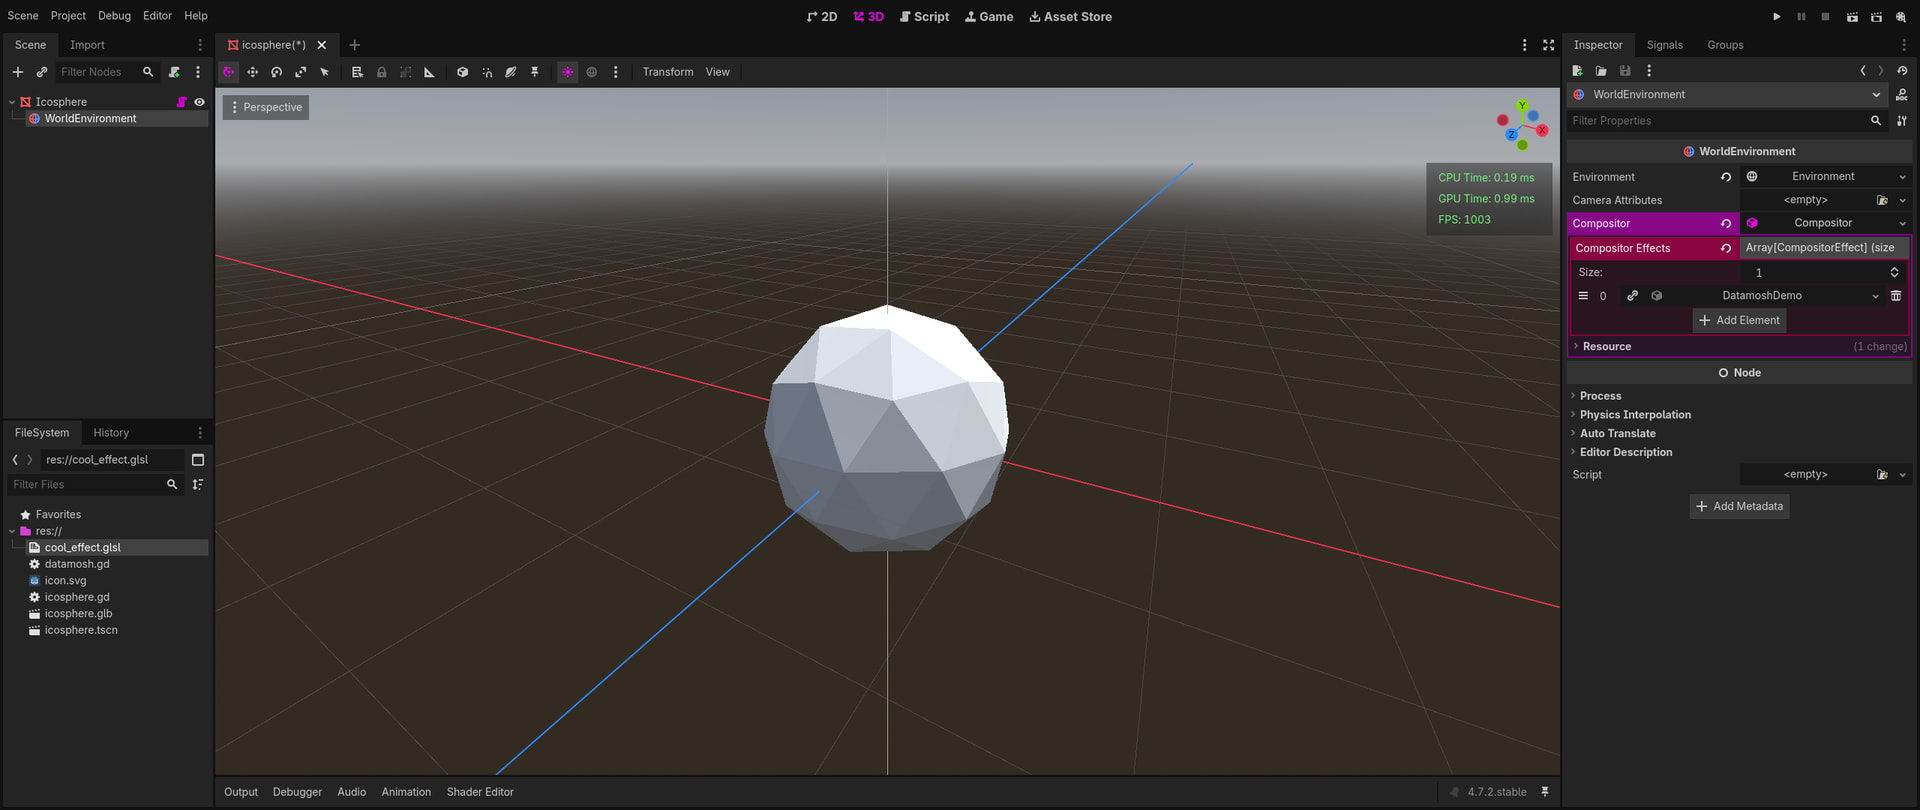
You can add it to the list, and with this, we have successfully made a compositor effect!.. That does nothing… Yet!
Making a ping pong buffer
The next step is to create what is often called a “ping pong buffer”, or double buffer. Since the Godot engine will never write to another buffer that isn’t the main screen, we need to make an entire new buffer, write to it, and never clear it the next frame, so it persists between frames.
To do that, first we declare two new StringNames at the top of our datamosh gdscript file. Those will be the identifiers for our new texture buffer.
const CONTEXT: StringName = &"PreviousFrame"
const PREVIOUS: StringName = &"previous"
Next, we get the texture internal name, and, if it doesn’t exist, we create it.
func _render_callback(_effect_callback_type: int, render_data: RenderData) -> void:
[…]
		var texture_name: StringName = PREVIOUS
		if not scene_buffers.has_texture(CONTEXT, texture_name):
			scene_buffers.create_texture_from_format(CONTEXT, texture_name, fmt, RDTextureView.new(), true)
Then we create a new uniform to pass it to our shader. I’m setting it as a UNIFORM_TYPE_SAMPLER_WITH_TEXTURE, instead of UNIFORM_TYPE_IMAGE, so it can be sampled with a linear filter, if you so desire it. Images can only be sampled per pixel, akin to nearest filtering the image, while textures can be sampled with either nearest or linear filtering.
		var uniform_prev: RDUniform = RDUniform.new()
		uniform_prev.uniform_type = RenderingDevice.UNIFORM_TYPE_SAMPLER_WITH_TEXTURE
		uniform_prev.binding = 1
		uniform_prev.add_id(nearest_sampler)
		uniform_prev.add_id(scene_buffers.get_texture_slice(CONTEXT, texture_name, view, 0, 1, 1))

		var image_uniform_set: RID
		image_uniform_set = UniformSetCacheRD.get_cache(main_shader, 0, [uniform_screen, uniform_prev])
And, finally, update the cool_effect.glsl file to receive another texture, on binding 1. Notice it is declared differently to the image2D.
layout(rgba16f, binding = 0, set = 0) uniform image2D screen_tex;
layout(binding = 1, set = 0) uniform sampler2D prev_tex;
Now, to test if you did everything correct, change the glsl file to the following:
void main() {
    ivec2 uv = ivec2(gl_GlobalInvocationID.xy);
    vec2 size = variables.screen_size;
    vec2 one_over_size = 1.0 / size;

    vec4 screen = imageLoad(screen_tex, uv);
    vec4 prev = texture(prev_tex, (vec2(uv + 0.5) * one_over_size));

    vec4 color = mix(screen, prev, 1.0);

    if(!any(isnan(color)))
    {
        imageStore(screen_tex, uv, color);
    }
}
If the screen turns black, you did everything correctly!
It’s black because we are reading from a newly created texture and writing it to the screen texture directly, without processing them.
Now, let’s add the ping pong buffer, so we save one frame into the next one, cumulatively.
First, declare a new pipeline and shader at the top of the gdscript file.
var pingpong_shader: RID
var pingpong_pipeline: RID
Then, make so it is purged when the shader is uninstantiated in the _notification() function.
		if pingpong_shader and pingpong_shader.is_valid():
			RenderingServer.free_rid(pingpong_shader)

		if pingpong_pipeline and pingpong_pipeline.is_valid():
			RenderingServer.free_rid(pingpong_pipeline)
Then, correctly initialize it in the initialize_cs() function. I’ll determine a glsl file name of ping_pong.glsl here, that we will create later. We can reuse the glsl_file variable, to avoid a small memory overhead. Again, comment the print() lines if desired.
	glsl_file = load("res://ping_pong.glsl")
	pingpong_shader = rendering_device.shader_create_from_spirv(glsl_file.get_spirv())
	if not pingpong_shader:
		print("Failed to get ping pong shader.")
		return
	print("Ping pong shader got successfully.")

	pingpong_pipeline = rendering_device.compute_pipeline_create(pingpong_shader)
	if not pingpong_pipeline:
		print("Failed to get ping pong pipeline.")
		return
	print("Ping pong pipeline got successfully.")
I’m choosing to remake the uniforms from scratch for the second dispatch. The memory overhead is just half a dozen bytes or so, and the advantage is that we’ll end up with two unfiltered UNIFORM_TYPE_IMAGEs, so we have pixel perfect datamoshing in the end. The following can be added to the end of the gdscript file, just after the rendering_device.compute_list_end() line.
		var uniform_out: RDUniform = RDUniform.new()
		uniform_out.uniform_type = RenderingDevice.UNIFORM_TYPE_IMAGE
		uniform_out.binding = 0
		uniform_out.add_id(scene_buffers.get_texture_slice(CONTEXT, texture_name, view, 0, 1, 1))

		var uniform_in: RDUniform = RDUniform.new()
		uniform_in.uniform_type = RenderingDevice.UNIFORM_TYPE_IMAGE
		uniform_in.binding = 1
		uniform_in.add_id(scene_buffers.get_color_layer(view))

		image_uniform_set = UniformSetCacheRD.get_cache(pingpong_shader, 0, [uniform_out, uniform_in])
And lastly, we must dispatch this ping pong shader proper.
		compute_list = rendering_device.compute_list_begin()
		rendering_device.compute_list_bind_compute_pipeline(compute_list, pingpong_pipeline)
		rendering_device.compute_list_bind_uniform_set(compute_list, image_uniform_set, 0)
		rendering_device.compute_list_dispatch(compute_list, x_groups, y_groups, 1)
		rendering_device.compute_list_end()
Now, the last thing missing is the ping_pong.glsl file. Create it on your file manager instead of the Godot editor. This is what it’ll be in full.
#[compute]
#version 450

layout(local_size_x = 8, local_size_y = 8, local_size_z = 1) in;

layout(rgba16f, binding = 0, set = 0) uniform image2D out_B;
layout(rgba16f, binding = 1, set = 0) uniform image2D in_A;

void main() {
    ivec2 uv = ivec2(gl_GlobalInvocationID.xy);

    imageStore(out_B, uv, imageLoad(in_A, uv));
}
It is a tiny shader, specifically to copy one texture to another, and nothing more. It doesn’t even need push constants, for minimum traffic between CPU and GPU.
If you remove the effect and re-add it to refresh it, the screen will still be black. To properly test if you did everything correctly, you change 1.0 to 0.9 in the cool_effect.glsl file, in the vec4 color = mix(screen, prev, 0.9);. If everything is correct, the screen will have a weird motion blur effect to it.
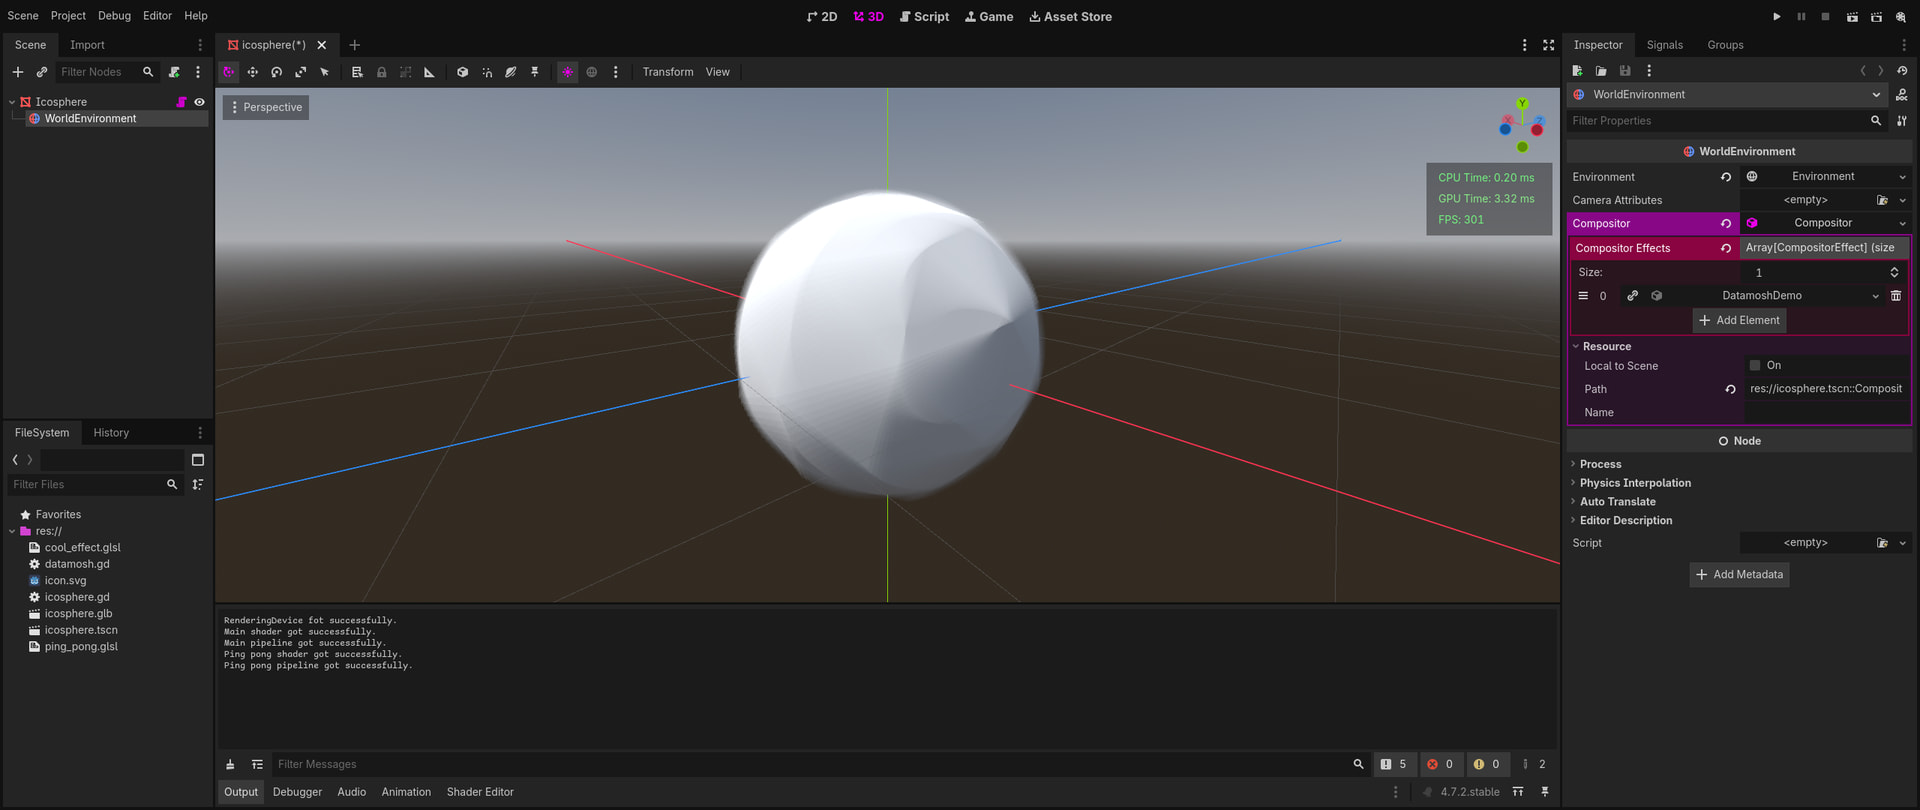
And that’s it for part 1!!! 
We successfully passed a texture from one frame, to the next!
Stay tuned for part 2, hopefully significantly smaller, and better written!