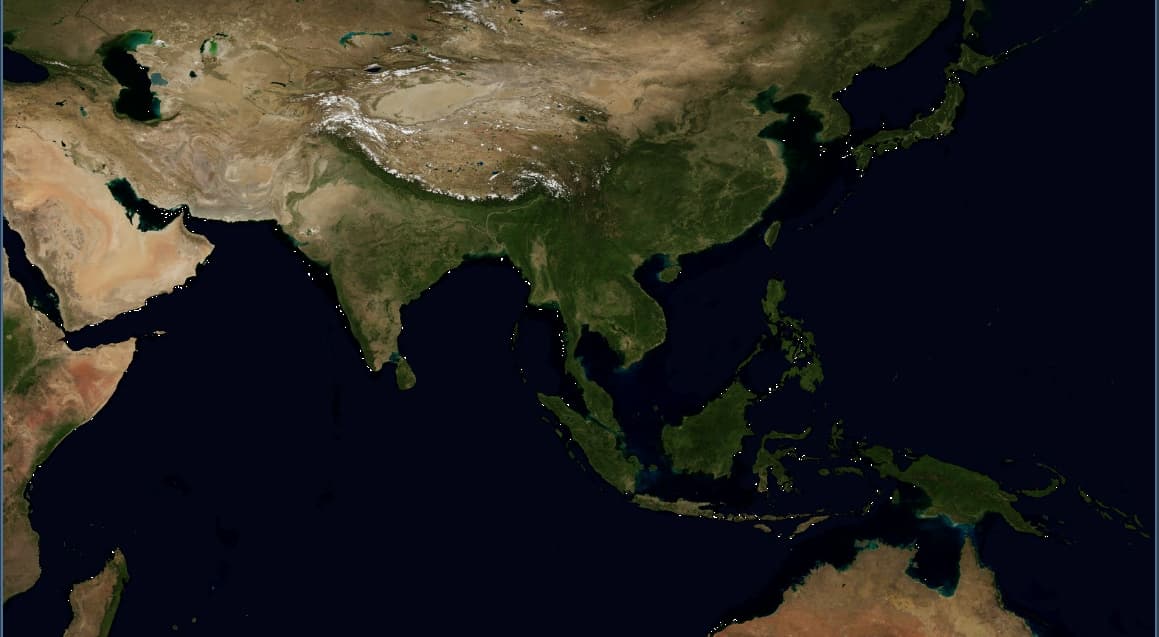
Hi, I am planning to make a small grand strategy game on godot using Paradox colormap technique, like this one:
Now I have a problem, generating Outline of the border so when I click on a random zone, the border of that zone will glow up.
I also look at this video make by Good Interactive Solution (https://www.youtube.com/watch?v=UtbU2fa4fMM&t=1s) but I wonder if there are any better solution than that, as it just loop over all pixels…(When i run the scene it just crashed)
I’d suggest doing a lot of the work before runtime.
You could preprocess this map and produce an indexed image (that is, each pixel is an index value) where the index in each pixel is which region it’s in. You could also make a data file containing an array of the regions along with useful info:
region name
a list of Vertex2D coordinates that define the vertices of the region’s polygon, which you could use to draw a line loop (for an outline), a translucent polygon (for a highlight), or whatever
region color
a list of adjacent regions, potentially useful for pathfinding or deciding what regions can be attacked directly from this one
With those, at runtime you could look a mouse click position up in the index map to get what region was selected, and then use that region’s info to highlight it, neighboring regions it can reach, and display whatever HUD info you want.
Get the pixel color from clicked position (I think you have this working allready?)
Pass that color to a shader and use it to brighten the country.
That’s pretty easy way to highlight, but if you want only the outlines to glow, it gets more tricky. I have some ideas:
I think looping trough the pixels to detect borders is a bit overkill. It would be much easier and faster to have another image that has the outlines allready drawn on it. Use the passed color value as a mask for the outline image. You can even use the map images alpha channel as the second image.
You will get a generated shader code that you can edit. Then copy paste stuff from my shader to yours. You need the two uniforms and the stuff from fragment function and replace COLOR with ALBEDO and COLOR.a with TRANSPARENCY.
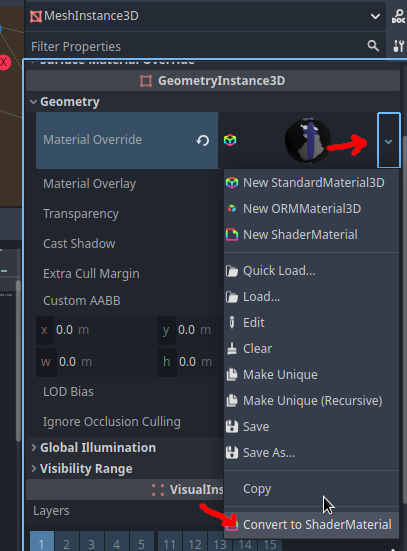
But if your game is 2D, I recommend using a TextureRect or Sprite2D. You can convert Material to ShaderMaterial just like above, but then my shader can be copy-pasted without modifications.
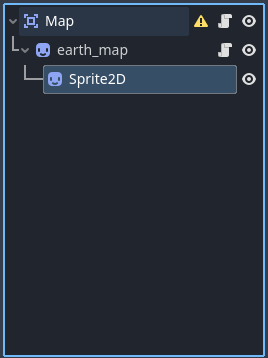
the map node has map.gd which change shader parameter:
map.gd
extends Area2D
# Called when the node enters the scene tree for the first time.
func _ready() -> void:
pass # Replace with function body.
# Called every frame. 'delta' is the elapsed time since the previous frame.
func _process(delta: float) -> void:
pass
func _on_main_change_hightlight(color) -> void:
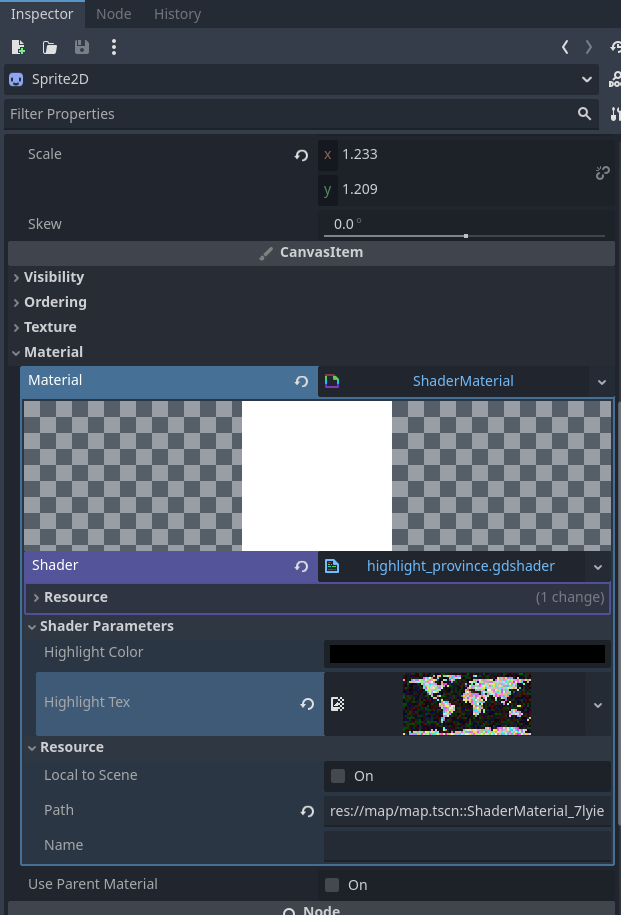
$earth_map/Sprite2D.material.set_shader_parameter("highlight_color", color)
print("Hightlighted Sucessful")
earth_map node is the statelite image (its attached script is empty)
the Sprite2D node has the Shader, and I copy/pasted your shader.
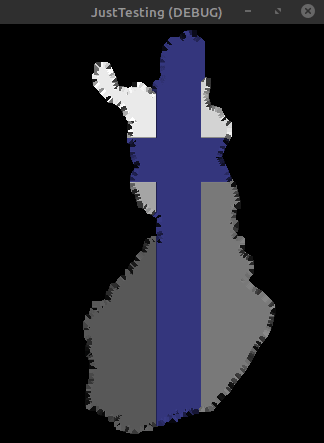
You are seeing weird white pixels probably because those are the color you are highlighting. If you use a texture like that, you will need to adapt the shader a bit.
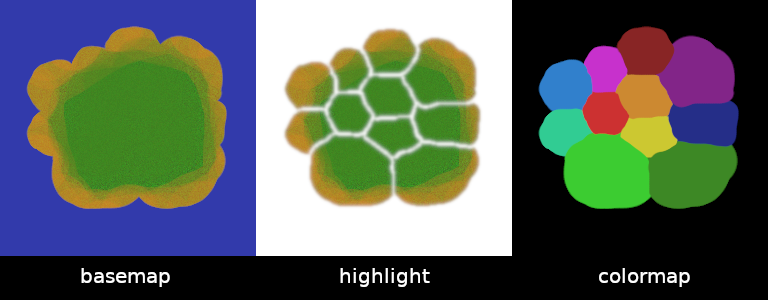
You will need 3 textures:
The basic map like you just posted
A version of the basic map, with highlights drawn on it for every region
The color-coded map that defines the areas
In my test the textures 1 and 3 were the same picture. I was using the builtin TEXTURE for this. Maybe it’s more readable if I use uniforms this time.
shader_type canvas_item;
render_mode blend_mix;

uniform vec3 highlight_color: source_color = vec3(0);

uniform sampler2D base_tex;
uniform sampler2D highlight_tex;
uniform sampler2D colormap_tex;

void fragment() {

	// Start with the unhighlighted base texture
	COLOR = texture(base_tex, UV);

	// Check if the selected color is the same as the color-coded map pixel
	if(distance(highlight_color, colormap_tex.rgb) < 1.0 / 255.0) // Might need to adjust the treshold if you get messy edges
	{
		// This pixel is in the area, so highlight it
		COLOR  = texture(highlight_tex, UV);
	}

	COLOR.a = 1.0; // This might not be needed
}
shader_type canvas_item;
render_mode blend_mix;

uniform vec3 highlight_color: source_color = vec3(0);

uniform sampler2D base_tex;
uniform sampler2D highlight_tex;
uniform sampler2D colormap_tex;

void fragment() {

	// Start with the unhighlighted base texture
	COLOR = texture(base_tex, UV);

	// Check if the selected color is the same as the color-coded map pixel
	if(distance(highlight_color, texture(colormap_tex, UV).rgb) < 1.0 / 255.0) // Might need to adjust the treshold if you get messy edges
	{
		// This pixel is in the area, so highlight it
		COLOR  = texture(highlight_tex, UV);
	}

	COLOR.a = 1.0; // This might not be needed
}
Here’s my current script:
extends TextureRect

@export var colormap_tex: Texture
@onready var colormap_img = colormap_tex.get_image()
@onready var mat = get_material()

func _on_gui_input(event):
	if event is InputEventMouseButton and event.button_index == MOUSE_BUTTON_LEFT and event.is_pressed():
		var mouse_pos = get_local_mouse_position()
		var color = colormap_img.get_pixel(mouse_pos.x, mouse_pos.y)
		mat.set_shader_parameter("highlight_color", color);
It seems like I have to redraw the whole map for hightlight texture, which is not so good kek.
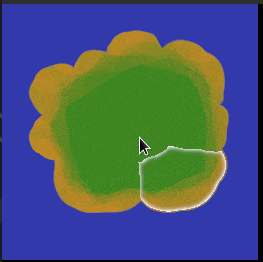
For now I will try to implement yours , but is there any ways to make it easier, like highlighting the zone, not the border?
(As you said "That’s pretty easy way to highlight, but if you want only the outlines to glow, it gets more tricky. " so I think it would be easier to just simply highlight the zone kek)
The highlight texture can just be a copy of the original map, with brightness added in Gimp. Or adjust the colors, write area names there or whatever you want.
Using a texture for highlighting allows lots of artistic liberties without coding. Like you can just draw whatever effect you want.
But making the effects with shaders spares memory and filesize. And can animate!
Check this out:
shader_type canvas_item;
render_mode blend_mix;

uniform vec3 highlight_color: source_color = vec3(0);
uniform vec3 tint_color: source_color = vec3(1.0, 0.0, 0.5);

uniform sampler2D base_tex: filter_linear_mipmap;
uniform sampler2D highlight_tex;
uniform sampler2D colormap_tex;

void fragment() {

	// Start with the unhighlighted base texture
	COLOR = texture(base_tex, UV);

	// Check if the selected color is the same as the color-coded map pixel
	if(distance(highlight_color, texture(colormap_tex, UV).rgb) < 1.0 / 255.0) // Might need to adjust the treshold if you get messy edges
	{
		vec3 c = vec3(1.0);


		// Uncomment the effect you want


		// Highlight texture
		//c  = texture(highlight_tex, UV).rgb;

		// Brighten
		//c  = vec3(1.0);

		// Darken
		//c  = vec3(0.0);

		// Blinking desaturation
		c  = vec3((COLOR.r + COLOR.g + COLOR.b) / 2.0);

		// Blur
		//c  = textureLod(base_tex, UV, 4.0).rgb;

		// Apply the effect with blinking as a bonus
		float strength = 0.5; // use range 0.0 - 1.0
		float speed = 5.0;
		COLOR.rgb  = mix(COLOR.rgb, c, abs(strength * sin(TIME * speed)));

		// If you don't like the blink, use this instead:
		// COLOR.rgb = c;

		COLOR.rgb *= tint_color;
	}

	COLOR.a = 1.0;
}