Nophys is an experimental project where I play around with the engine, making a 3d game without using dedicated physics engine (default, Jolt, etc.) provided through Godot. I don’t have any idea currently to make an interesting game with somewhat a good story, so I just tinker around with this idea of no usage of physics engine for the game in my free time. Hopefully, good idea/story will popup while working on this project .
The idea was inspired from a video made by lawnjelly where he working on a feature called Navigation Physics. There’s also a proposal made by him for this particular feature.
Since not all type of 3d games will work without physics, I want to make a game similar to Digimon Story & Persona series. The player movement for these series and some older JRPG were mostly limited with overhead/static camera, mostly static or non-collide able moving NPC and had turn-based battle system where physics engine is not necessarily required but convenient.
Still, that’s sounds and looks very ambitious for a one person (who still have no game idea) to make. Instead of JRPG, let me reword it into a low poly 3d Visual Novel game with couple of turn-based battle in-between.
Now, that sounds achievable
Why?
No particular reason. Just intrigue with the idea & want to tinker/play around with Godot Engine while waiting for some game idea to materialized and do some devlog at Godot forum. Oh, I’m also experimenting with other language; Swift. It’s mostly a devlog about me trying stuff and failed at it.
How?
At least for the player, it will extends from the regular Node3D instead of using CharacterBody3D/RigidBody3D and make it move by manipulating its position with the help of navigation features (NavigationRegion3D, NavigationAgent3D, etc.) to provide the path and boundary of a walk-able area. Workaround also needed when useful nodes/features for 3d games which make use of physics engine such as SpringArm3D to avoid camera clipping through wall, and RayCast3D/Area3D for body/area collision check are unavailable.
I have put some work already on this project which I will update periodically in this topic. Not much, but enough content for another post and the workaround I’ve done was mostly math. I mean a lot of math. I’m not that smart, but fortunately It’s 2025 and there are a lot of works that already being done by great people which I can use and learn from, including Godot Engine where a lot of math related helper function available such as Geometry2D & Geometry3D. So, hopefully this will work somehow
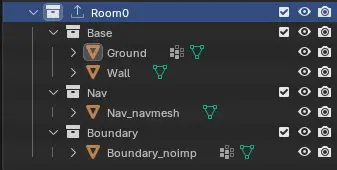
The player will be controlled as a 3rd person within a walkable area provided through NavigationRegion3D by baking NavigationMesh or from GLTF file with -navmesh name suffix.
# Player
func _physics_process(delta: float) -> void:
    var input_dir := Input.get_vector("left", "right", "forward", "backward")
    var dir := Vector3(input_dir.x, 0.0, input_dir.y)
    dir = dir.normalized()
    dir.y = 0.5

    var curr_pos := global_position
    var target_pos := current_pos + dir

    # Set agent's target
    navigation_agent_3d.target_position = target_pos

    if not navigation_agent_3d.is_navigation_finished():
        # Return position within the NavigationMesh area
        var move_dir := navigation_agent_3d.get_next_path_position() - curr_pos

        # Move player
Direction vector was obtained from player input and set it as the agent’s target. Then, the player position can be moved to a position return by the get_next_path_position() or get_final_position(), which also can be used. Note that checking for is_navigation_finished() for every frame might be expensive, where boolean check or navigation_finished signal can be used instead.
Mini GIF Tutorial
Somehow I got myself distracted to make GIFs using ffmpeg for splitting the video into frames, which then import into GNU Image Manipulation Program for final editing. I ended up with a gif with a file size larger than the original video, but it nice to have a visualization that loop forever.
-b:v and -r options are the video’s bitrate and framerate where 24/1 means 24 frames per second. The output frames can be reduce by changing the -r value such as 24/3 which means 24 frames per 3 second.
The video’s information can be shown by using ffprobe which usually installed alongside ffmpeg.
ffprobe input.mp4
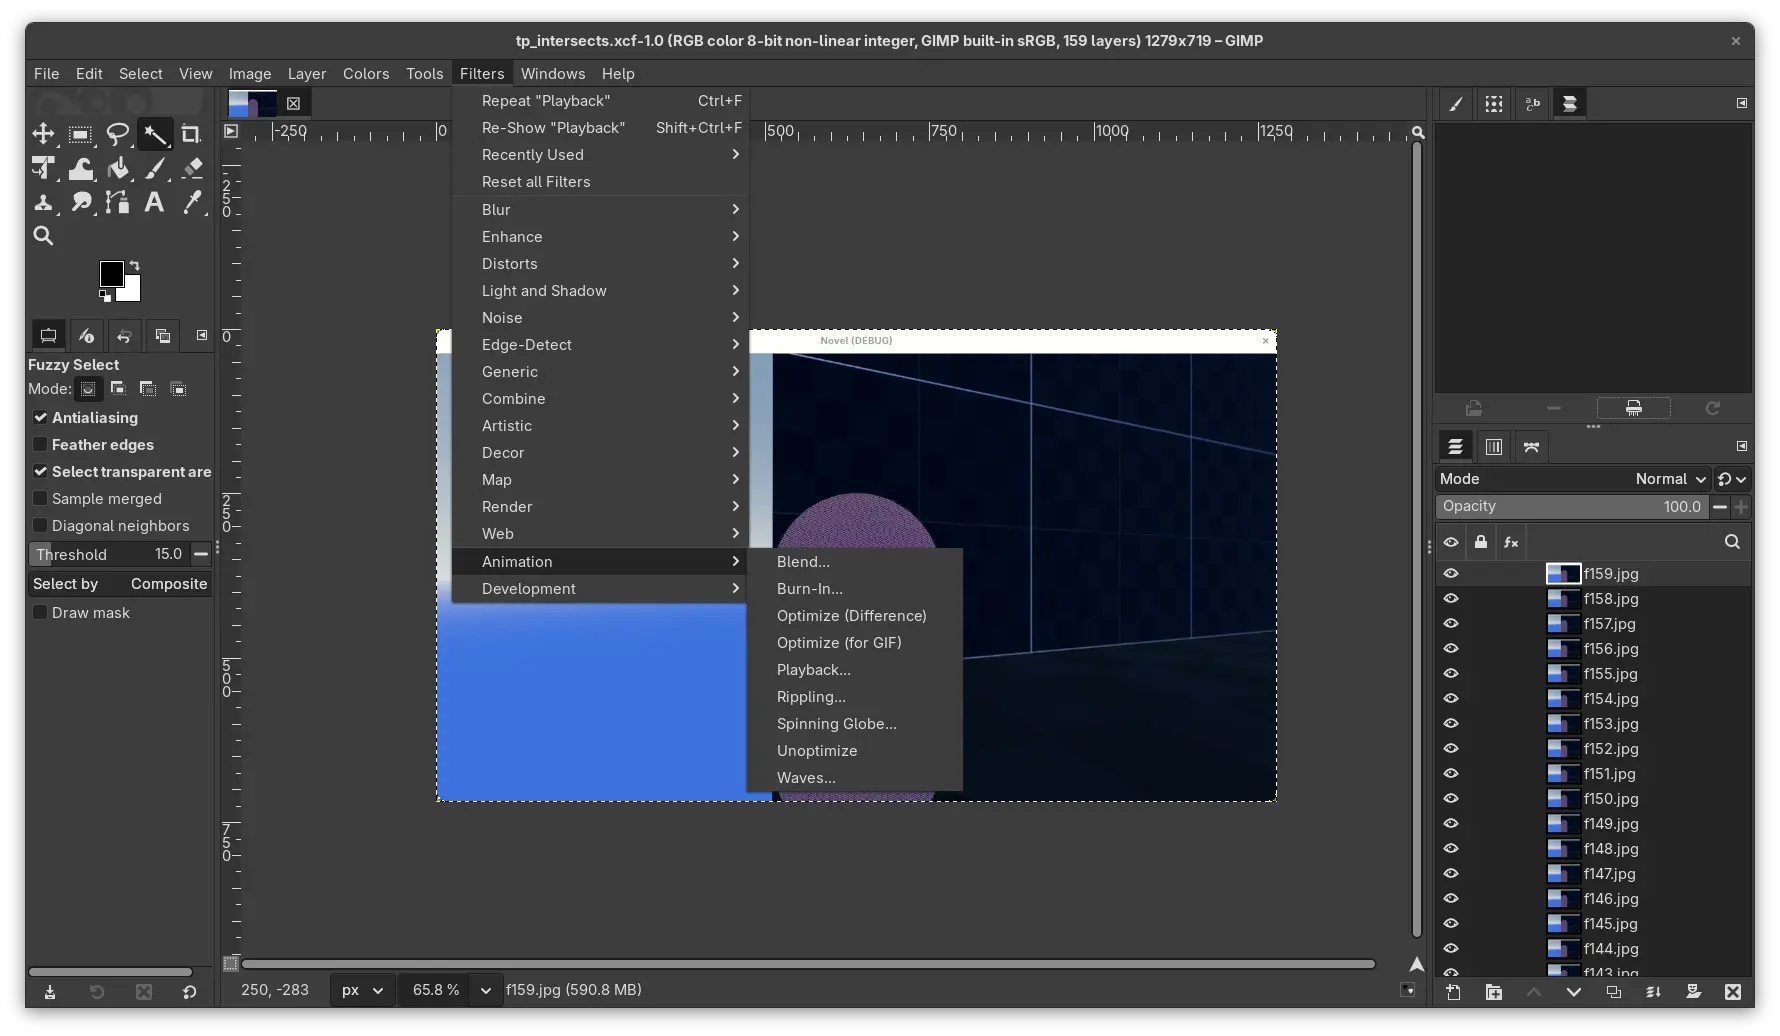
Moving on, inside GIMP from the menu bar, File > Open as Layers.... Before exporting, the playback can be previewed from Filters > Animation > Playback.... Some optimization in term of file size can be done through Filters > Animation > Optimize (for GIF), but it can affect the quality of each frame. Since it copy each layer before applying the filter into another working file, it can be tested without losing original layers. Finally, it can be exported to a gif file from File > Export As....
At the time writing this post, found a command line program gifsicle for manipulating animated GIFs.
gifsicle --scale 0.5 -optimize -O3 animation.gif
Camera for 3rd Person
As seen from the gifs above, the camera does clipped into the wall since the usual class/node for the job, SpringArm3D is unavailable. So, need to check intersections with the geometry itself.
Inside the camera scene, contains a greenish colored sphere which represent target/camera postion, and a red-ish sphere marking the max distance of the camera position at local Z-axis from the scene’s origin. By default, the camera will move toward the end position, and will move to an intersected point if collided. Typical SpringArm3D setup.
Walls in this case are flat surface with 90 degree inclination which form a map outer boundary. In Godot, there’s a resource called PolygonPathfinder which provide a 2d polygon with a useful methods such as get_intersections(from: Vector2, to: Vector2) & is_point_inside(point: Vector2). This resource only involve 2 axis, but it can be use here while omitting Y-axis value and only operate on XZ-axis, making sure the camera stay inside of the map’s outer boundary. It’s like viewing the scene from the top where only 2 axis does matter.
For a simple map like square, the resource would be a square polygon with 4 edges, and check if there are any intersection between the camera segment and map edges at every frame. If yes, move camera to the intersection point which is in front of the wall.
Sets up PolygonPathFinder with an array of points that define the vertices of the polygon, and an array of indices that determine the edges of the polygon. The length of connections must be even, returns an error if odd.
var polygon_path_finder = PolygonPathFinder.new()
var points = [Vector2(0.0, 0.0), Vector2(1.0, 0.0), Vector2(0.0, 1.0)]
var connections = [0, 1, 1, 2, 2, 0]
polygon_path_finder.setup(points, connections)
Now, where to get the vertices? I first tried getting the value from the NavigationMesh itself using get_vertices() & get_polygon(idx: int), but there are some undesired thing happened like duplicated and unsorted vertices position. It might be something wrong on my end, and there might be more elegent way of doing things, but I took this opportunity to try different approach; fetch the data from Blender.
Blender Plugin
Blender is my software of choice to model stuff. It’s functionality can be extended through plugin using python and with some extra boilerplate for it’s editor integration. For mesh/geometry data access, BMesh Module can be used to extract the data and dumping it into a json file, so that Godot can read it at runtime.
I don’t know how most people workflow when make Blender plugin, but the editor’s IDE does not have any syntax checking, inline documentation and has unreliable auto-completion. Not sure if that’s the default experience or there’s plugin need to be enabled. I also found a fake-bpy-module where it can be used with external editor for a better workflow.
The plugin was set into this part/section, which pop in and out when pressing N key. Total of 300 line of code. The method itself is just couple of line, mostly the boilerplate to setup the UI which take a lot to understand and implement.
In Swift, there’s a Codable protocol where you can adopt for serialize type to and from any of the Swift built-in data format:
struct MeshData: Codable {
  var vertices: [SIMD3<Float>]
  var indices: [Int]
  var connections: [Int]
  var faces: [SIMD3<Int>]

  // If variable name should be different from key
  private enum CodingKeys: String, CodingKey {
    case vertices
    case indices
    case connections
    case faces
    //case someExample = "some_example"
  }
}
Then, decode the json file:
import Foundation

struct MeshDataLoader {
  func load(_ meshName: String) -> MeshData? {
    var data: MeshData? = nil
    do {
      let filePath = "MeshInfo.json"
      let fileCont = try String(contentsOfFile: filePath, encoding: .utf8)
      guard let fileData = fileCont.data(using: .utf8) else {
        GD.printErr("Failed load: ", filePath)
        return nil
      }
      let decoder = JSONDecoder()
      let decoded = try decoder.decode([String: MeshData].self, from: fileData)
      guard let meshData = decoded[meshName] else {
        GD.printErr("Failed load: ", meshName)
        return nil
      }
      data = meshData

    } catch {
      GD.printErr(error)
    }

    return data
  }
}
With the PolygonPathfinder has been setup, intersection on the segments/edges of the polygon can be checked by passing the camera’s segment global position.
# --snip--
@onready var camera := $Start/Camera
@onready var start_segment := $Start
@onready var end_segment := $Start/End

func _physics_process(delta: float) -> void:
    # --snip--

    var min_point = Vector2(
        start_segment.global_position.x,
        start_segment.global_position.z
    )
    var max_point = Vector2(
        end_segment.global_position.x,
        end_segment.global_position.z
    )
    var intersections: PackedVector2Array = get_intersections(
        from: min_point,
        to: max_point
    )
    if intersections.is_empty():
        camera.position.z = end.position.z
    else:
        # if intersections > 1
        # Loop through array & set position to the closest
The code itself is self explainatory and it works fine and well
For the second gif, it does put the camera in front of the walls, but it still clipped a little into the wall and able to peak into the void. I will try to solve this and disscuss about it on the next post.
It would be nice if there is no need to use separate resource, and if it can be done through navigation related classes itself. Fortunately, there’s already a proposal to introduce a somewhat raycast feature.
The post is all over the place, but that’s it for this update
The camera should be positioned at the collision point when it move into the ground, same as when it move into the wall. At first, the idea was just to clamp the Y value higher than the position of the ground, so the camera won’t go into it at all. That means the ground would need to be always flat when the camera is positioned as a third person view following the player, but that would be boring and limited in term map/level design.
The solution would be similar to what has been done for the boundary detection, instead the camera’s segment will check collision with the ground mesh itself and repositioning the camera to the collision point if it move into the ground.
Geometry3D provides geometric operation for 3d such as segment_intersect_triangle to get the intersection point within 3 different vertex. The triangle faces of the ground is provided through the blender plugin, which then can be loop through to check if anything is collided with using the helper function. Optimization might needed if the map is too large by separating it into multiple small chunks.
Similar to the previous post, the camera can still peek through the ground when intersect at small angle. With SpringArm3D, it can be solved by supplying a Shape3D which will be cast on its Z-axis instead of ray cast. The usual choice would be SphereShape3D at a given radius which is fast to check collisions against.
For PolygonPathFinder, I assume it can be replicated by using get_closest_point within the edges of the polygon, which then a distance between it and the end point of camera segment can be check. For example, if the distance between the two points is lower than a minimum distance, the camera will retract toward the player position and if the distance is above the minimum distance it will do the opposite.
Tried to implement it, somewhat works but have some glitches here and there. There is also for the ground check which might be more complicated. Don’t have enough patience to make it works, so I drop it and use different approach.
Instead I duplicate the ground geometry, separate by selection, scale it down inside Blender and use it as a reference for the collision check. Given the offset between it and the real geometry, the camera no longer able to peek through the wall & ground
The downside of it is more manual work. Since the duplicated geometry need to be between the real one and navigation mesh, I also manually create the navigation mesh and import to godot using the _navmesh name suffix.
These approach works and maintainable on small map but might not work on more complex map/level. As the project goes, I’ll improve the workflow and approach to avoid edge cases that it might come with.
The pill shaped player now move relative to the third person camera. Currently, the player has a simple state machine with idle and move state. Acceleration and deceleration were also added and controlled inside the move state. The player controller now somewhat usable to move around these empty test map. One problem found where the player can stuck at low sharp angle within the NavigationMesh.
I was about to test peertube embedding, but it does not work. I guess the forum itself need to whitelist the domain under the allowed onebox iframes. I created a peertube channel at MakerTube to post short clip about the project, which then can be embedded here. Not today but surely tomorrow.
More Camera Work
Some code for the camera placement when collide with walls need some adjustment since it involve Y-axis where the intersection point does not have that information.
When view from the side, The y value of the intersected point is always zero regardless of the rotation of the camera around x-axis, represented by the blue dotted line. With some math operation, y value of the red dotted line can be found from the x or z value of the intersected point using the line equation y = mx + c.
func find_y_at(x: float, p0: Vector2, p1; Vector2) -> float:
    var dx = p1.x - p0.x
    var dy = p1.y - p0.y
    var m = dy / dx
    var c = p0.y - m * p0.x
    return m * x + c
p0 and p1 are points that formed the red dotted line which is the camera vector. m is the slope and c is the Y Intercept. Another solution would be shoot up a vector/segment/ray from the intersected point and find the new intersection point on the red dotted line using a segment_intersects_segment method from the Geometry2D helper function.
That is all.
The camera implementation while not perfect is done for now. Basic player movement also has been implemented. With stock godot features, these can be done under a week or even a day
Hmm.. the update was late and keep getting shorter. Not much work done. I can see that future update will be less frequent too but hopefully will not stop
It’s been a while since last update, but not so much progress have been done . Life suddenly got busy, but not that I motivated either if given more time. But, I did made a basic crowd system where random people will move across the map/scene within given path, similar to the games that were mentioned in the first post.
More work on Blender plugin
Now the plugin have almost 500 lines of codes including the part of ui/plugin setup and still can’t decide the name, so it’s keep changing from time to time. I have no idea if this have any future aside from making tool is fun. I’ve been experimenting with Servers (RenderingServer and NavigationServer) in Godot, bypassing the node system. So, I’m using Blender to visualize and design the level, then export the data as JSON which can be read from Godot side. Path and spawn point can be exported now in form of it’s Transform.
The crowd system is similar to games like Persona 5, Digimon Story Time Stranger and NEO: TWEWY where random people move through given paths within certain area, but the player can’t bump into them or interact with them. A simple system and served it purpose to make the place/scene looks crowded.
Simple. No collision involved and the crowd need only one state and animation (walking). Path3D and PathFollow can provide the basic system for that and only left us with how to populate people on the paths. Visually, the individual/crowd has simple design and small number of different character model which help make the crowd not all the same. The crowd will fade at start/end of path, also when near the player and camera, which can be done with some tweaks to default Godot shader material.
I might be wrong here, but you don’t use nodes like normal for Path3D and PathFollow if using Servers. You still can use resource like Curve3D which give shape to Path3D by manually sampled for other purposes like adding points to it, to be sampled later with sample_baked_with_rotation.
There’s a lot that can be pointed out that can be improved upon in the future. Current example only use single model with one animation that sync to each other, walk on simple straight path without any specific context and destinations. Even with that, It looks good enough .
The crowd fade when near the player and camera was by using the default distance fade feature from StandardMaterial3D using object dither mode which is the most performant (according to docs). The default behavior will allow the material to fade when near the camera view with given distance and need some changes to make it fade near player position. The StandardMaterial3D can be converted into ShaderMaterial so the shader code can be changed.
// --snip--
uniform float fade_cam_min : hint_range(0.0, 4096.0, 0.01);
uniform float fade_cam_max : hint_range(0.0, 4096.0, 0.01);
uniform float fade_min : hint_range(0.0, 4096.0, 0.01);
uniform float fade_max : hint_range(0.0, 4096.0, 0.01);

uniform vec3 character_position;

void fragment {
    // --snip--

    // Distance Fade: Object Dither
    float fade_player = length(MODEL_MATRIX[3].xyz - character_position);
    float fade_cam = length((VIEW_MATRIX * MODEL_MATRIX[3]));

    // Use interleaved gradient noise, which is fast but still looks good.
    const vec3 magic = vec3(0.06711056, 0.00583715, 52.9829189);
    float fade = clamp(
        smoothstep(fade_cam_min, fade_cam_max, fade_cam)
        * smoothstep(fade_min, fade_max, fade_player)
        , 0.0, 1.0);

    // Use a hard cap to prevent a few stray pixels from remaining when past the fade-out distance.
    if (fade < 0.001 || fade < fract(magic.z * fract(dot(FRAGCOORD.xy, magic.xy)))) {
        discard;
    }
}
It’s a product of trial and error . Introduced a shader uniform called character_position which it value was used to calculate the fade when near player just like it did with the camera view by default.
Then, pass the player position through gdscript in _physics_process. Changes to the shader uniform will be effective on all instances using this ShaderMaterial.
Each character was spawn randomly along the path at the start of the scene using randf() function which return a value from 0.0 to 1.0 which represent the start and end of the path respectively. Some problem with that method was it possible that they spawn very closely with each other like in the gif above. Workaround that can be done is to have offset parameter which allow each character to shift to the left or right within the path. With randomness always come edge cases like this which might make me just manually spawn them with given gap between them.
The basic crowd system has been improved upon from the last time. Not much, but there are some improvement.
Little Improvement on Crowd System
The walk animation is still the same, but now every instance has different offset so the walk animation is unsync to each other instances. Every instance are sharing the same material and shader, so this can be achived by adding per-instance custom value INSTANCE_CUSTOM to TIME. I think this is a feature of MultiMesh where you can pass the value through function like set_instance_custom_data(). Can read more here: Animation a school of fish
Yes MultiMesh was being used for the scene above. Only one MultiMesh used currently to populate the mesh and will need more than that to add more diversity within the crowds. Each instance can be move by iterating it and supply new transform to it and the instances that are not moving would be left alone. Now each path has different speed randomly and the animation speed also follow those value. It’s subtle but it does make it not looks the same, which is good.
Each path is devided into number of segments and within each segment one instance will be placed randomly. Every segment’s end will be pushed back a little bit so it does not overlap with the next segment’s begin, so that instance would not be placed too close to each other.
Level Editing in Blender
I’m using RenderingServer because I hate myself. So I do not have MeshInstance3D to place/move it within Godot 3d workspace and I intrigued by Blender Studio’s workflow which they build 3d scene all inside Blender when they developing DogWalk. So this plugin have been build upon from the first update to export .json file which will hold data that were needed for each map, for example the mesh name and it’s Transform3D within the map. Then, in Godot during game initialization it will use that data to populate the mesh within the map like the video above. It’s not all that great since it break a lot, but it is something that I enjoy to make it work
Now let’s get back to work! Actually I still have something left to talk about regarding basic animation setup that have been done for the crowd, but I’ll leave that for the next update so it will be a quick one.
The crowds does not use Skeleton3D and AnimationPlayer for its animation. Skeletal animation can be expensive when there are a bunch of them on screen. The crowds number might not reach to the point that performance issue can occur, but I still want to try using Vertex Animation Texture (VAT) instead.
Vertex Animation Texture (VAT)
The crowd mesh still need to be rigged and still need to be animated with skeletal animation, then bake it into a texture which then can be read and processed through shader for the boneless exported mesh. In Blender, the animation baking process can be done through extension called OpenVAT.
Multiple animation can also be baked into one texture which then the startFrame and endFrame need to be specified in godotshader to get each region of the animation within the texture, but no blend between the animation for Godot yet. From the previous post, I only use one mesh with one material and one shader, populated using MultiMesh. By using set_instance_custom_data, parameters like startFrame, endFrame and framerate can be passed per-instance to choose an animation to be played. Idle animations has numbers of variation which randomly selected for crowd that idle.
There are some weird problems that I encountered when baking animation through OpenVAT. I was using Blender 4.2 LTS which works fine for one animation but not when there are multiple animation, but it does works when using the extension with blender 5 with some glitches here and there. I’m not using the latest version because it unstable and keep crashing especially during shader compilation. It also crash when baking the texture while godot is open. Not enough resource? Idk. Note that I do use an old weak laptop, and even when it works, the outcome was cursed interpolated animation. I saw someone did it just fine, so I really don’t know where the problem was. It might be that the texture not generated properly or it might be something else. Moved on for now.
To learn more about Vertex Animation Texture, OpenVAT website is cool, packed with technical information. Not that I understand any of that.
For a lifesim game in the style of The Sims, you don’t need any special ideas — it’s enough to let players simply observe the characters in a simulation of everyday life.
True but I’m not making any simulation and it seems like hard to implement. I guess. Saw couple of devlog videos on Youtube that does crowd simulation. Very interesting.
Not much difference. I learned from his shader! He use shader provided through OpenVAT and improve upon that to add custom_data & color_data to sent per-instance value. I do not use his plugin tho which provide new node based on MultiMeshInstance where you can animate using VAT.
Oh, the link you provide was his old plugin, he now create a new implementation based on OpenVAT
The physics is using a C++ GDEXtension that uses the PhysicsServer3D directly and is nodeless and is based on what you see in this video: https://youtu.be/rIop-iawh6M
My next step is to write a C++ GDExtension that uses the NavigationServer3D directly (nodeless) for crowd based agents and path finding for hundreds of enemies.
Will be interesting to see how your crowd solution scales with large number of agents.
Does not meant to summon you here but glad to see you here. Thanks for the addon. Learned from it. Godot definitely can provide better performance if you dare to do it the hard way. Great videos showing optimization you have done.
Looking forward to it.
My crowd system is quite simple, so it should be no problem. I think.