Hello!
For those who encounter Texture Array for the first time, it may be unclear how to use this texture method in practice. Today, I will explain how to do this using a simple example.
Before starting, I advise you to read this article to better understand what is happening:
Also, before we start, I should mention that Texture Array is not something you should necessarily build your game on. It is just one of the optimization methods. Therefore, when creating models and locations, focus primarily on performance, and not on adjusting to Texture Array.
So, I have some terrain where there should be a road, ground, and grass. I want to use a texture atlas, but it can’t be tiled. That’s where Texture Array comes in:

-
I export this model from Blender to Godot, using 3 materials without textures. I did not touch the UV.
-
I transfer this texture atlas to my texture folder (at the same time, I will show how you can use such “multi-maps”):
-
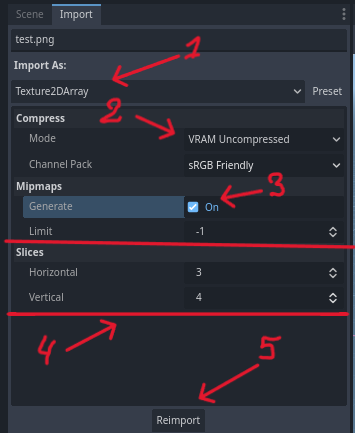
Next, I select the texture atlas and apply these import settings to convert it to a Texture Array. Be sure to check the Mipmaps box, otherwise, you will encounter fps drops and graininess at a distance. If you know what you are doing, you may choose not to check it.
-
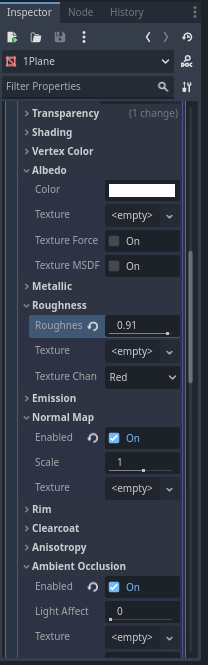
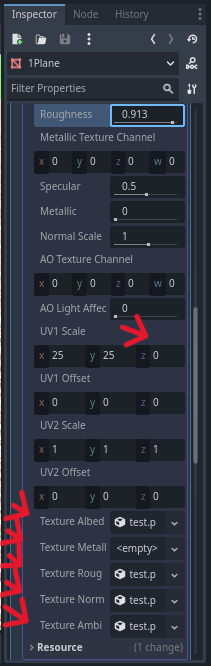
Next, I set up the scene and select its materials. Let’s start with Material 1 (Ground). Before converting the material to a shader, customize it to your needs. My settings are as follows:
-
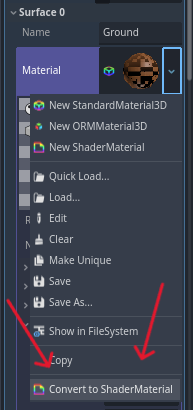
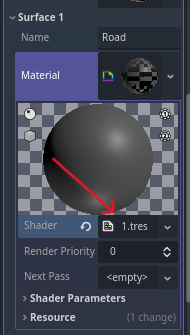
Next, convert the material to a shader and open the shader itself:
-
Your next step is to edit the generated shader code. I will not give you the code since there is no universal solution. Your material can consist of just ALBEDO, or purely of NORMAL_MAP and EMISSION, or from a thousand and one other configurations. Just remember the key points:
1)Replace all “sampler2D” with “sampler2DArray”;
2)In lines like “vec4 albedo_tex = texture(texture_albedo, base_uv);”, replace “base_uv” with “vec3(base_uv, float(uv1_scale.z))”.
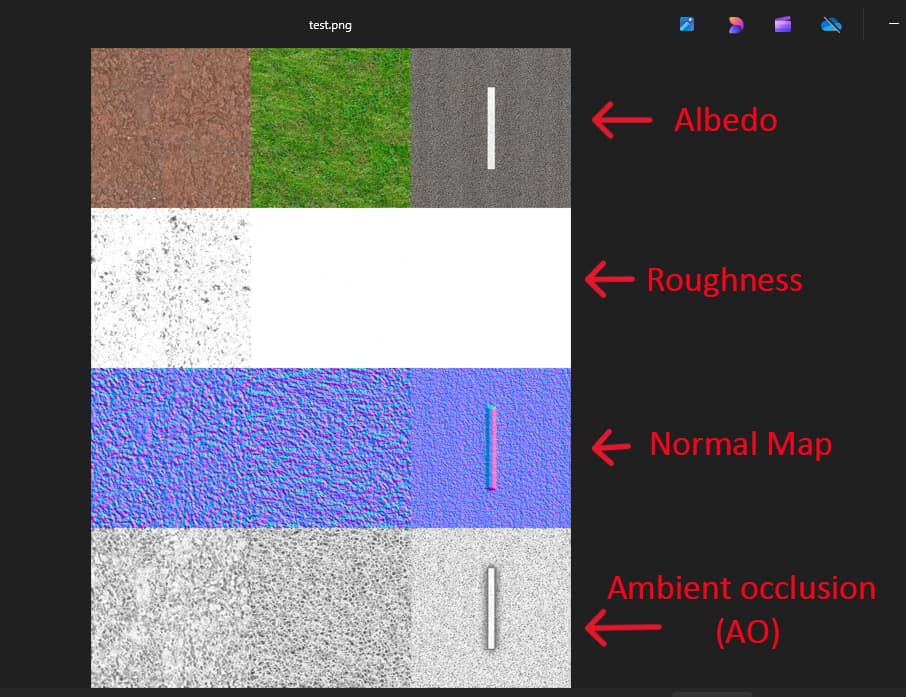
In the screenshot of my code, you can notice some numbers. What are they for? This is exactly the method that allows you to use “multi-maps.” In the texture lines of the next order to uv1_scale.z, which points to the layer with the texture, add the length of the texture atlas along the x axis, in my case it is 3.
Also, don’t forget to save this shader to a file; I called it “1.”

By the way, you should understand that using such “multi-maps” is not mandatory. First of all, you should focus on performance. If you need to create a texture map with 30 textures, it would be unwise to create a “multi-map.” It would be more appropriate to make 2-4 (as many as you need) texture atlases with maps of different types. Remember that texture atlases also have limitations, and no video card will work normally with an atlas of 100,000px x 100,000px.
-
After editing the shader, fields for Texture Arrays will appear in Shader Parameters. Fill them in and set up UV1 scale, where z is responsible for the texture layer index, for the Ground material, this is 0. Remember that you can have your own texture fields; it all depends on how you set up the material and shader.
-
Next, we move on to the other materials. This part is easier: set up the material itself, convert it into a shader, and select the already saved shader. In my case, it is named “1.” Go to Shader Parameters, assign Texture Arrays, UV scale, and the texture layer, which is assigned via z.
Result:


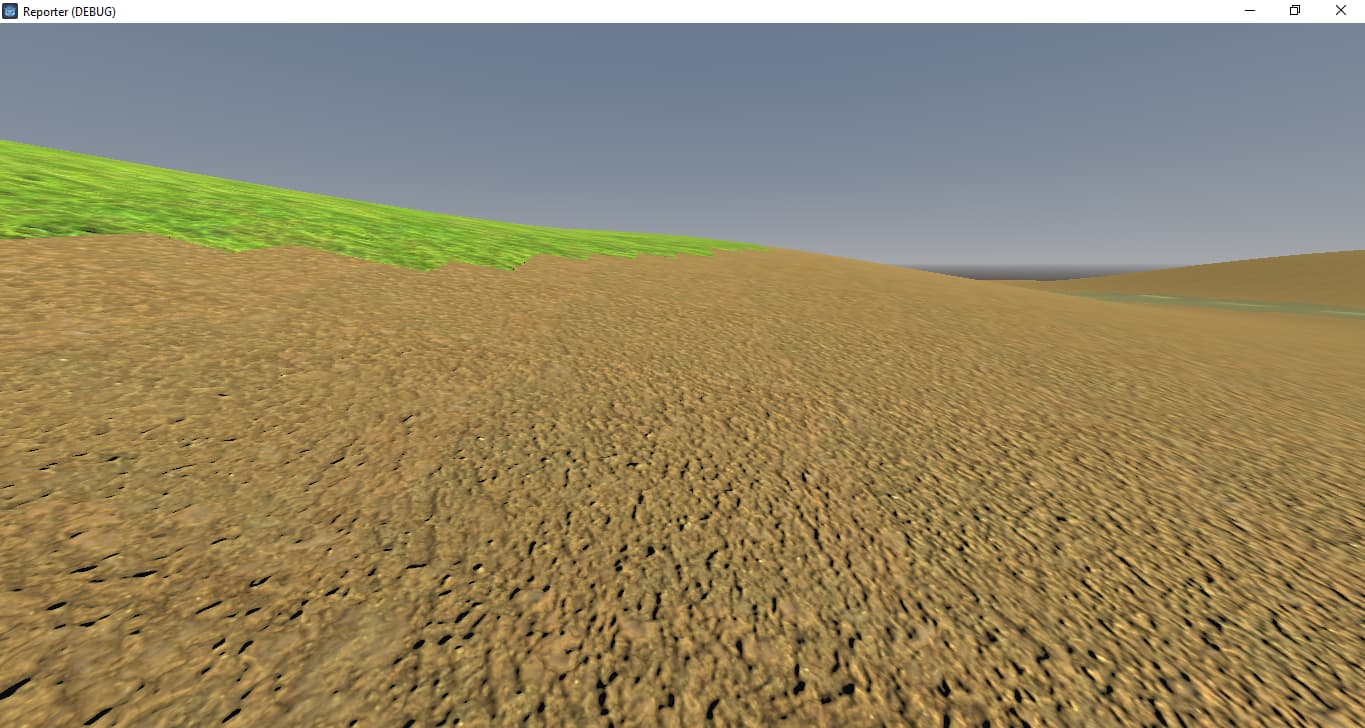

Don’t look at the unevenness and general wretchedness, I didn’t try to make it beautiful. The main goal was to show how Texture Array works and how to use it with simple examples, then I think you’ll figure it out yourself. The main thing is to learn how to work with raw code shader.
You can modify and automate the code of this shader to suit your needs.
I also want to note that this is not the only way to use Texture Array in Godot, but it is one of them.
Bye!